Was this content helpful?
How could we make this article more helpful?
First Use: Empty Enclosure
Before connecting to NAS OS, configure the Seagate NAS on your network. For instructions, review your NAS's user manual and quick start guide.
Enclosure with disks: If you purchased an enclosure with disks, go to First Use: Enclosures with Disks for instructions on how to set up Seagate NAS OS.
Choose compatible hard drives
Seagate NAS are compatible with most SATA I, SATA II, and SATA III hard drives. Older hard drives that are not constructed for NAS can experience reduced performance or failure. If you have any questions regarding hard drive compatibility, see your product's user manual.
Seagate Hard Drives: When adding new hard drives to the enclosure, consider Seagate Hard Drives. Seagate hard drives are specially prepared and optimized for use with your Seagate NAS.
Install Seagate NAS OS
Important info: During Seagate NAS OS installation, the hard disks inserted into the NAS enclosure will be formatted and all data deleted.
The NAS administrator should follow the instructions below once the NAS has been configured and booted from the included USB key:
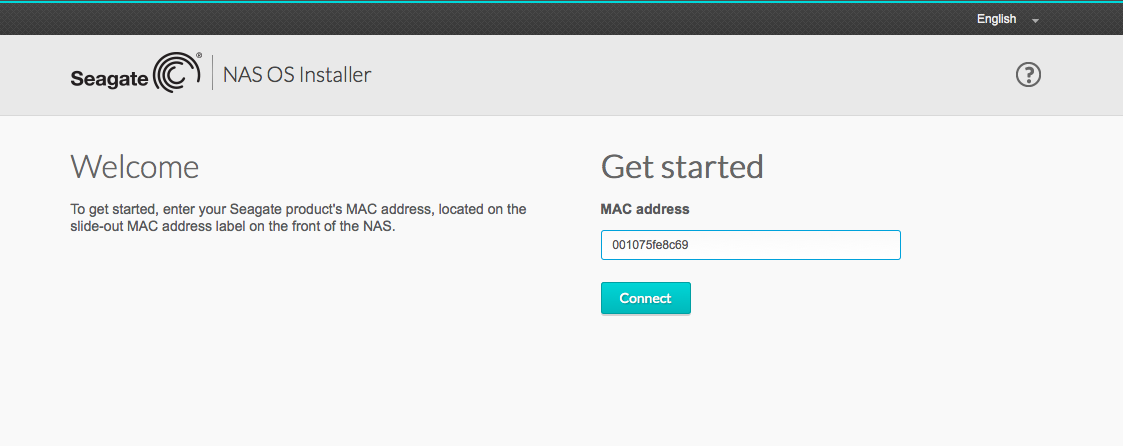
- The quick start guide and hardware user manual for your Seagate NAS provide details on how to connect to the NAS using a computer on the network. The NAS OS Installer prompts you to enter the NAS's MAC address. Refer to the quick start guide or hardware user manual for details on how to locate the MAC address.
- Enter the MAC address at the prompt and choose Connect.
- To continue, choose Start.
- Review the message and check the box. Choose Next.
- The installer will format the drives and install NAS OS. The operation can take up to 10 minutes. Upon completion, you will be prompted to remove the USB key and choose Confirm to reboot the device. You must remove the USB key before choosing Confirm. The NAS will use the USB key as the boot disk if it is not removed.

- Upon reboot, the status LED will turn on and begin to blink. The boot process takes up to 10 minutes to prepare the drives for NAS OS. The device is ready to be accessed once the status LED has turned solid blue and the welcome page appears for the NAS Setup Wizard on your computer.
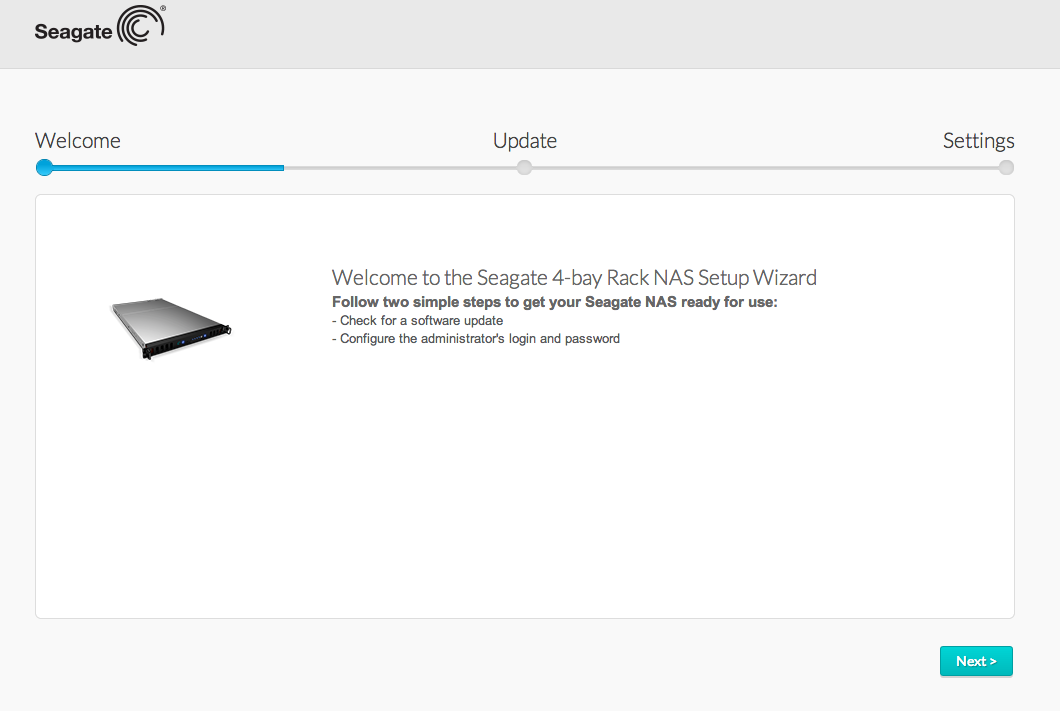
- Choose Next. NAS OS will search for a firmware update. If a new update is available, follow the instructions to get the latest software.
- The NAS OS administration tool will prompt you to create an administrator password.

- You can also change:
- The name of the device.
- The administrator login (the default is admin).
- The time zone.
- Make certain to note your login and password for future use.
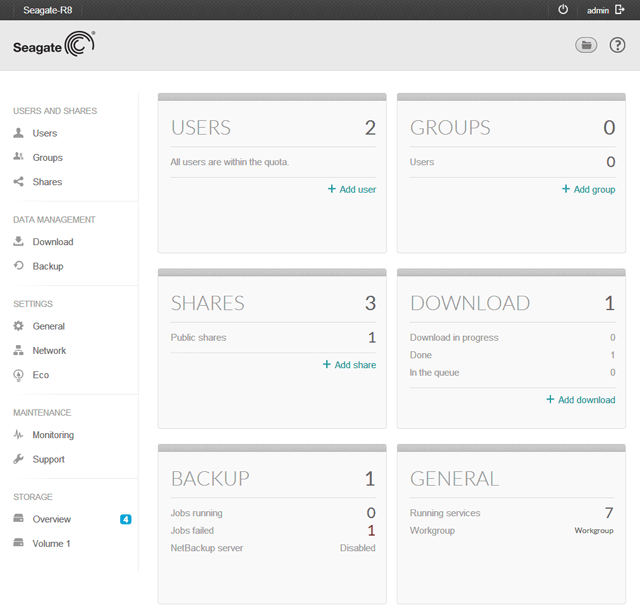
- Choose Finish. You will be taken to the NAS OS home page.
Next steps
- Simplify NAS access: Seagate recommends that you install the software utility Seagate Network Assistant before moving forward with the device configuration. Seagate Network Assistant gives you instant information on your Seagate NAS, such as firmware version, IP address, and MAC address. It will also provide quick access to shares and NAS OS. See Seagate Network Assistant for instructions.
- Configure your NAS: For details on how to configure and use your Seagate NAS, go to Shares: Access and Transfer Files and NAS OS Administration.
- Install Sdrive for local and remote access: Sdrive gives you easy access to shares and NAS OS on local and offsite networks. For more information, see Remote Access.