Viewing Tasks and Logs
Seagate BlackArmor Backup has a Tasks and Log screen that allows you to view its working logs and scheduled tasks. The logs can provide information about scheduled backup or validation task results, including reasons for failure, if any.
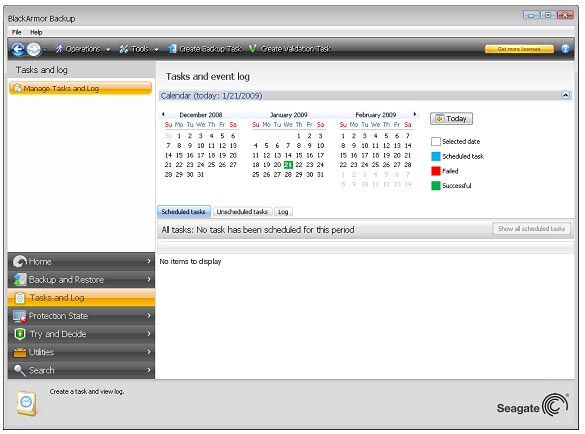
To open the Tasks and Log screen, click Tasks and Log on the sidebar. By default, the screen opens with the Scheduled Tasks tab selected. The tab shows all scheduled tasks (if any). Selecting the Unscheduled Tasks tab will show all tasks that have been configured after choosing Do not schedule at the Scheduling step in the Backup or Validation wizard, regardless of whether they have been completed or not.

The color marks in the calendar show information about the days with scheduled tasks, tasks completed with errors, and successfully completed tasks. The current day is highlighted in bold font. Clicking a day marked with a scheduled task shows a task(s) scheduled for this date.
The buttons with the left and right arrows at the sides of the calendar allow you to browse the months being shown in the calendar. If you have gone several months back or forward, clicking the Today button will quickly return you to the current month and date.
Clicking any day in the past takes you to the Log tab and shows logs for the selected date. If there are no logs for that date, an appropriate message appears.
To view logs, you can just click on the Log tab.
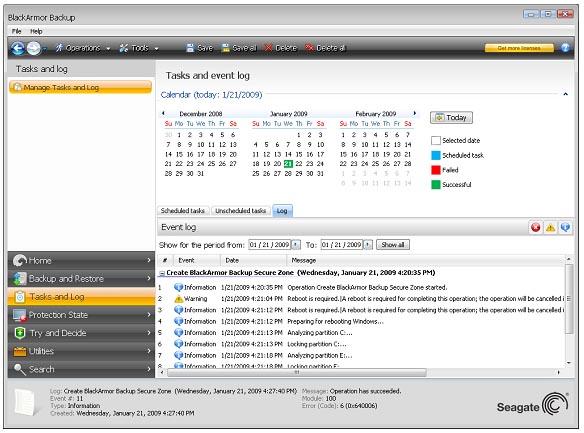
When the Log tab is selected, the upper pane shows the calendar, while the lower one shows logs’ contents.

To view the logs for a specific period, select the period by clicking the right arrow buttons in the From: and To: fields of the Show for the period area. Clicking the arrow in the From: field opens a pop-up calendar where you can set the start day of the period by double-clicking the appropriate day number. Then set the end day using the same procedure for the To: field. You can change months and years in the pop-up calendars using the left and right arrows in the month name area. In addition, you can enter the desired period start and end dates directly in the fields. If you would like to see all the logs, click the Show all button.
To delete a log entry, select it and click the Delete button on the toolbar. To delete all log entries, click the Delete all button. You can also save a log entry to file by clicking the Save button. To save all logs to file, click Save all.
If any step shown in logs was terminated by an error, the corresponding log will be marked with a red circle with a white cross inside.
The three buttons to the right control message filters: the white cross in the red circle filters error messages, the exclamation mark in a yellow triangle filters warnings, and the “i” in the blue circle filters information messages.
To view the details of the current step better, you can hide the calendar by clicking the Up arrow at the top right of the calendar pane. This will enlarge the logs area. To view the calendar again, click the Down arrow at the top right of the calendar pane.
Clicking a day marked with a scheduled task takes you to the Scheduled tasks tab with the task details shown. Clicking any day in the future also takes you to the Scheduled tasks tab.


