


Este artigo fornece instruções para aprimorar o desempenho de um dispositivo de armazenamento externo ao usar Windows.
A seguir há alguns métodos para aprimorar o desempenho do seu dispositivo:
- Verificar os recursos do sistema
- Habilitar o armazenamento em cache de gravação nas configurações de hardware
- Formatar o dispositivo com NTFS, o sistema de arquivos nativo do Windows
OBSERVAÇÃO: habilitar o armazenamento em cache de gravação aumentará a velocidade do seu dispositivo independentemente do formato que você escolher.
Verificar os recursos do sistema:
Para fazer grandes transferências de dados ou tentar maximizar a velocidade geral da transferência, o ideal é garantir que as tarefas extras sejam mantidas ao mínimo. Isso permitirá que seu sistema se concentre mais na transferência de dados, o que deverá aumentar o desempenho.
O que é armazenamento em cache de gravação?
O armazenamento em cache de gravação é usado para aumentar o desempenho com o uso de memória volátil (RAM) para coletar os comandos de gravação enviados a um dispositivo de armazenamento. O armazenamento em cache desses comandos possibilita que o computador os salve temporariamente até que eles sejam gravados em um dispositivo de armazenamento externo.
Embora o armazenamento em cache de gravação realmente aprimore o desempenho, é necessário tomar algumas precauções. É importante conhecer os riscos, como perda de dados ou corrupção de dados devido à queda de energia, falha de hardware ou não remover o dispositivo com segurança, simplesmente porque os dados deixados na RAM não foram gravados no dispositivo de armazenamento externo. Para obter mais informações, consulte este artigo da Microsoft.
OBSERVAÇÃO: é extremamente importante remover o dispositivo de armazenamento externo com segurança antes de desconectá-lo do computador. As instruções para remoção com segurança estão disponíveis abaixo.
Como habilitar o armazenamento em cache de gravação no Windows:
- Conecte o dispositivo de armazenamento externo ao computador
- Clique com o botão direito do mouse em Meu Computador ou Este Computador e clique em Gerenciar.
- Selecione Gerenciador de Dispositivos.
- Expanda Unidades de disco
- Clique com o botão direito do mouse na unidade na qual você deseja ativar ou desativar o armazenamento em cache de gravação e, em seguida, clique em Propriedades.
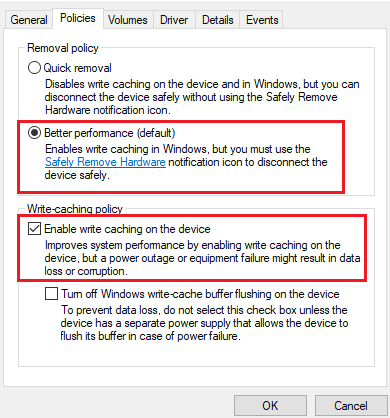
- Clique na guia Políticas.
- Clique para selecionar Melhor desempenho
- Clique para selecionar Habilitar gravação em cache no dispositivo
- Clique em OK.
Como remover o dispositivo de armazenamento externo com segurança:
- Clique no ícone de Remover com Segurança na bandeja do sistema do Windows para visualizar os dispositivos que você pode ejetar.
| Windows 7 | Windows 8/Windows 10 |
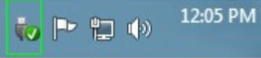 | 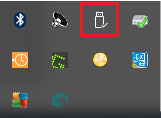 |
- Se você não visualizar o ícone de Remover Hardware com Segurança, clique na seta Mostrar ícones ocultos na bandeja do sistema para exibir todos os ícones na área de notificações.
- Na lista de dispositivos, escolha o dispositivo que você deseja remover. O Windows exibe uma notificação quando é seguro remover o dispositivo.
- Desconecte o disco rígido do computador.
Otimizar o desempenho formatando o dispositivo em NTFS
Alguns dispositivos de armazenamento externo são pré-formatados como exFAT para oferecer compatibilidade com computadores Mac e Windows. Se você usar o disco somente em um computador com Windows, pode otimizar o desempenho de cópia de arquivos formatando o disco com NTFS.
Escolha um sistema de arquivos
Use NTFS se:
…você conectar o dispositivo de armazenamento a computadores com Windows e não precisar permitir que um Mac grave no dispositivo de armazenamento.
Use exFAT se:
…você precisar permitir que computadores Mac e Windows leiam e gravem no dispositivo de armazenamento.
Como formatar seu dispositivo:
- Verifique se o dispositivo de armazenamento está conectado e montado no computador.
- Vá para Pesquisar e digite Gerenciamento de disco. Nos resultados de pesquisa, clique duas vezes em Gerenciamento de disco.
- Na lista de dispositivos de armazenamento na parte central da janela de Gerenciamento de disco, localize seu dispositivo de armazenamento.
- A partição deve estar disponível para formatar. Se estiver formatada, clique com o botão direito do mouse na partição e escolha Excluir.
- Para criar uma nova partição, clique com o botão direito do mouse no volume e selecione Novo Volume Simples. Siga as instruções apresentadas na tela quando Assistente para Novas Partições Simples abrir.
OBSERVAÇÃO: se o dispositivo estiver com o armazenamento em cache de gravação habilitado, o sistema de arquivos exFAT não estará disponível durante a realização de uma Formatação Rápida. Veja abaixo:
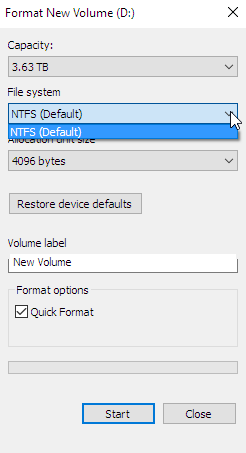
Nesse caso, para reformatar exFAT, é necessário excluir um volume em Gerenciamento de disco e seguir as mensagens para formatar o disco como exFAT.
Para obter instruções adicionais, consulte Como formatar seu disco rígido.