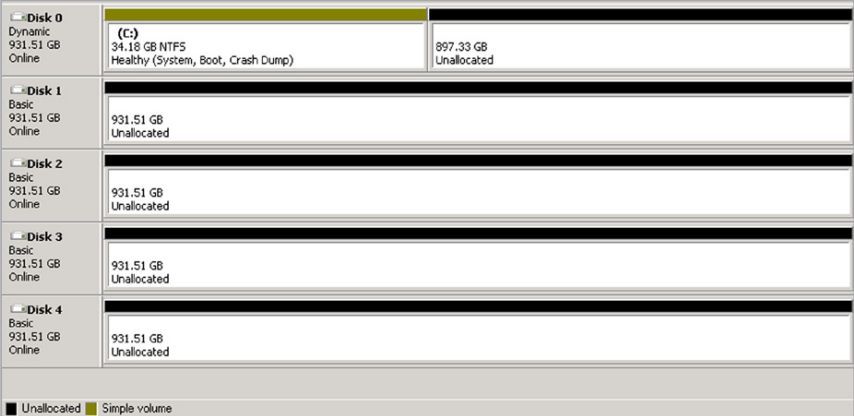
Use Windows Disk Management to configure RAID volumes. Drives must be connected and unformatted in order to create various types of volumes on them.

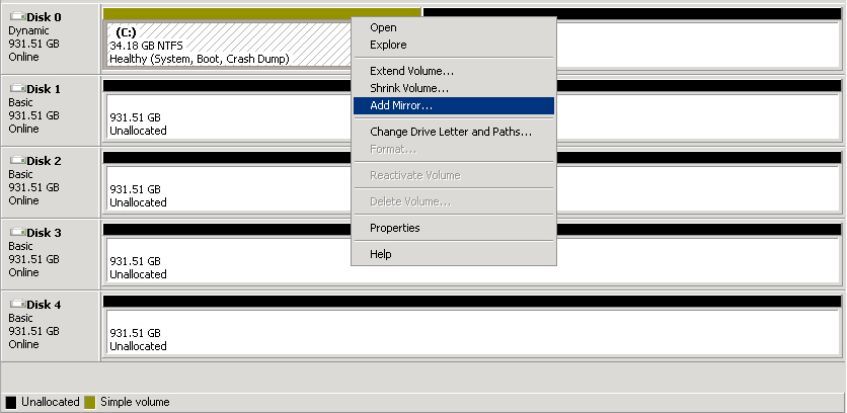
From here you can create one or more RAID arrays on the disks to use. In the next screen shot we will select the C drive and choose to mirror it.

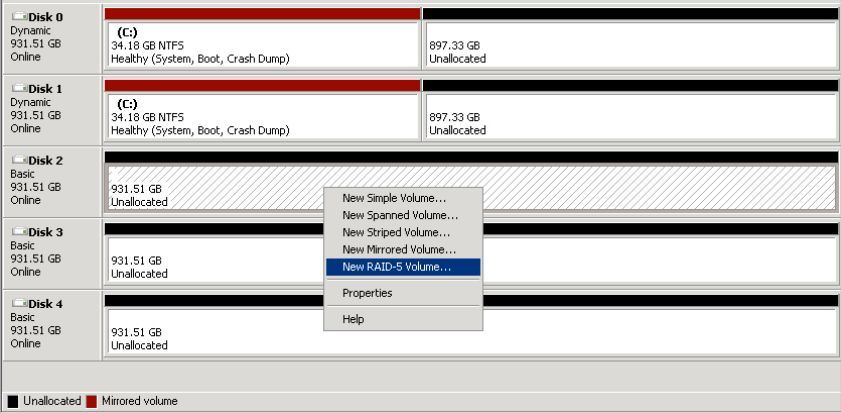
Once the RAID is defined, the yellow “simple volume” will change to a “Mirrored volume,” and we can use the rest of the space for a RAID 5 and its SWAP volume.

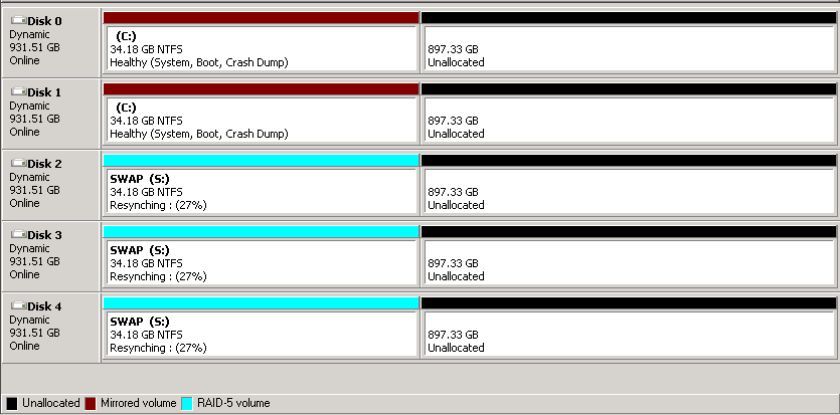
This starts a Wizard that will allow you to specify which disks are included in the RAID and how much of their space is to be used. Since we want to create the swap volume first, it should be the same size as your C drive. In the example this is 35GB. The swap should be included on disks 2, 3 and 4 and the drive letter should be S. Make certain that the volume type is NTFS and the volume label is SWAP.

As you can see, we now have the swap volume created and the rest of the space is unallocated. We want to create the swap file now.
- From the desktop, right click over “Computer” and select properties and then “Advanced System Settings” from the left.
- From the system properties window, select the Advanced tab and in the first category, Performance, click on the settings button.
- At the “Performance Options” window, click on the Advanced tab and select Change.
- Now you have the virtual memory window and click once on the S drive labeled Swap and in the pane below click on the radial button for Custom Size.
- In the “Initial Size” and “Maximum Size” fields, enter 5120 and click set then OK. You can then exit the setup and reboot the server.
The purpose of this is to create a paging file, which the computer can then use as a type of RAM that’s actually an area on the hard disk. It will increase performance and reduce chances of corruption or data loss.
Once you have this step completed and the device rebooted, you can create another RAID with the remaining space on the disk. Follow the same steps as before.


