若要创建 RAID 阵列:
- 从“Applications(应用程序)”列表中打开 LaCie RAID Manager。
- 打开后,从左栏选择“Adaptor 0(适配器 0)”一行。
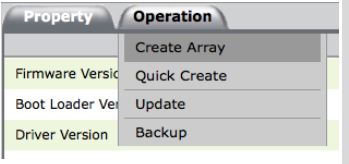
- 选择右侧的“Operation(运行)”选项卡,接着选择“Create Array(创建阵列)”。

- 通过单击要添加的每块驱动器的图标来选择要添加到 RAID 中的驱动器。

- 选完驱动器后,验证页面底部的相关设置并选择“Submit(提交)”。
- 从“RAID Level(RAID 级别)”下拉菜单提供的选项中选择您首选的 RAID 配置。
- 从二级下拉菜单中选择启用或禁用磁盘缓存。
- 从三级下拉菜单中选择“Stripe Size(条带大小)”。
条带大小的默认值一般为 256K;如使用较大文件(如高清视频和音频),则推荐增加条带大小。 - 在“Name(名称)”文本框中填写 RAID 的名称。
- 按“提交”按钮创建该 RAID。
在完成 RAID 创建后,您需要创建一块虚拟磁盘。
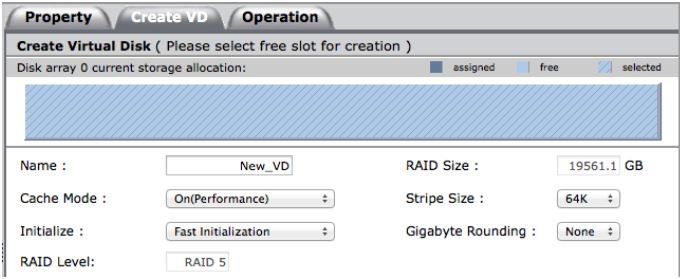
- 从左栏中选择“Array 0(阵列 0)”一行并选择“Create VD(创建虚拟磁盘)”选项卡。

- 在此窗口中的“Name(名称)”文本框内输入虚拟磁盘的名称。
- 选择是否开启或关闭“Cache Mode(缓存模式)”。开启该模式能提高性能,关闭则可增强可靠性。
- 除非您对“Initialization(初始化)”、“Stripe Size(条带大小)”及“Gigabyte Rounding(吉字节舍入)”有特定的偏好设置,否则剩余配置均可保留默认值。
- 完成此操作后,即可选择“Submit(提交)”按钮创建该虚拟磁盘。


