Was this content helpful?
How could we make this article more helpful?
Getting Connected
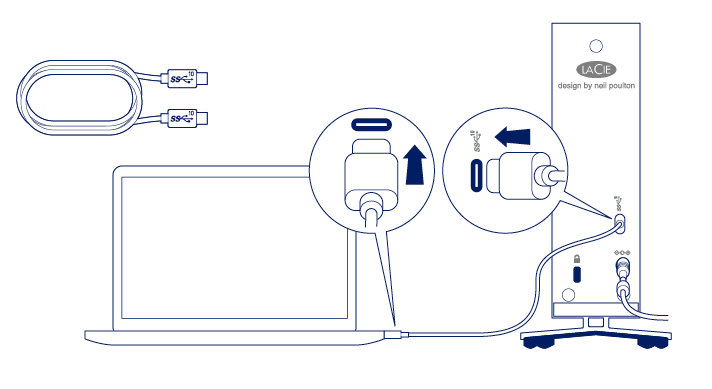
STEP 1 – Connect the USB-C cable
Use the USB-C cable to connect 2big RAID to a USB-C (USB 3.1 or Thunderbolt 3) port on your computer.
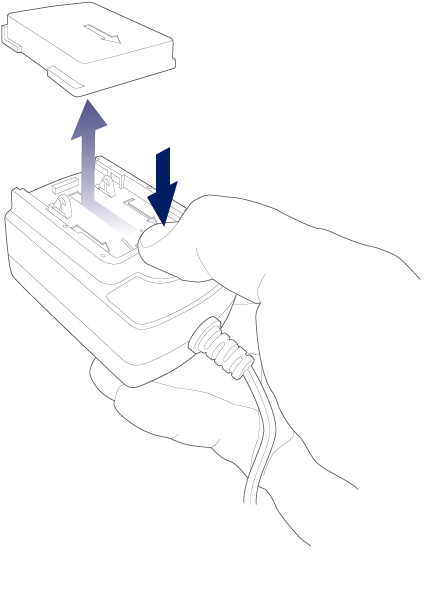
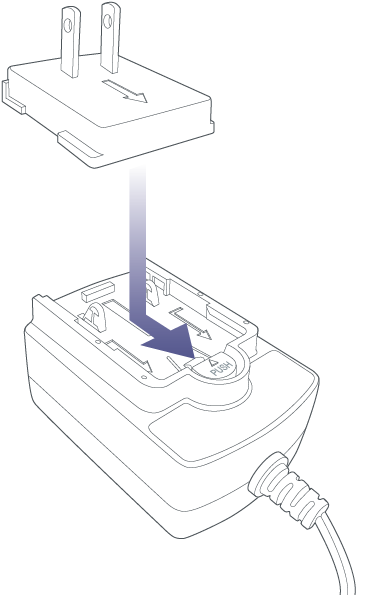
STEP 2 - Prepare and connect the power supply
LaCie d2 Professional will power on automatically when it is connected to a computer that is turned on and a live power outlet.
- Press the release tab on the universal power supply to unlock the safety cover. Slide the cover back to remove it.
- Place the adapter plug for your location into the channel on the power supply. Slide it down to lock it in place.
 |  |
- Connect the power cable to the power input on d2 Professional, and then connect the power supply to a live power outlet.

STEP 3 - Set up LaCie d2 Professional
The setup process lets you:
| Register your device | Get the most from your device with easy access to information and support. |
| Install Toolkit | Manage backup plans, mirror folders, and more. |
- Using a file manager such as File Explorer or Finder, open LaCie 2big RAID and launch Start Here Mac or Start Here Win.
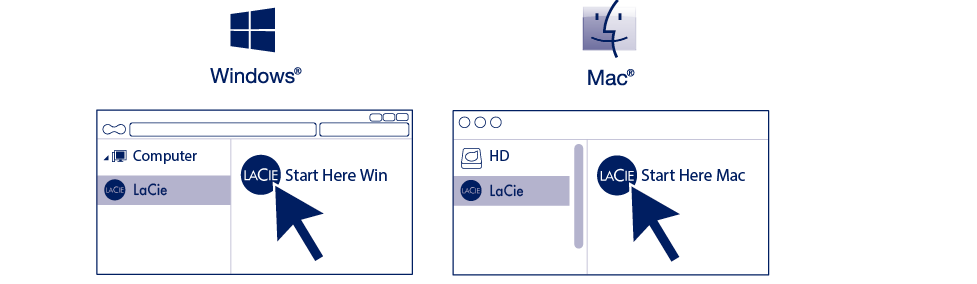
- Follow the onscreen instructions.
| Learn more about Toolkit |
|---|
Toolkit provides useful tools that let you easily:
|
Storage format
LaCie d2 Professional is delivered preformatted as exFAT for compatibility with both Windows and Mac computers. If you use the drive with only one type of computer, you can optimise file copy performance by formatting the drive in the native file format for your operating system. Choose one of the following methods to optimize your drive:
- Use Toolkit to optimize disk format. See the Toolkit user manual for details.
- Manually format your drive. See Optional Formatting for details.
Disconnecting the hard drive
In order to avoid file system corruption, it’s important to unmount the drive volumes before disconnecting the interface cable. See Safely Remove Device From Your Computer for details.