DB_SECONDARY_BAD may show inside the error log on an Ethernet Disk. This is referring to the Apple Filing Protocol (AFP) database.
AFP demands a small database file exist at the beginning of each network share to display its contents. On occasion, a power outage or other sudden interruption of the disk can cause the hidden database file on the drive to become corrupted and unusable. When this happens, The error message "DB_SECONDARY_BAD" can appear.
The solution is to remove the corrupted database, and allow the generation of a new one. Follow the procedure below to do this.
IMPORTANT NOTE: The procedure below involves the use of the Terminal program. This program, if used incorrectly, can cause data loss, or other problems. Ensure everything is typed precisely to avoid data loss. Ensure an up to date backup exists prior to starting this process.
-
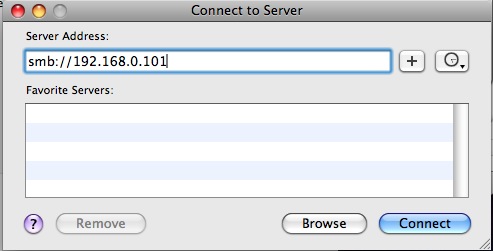
Connect to the drive using a different protocol. SMB is available on all computers, so use that to erase the files. From the Finder menu bar, click Go, then Connect to Server. Type in smb:// followed by the Ethernet Disk's IP address.

- After clicking Connect, the computer will request a user name and password. Enter the credentials for the administrator account (by default, the user name is admin, and the password is admin) If there are multiple shares, choose the one that is non-functional.
- Open the program "Terminal". This is within the Utilities folder (MacHD --> Applications --> Utilities)
- In the terminal window, type:
cd /Volumes/
then press enter. Ensure a capital V is used in Volumes, as everything is case-sensitive within Terminal.
Next, type cd, followed by the name of the share needing repair. For example, if the share needing repair was named ED_mini, the command would be:
cd ED_mini
Press enter after the command has been entered. Finally, type:
rm -R ./.AppleDB
To avoid misspelling the command, in plain language, this is "R, M, Space, dash, R, space, dot, slash, dot, AppleDB." Press Enter when the command is typed. At the end, the terminal window should look exactly like this:
- Finally, hold down the button on the front of the drive until it begins to flash. After about a minute, the drive will shut down. Press the button again to turn it on. AFP should be functional again.


