Please follow these steps to replace a disk and rebuild the RAID. The same information is found in your device's user manual found here: http://manuals.lacie.com/en/manuals/ns2-nsmax/raid
- Important info: LaCie highly recommends using two disks of equal capacity within the Network Space MAX. If the new disk is smaller than the one it is replacing and/or the existing disk within the enclosure, you will receive an error on the Dashboard. If it is larger, the additional capacity will be unusable.
- If you removed Disk 2 (the top disk) or the slot is empty, carefully insert the new/replacement drive into the top bay. If you removed Disk 1, first carefully insert the replacement drive into the bottom bay, then replace Disk 2 into the top bay and re-secure the 4 screws that attach the drives to the chassis.
- Place the top shell back onto the bottom plate.
- Plug the network and power cables back into their ports.
- Turn on the device by pushing the rear power button.
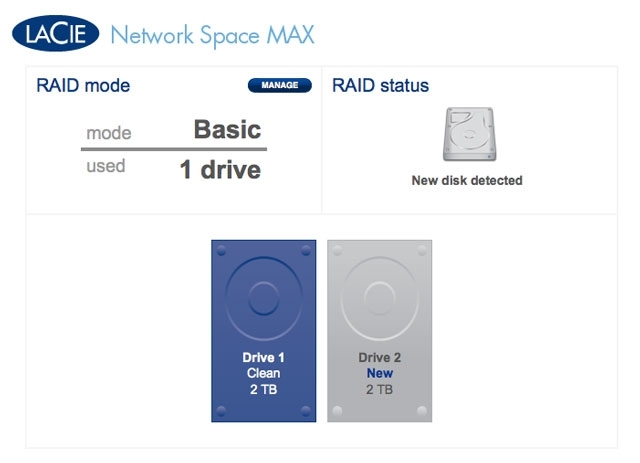
- Once the Network Space MAX has booted, go to the Dashboard RAID Management to rebuild the RAID with the new or replacement disk (see the instructions below). In the drive map, the new disk will be represented by a light grey with the label New. A yellow warning symbol will appear if you have inserted a disk that does not have the same capacity as the existing hard drive.

- Click the MANAGE button.
- You will be asked to select the disk(s) for the RAID array.
- Check the box under the new disk, then click NEXT.
- Choose a RAID level. Note that selecting RAID 1 will preserve all your data currently on the old disk while RAID 0 will delete it by rebuilding the entire RAID. If you wish to build a RAID 0 array and you have not backed up all your data, select CANCEL to end the RAID configuration. You may return once the data backup is complete.
- If you are certain of the selected RAID, click NEXT.
- A short summary will explain the target RAID. Click FINISH to begin building the RAID array.

RAID 0 only: You must confirm your selection. Read the warning and click YES if you agree to continue.
Synchronizing to RAID 1 will take four or more hours depending upon the capacity of the hard drives. RAID 0 should not take longer than five minutes. While the network storage will briefly go offline when building the RAID configuration, you will have access to the storage once Synchronizing begins. A green check mark will appear in the RAID status window once the RAID configuration is complete.


