Advanced Python Web App
-
This tutorial will teach you how to create an advanced web app using the NASOS SDK. This app will make use of the NAS API authentication mechanism
-
This app will be using the Python language with the web.py framework
-
The app will simply display a dynamic web page with the name of the currently logged in user
Note
You can download the full source code for this tutorial
Project File
Create the project using:
mkdir -p ~/Projects/webapp_api
echo -e "com.nasos.webapp_api\n1.0\norg.debian.wheezy-lamp-1.2,com.nasos.unicorn_api-7.0.0" | sudo rainbow --init ~/Projects/webapp_api/
sudo chown -R rainbow:rainbow ~/Projects/webapp_api
Edit ~/Projects/webapp_api/package.json so it contains:
{
    "type": "application",
    "id": "com.nasos.webapp_api",
    "version": "1.0",
    "depends": [
        "org.debian.wheezy-lamp-1.2",
        "com.nasos.unicorn_api-7.0.0"
    ],
    "network_ports": {
        "WEB_UI": 8080
    }
}
As can be seen, we will use the org.debian.wheezy-lamp-1.2, since we need
Python, and we declare the port 8080 for our WEB_UI.
We also depend on the nasos.unicorn_api-7.0.0 package, since we’ll use the
NAS API.
API Configuration file
Create the source directory:
mkdir -p ~/Projects/webapp_api/source
Create the ~/Projects/webapp_api/source/unicorn_api.conf file with the
following content:
{
    "mandatory_perms": ["v7.0.nas_authentication.NasAuth"]
}
This means we’ll be using the v7.0.nas_authentication.NasAuth NAS API.
Install Scripts
Edit the ~/Projects/webapp_api/scripts/post-install script so it contains:
#!/bin/sh
/usr/bin/unicorn_helper --register
exit 0
Edit the ~/Projects/webapp_api/scripts/pre-remove script so it contains:
#!/bin/sh
/usr/bin/unicorn_helper --unregister
exit 0
Startup Script
Create the ~/Projects/webapp_api/source/rc.local file with the following
content:
#!/bin/sh -e

# Updates config file with NASOS informations
/usr/bin/unicorn_helper --set port $RAINBOW_PORT_WEB_UI
/usr/bin/unicorn_helper --set path $RAINBOW_WEB_PATH

PIDFILE=/var/run/webapp_api.pid
case $1 in
    start)
        start-stop-daemon --start \
                          --make-pidfile \
                          --pidfile $PIDFILE \
                          --background \
                          --startas /usr/bin/webapp_api.py
        ;;
    stop)
        start-stop-daemon --stop --pidfile $PIDFILE
        rm -f $PIDFILE
        ;;
esac

exit 0
App Source Code
The app is composed of a single Python file. Create the
~/Projects/webapp_api/source/webapp_api.py file with the following content:
#!/usr/bin/python
import web
import json
#Import required files for communicating with the NASOS Backend
from transformer.transport.client_http import HTTPClient
from transformer.plugins.application import ApplicationClientAuthentication
from transformer.lib.errors import UnknownToken

config = json.load(open('/etc/unicorn_api.conf'))
nas_ip = "127.0.0.1"
nas_port = 8888

# Configure the NAS API authentication by specifying the install_id and
# app token
client = HTTPClient(nas_ip, nas_port)
app_auth = ApplicationClientAuthentication()
app_auth.set_app_id(config["install_id"])
app_auth.set_app_token(config["token"])
client.set_authentication(app_auth)

# We can now open a session, and store the session_token
app_session_token = app_auth.open_session()["session_token"]


# This method redirects to the NAS Webboard for authentication. The
# redirect URL must contain the app_session_token and the app_path
def login():
    return "<html><meta http-equiv='Refresh' content='0;url=/?app_session_token=%s&app_path=%s&locale=fr#welcome'></html>" % (
        app_session_token, config["path"])

# Those are the URLs handled by our app
urls = (
    '%s' % config['path'], 'index',
    '%s/' % config['path'], 'index',
)

_client_context = {}

# This method sets authentication information for a user, given its token
def get_user_client(app_user_token):
    # Check if the user's information is already stored.
    user_client = _client_context.get(app_user_token, None)
    # If not, we need to authenticate as the given user
    if user_client is None:
        user_client = HTTPClient(nas_ip, nas_port)
        user_auth = ApplicationClientAuthentication()
        user_auth.set_app_id(config["install_id"])
        user_auth.set_app_token(config["token"])
        user_auth.set_session(app_session_token)
        user_auth.set_user_token(app_user_token)
        user_client.set_authentication(user_auth)
        # We store the user_client so we don't need to create it on each request
        _client_context[app_user_token] = user_client
    return user_client

# This method calls the NasAuth API to get user information
def get_user(user_client):
    from unicorn_api.v7.sv0.nas_authentication.NasAuth import NasAuth
    nas_auth = NasAuth()
    try:
        return nas_auth.mySelf(user_client)
    except UnknownToken:
        return None

class index:
    # This method handles our URLs.
    def GET(self):
        # We look for an app_user_token in the GET parameters
        app_user_token = web.input().get("app_user_token", None)
        # If we have no app_user_token, we redirect to the login page
        if app_user_token is None:
            return login()
        # Get the user information
        user_client = get_user_client(app_user_token)
        user = get_user(user_client)
        # In case of error, redirect to the login page
        if user is None:
            return login()
        # We can now greet our user
        return "Hello %s" % user.login

class MyApplication(web.application):
    def run(self, port, *middleware):
        func = self.wsgifunc(*middleware)
        return web.httpserver.runsimple(func, ('0.0.0.0', port))

if __name__ == "__main__":
    web.config.debug = False
    app = MyApplication(urls, globals())
    app.run(port=int(config['port']))
Build Script
Create the ~/Projects/webapp_api/build.sh file with the following content:
#!/bin/bash
install -m 755 /home/source/rc.local /etc
install -m 755 /home/source/webapp_api.py /usr/bin
install -m 644 /home/source/unicorn_api.conf /etc/
pip install web.py
exit 0
This script:
- Installs the
rc.localscript in the app’s/etc - Installs the
webapp_api.pyscript in the app’s/usr/bin - Installs the
unicorn_api.conffile in the app’s/etc - Installs the
web.pypython module usingpip
Build the App
You can then build the app using:
sudo rainbow --build ~/Projects/webapp_api
sudo rainbow --pack ~/Projects/webapp_api
Then .rbw package is available in:
~/Projects/webapp_api/build/x86_64/com.nasos.webapp_api-1.0-x86_64.rbw
The app cannot be tested inside the NASOS SDK VM, since it uses the NAS API. This means it needs to be installed on an actual NAS for testing. Please refer to the Debugging you App for details.
You will need to install the app and its dependencies on a NAS device, get the app’s URL and open it in a web browser.
You should get something like:
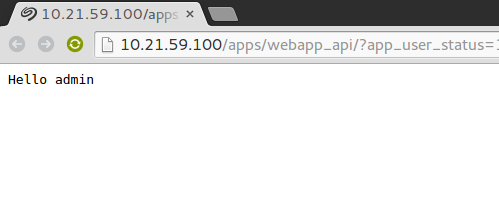
Here we can see the name of the currently logged in user (admin). Try to log out and back in with another user, and you should see its name instead.