


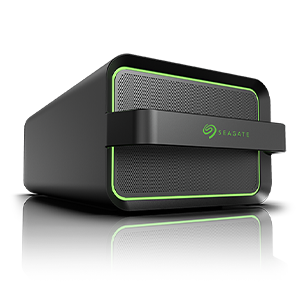

This article covers frequently asked questions about the FireCuda Gaming Dock and provides their answers.
Can I connect the FireCuda Gaming Dock to another port besides Thunderbolt 3?
Yes, the Dock can be connected to a USB-C Gen 1 port, or even a USB-A port using a USB C to A cable adapter. However, in these instances the FireCuda Gaming Dock does have limited functionality:
- The Dock’s m.2 NVMe slot is not supported
- Daisy Chaining Thunderbolt 3 devices is not available
- Data transfer performance can be limited depending on the use-case
We strongly recommend always having the Dock connected to a Thunderbolt 3 port when possible to ensure full functionality.
Will the FireCuda Gaming Dock charge my laptop?
The Dock is not designed to charge laptops. It can provide a maximum of 15W of power, which in some cases can keep the laptop’s battery from discharging, however it is recommended to continue using your regular power supply to provide your laptop with the full power it requires, whether or not the Dock seems to be providing some of it.
Why is game performance decreased when using the Dock on my laptop?
Likely the laptop is running off of battery power, which results in the processor (and potential graphics card) not getting all the power they need to run at full capacity. Laptop hardware performance is often limited when using battery. See the answer to the previous question about the Dock providing power to your laptop, and ensure to have your laptop’s power cable connected.
Which m.2 drives are compatible to install in the Dock’s m.2 NVMe slot?
This slot is only compatible with m.2 NVMe SSDs, size 2280. Other sizes are not supported, and if the m.2 SSD is SATA (instead of NVMe) then it will not be recognized by your computer. Ensure that you only install an NVMe rated drive in the slot. We strongly recommend Seagate FireCuda NVMe SSDs for guaranteed compatibility and performance.
I’ve installed a compatible NVMe drive, but it’s not showing up in Explorer or Finder?
To cover all our bases, verify that it’s an m.2 NVMe SSD and not an m.2 SATA SSD, and also ensure that the FireCuda Gaming Dock is connected to a Thunderbolt 3 port on your computer, not a USB-C Gen 1 port (or a USB-A port using an adapter cable). If these conditions are all met, then it’s likely the drive is currently blank and simply needs to be initialized, partitioned, and formatted from Disk Management on Windows, or Erased in Disk Utility on macOS.
How to make sure I’m getting full performance out of an added NVMe SSD?
This applies to other types of drives as well; in Windows make sure to enable Write-Caching on the NVMe drive for best performance. The steps for Windows 10 are:
- Right click the Start Menu
- Open Device Manager
- Click on Disk Drives to expand it
- Find the NVMe drive in the list and right-click it
- Open the drive’s properties
- Go to the Policies tab
- Check “Enable write caching on the device” and click OK
- Restart the computer, or eject and reconnect the drive to apply the change
Note: While this improves performance, it also increases the risk of losing/corrupting data in the event of a power outage or equipment failure during a transfer. It is now especially important to always safely eject the NVMe drive before disconnecting it from your computer (while the computer is on) and to always keep a backup of your important data. It is always safe to disconnect the Dock if the computer is off.
What is the safest way to disconnect my FireCuda Gaming Dock from my computer?
As mentioned above, It is always safe to disconnect the Dock if the computer is off. While the computer is on, use your operating system’s Safe-Eject function to eject all volumes connected to the Dock before disconnecting it. This includes the internal 4TB HDD, any added NVMe drive, and any other drives connected to the Dock’s USB ports, or Daisy Chained to the 2nd Thunderbolt 3 port. In Windows, when ejecting drives, the Dock will also show as a separate PCI device. It is not as vital to safely eject this aspect of the Dock, but it’s still recommended. In mac OS, Command-click the drives’ volumes and click eject, or click and drag them to the Trash icon.
How should I connect a monitor or TV to the Dock’s DisplayPort?
The DisplayPort on the Dock is version 1.4 - to ensure full functionality make sure the Dock is connected to a Thunderbolt 3 port on your computer.
Note: The Dock also supports connecting a USB-C or Thunderbolt monitor to the second Thunderbolt 3 port. Depending on how your computer receives Thunderbolt 3 signals, it might not accept a Thunderbolt 3 monitor and DisplayPort monitor’s connection at the same time.
- Connecting from DisplayPort to DisplayPort, or to DisplayPort Mini:
- Use a high quality cable, preferably rated for DisplayPort 1.4 when possible.
- Connecting from DisplayPort to DVI, or to HDMI, or to VGA:
- Use an active DisplayPort adapter or cable instead of passive
- Connecting from DisplayPort to Dual-Link DVI:
- Use a DisplayPort to mini DisplayPort (mDP) dongle and a mini DisplayPort to Dual-Link DVI adapter
How do I get two monitors connected to the Dock and working correctly?
The FireCuda Gaming Dock is DisplayPort 1.4 compatible and supports MST (Multi Stream Transport) which means that two DisplayPort monitors can be Daisy Chained using that port, but only if the 1st monitor in the chain also supports MST and has a second DisplayPort interface, or if a DisplayPort splitter is used.
Another option is to have one monitor connected to the DisplayPort interface, and a second monitor connected to the Dock’s second Thunderbolt 3 port on the Dock.
Note: Either of these setups will only work if the host (your computer) supports Dual 4K @ 60hz through its Thunderbolt 3 port. See this list on GTrusted.com and look in the Thunderbolt column to check if your system is compatible. If your computer is not in the list, contact support of the device manufacturer for more information.
Do I need special drivers to use the Dock’s Ethernet and Audio-in/out ports?
No, just like the Dock’s USB 3 ports, the Ethernet and Audio ports should be plug and play and will work correctly without the need for installing any extra drivers. However it might be necessary to manually assign your computer to use these ports in your computer’s Network / Audio settings.
How do I manage the FireCuda Gaming Dock’s LEDs?
Download and install Toolkit for your operating system which has an LED Control Panel specifically designed to manage the Dock’s LED system. See the user manual for more details on which options are available, and how to make changes.
What peripherals and devices will work with the Dock?
While we have tested extensively and can verify that most devices work when connected to the Dock in an established use-case, we’re not able to test 100% of them and cannot guarantee that every other device on the market will be fully compatible. For example external Thunderbolt 3 GPU enclosures should all work in principal, however it is possible that not all of them will be fully compatible when Daisy Chained to the FireCuda Gaming Dock. For further assistance, you may contact Seagate Support.