Was this content helpful?
How could we make this article more helpful?
Getting Started
Register your device
Register the product and redeem offers using a mobile device.
- Open the quick start guide included in the package.
- Scan the unique QR code and follow the on-screen steps to register FireCuda Forge and access partner offers.
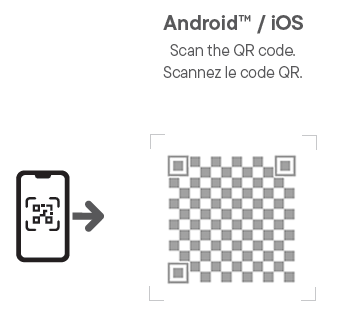
You will receive an email confirming your device registration.
Shortcuts
If you can no longer access the registration QR code, use the following URL:
| Register | www.seagate.com/register |
Install compatible SSD before use
IMPORTANT!
An SSD is required for FireCuda Forge to operate. The SSD is not included with the device and must be purchased separately. Your SSD must meet the following specification:
- M.2 2280 NVMe SSD
- PCIe Gen3 or higher
- 1 TB (FireCuda Forge recognises only up to 1 TB of SSD capacity. Higher capacities do not improve performance.)
- Minimum 2,400/2,000 MB/s read/write
- DRAM cache recommended
| SSD specification | Result |
|---|---|
| PCIe Gen3 | Supported. |
| PCIe Gen4 or later | Supported, but PCIe generations greater than PCIe 3 do not improve performance. |
| 1 TB capacity | Recommended for optimal performance. |
| Greater than 1 TB | Supported, but FireCuda Forge recognises only up to 1 TB of SSD capacity. Higher capacities do not improve performance. |
| Less than 1 TB | Supported, but performance may be reduced. |
| No heatsink | Do not use an SSD with a heatsink. Heat management is provided by the thermal pads included in the box. |
Before you begin
- Back up any existing data on your SSD to another storage device before installing it in FireCuda Forge. Data stored on your SSD will be deleted to prepare it for use in FireCuda Forge.
- Make certain FireCuda Forge is not connected to your PC. Disconnect the power supply from FireCuda Forge.
- Electrostatic discharge (ESD) can damage the SSD. Ground yourself before handling internal components.
- Handle the SSD by its edges. Do not touch the connector pins.
Tools required
| Included | Not included |
|---|---|
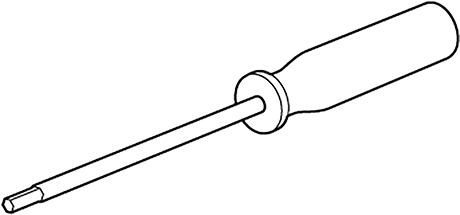 Hex screwdriver (2 mm) | 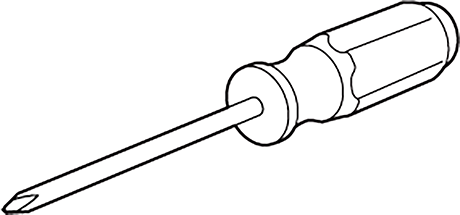 Phillips screwdriver (PH1) |
Remove cover
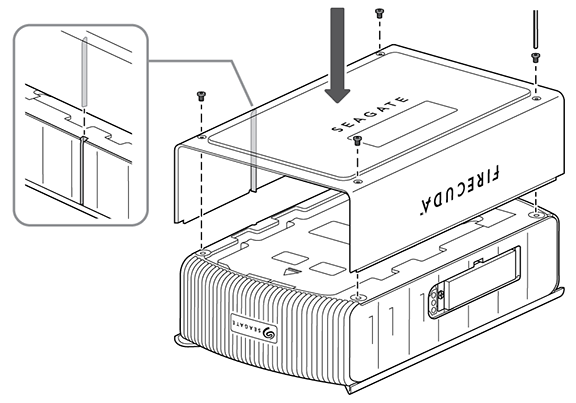
On a flat work surface, turn FireCuda Forge over to access the bottom of the device. Using the included 2 mm hex screwdriver, remove the four M3 screws (5 mm).

Lift off the cover.

Attach first thermal pad
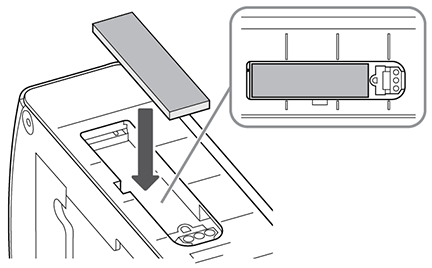
Turn FireCuda Forge on its side to access the SSD bay.
Remove one thermal pad from the sheet.
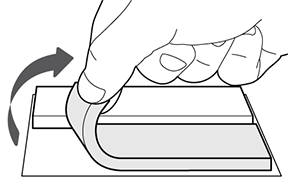
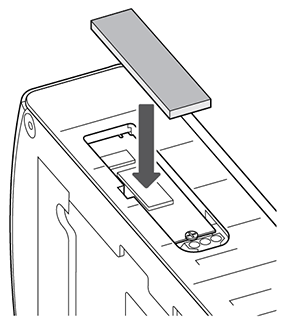
Place the pad (sticky side down) in the SSD bay as shown. Press to fix the pad in place. Do not remove the film on top of the pad.
Attach M.2 SSD
Align the notch on the M.2 SSD with the divider in the slot.
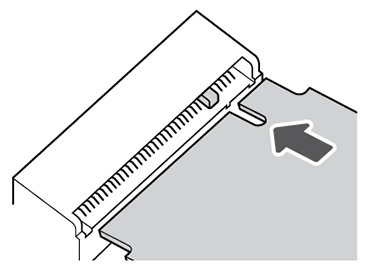
Insert the SSD carefully until it is firmly seated. Do not force it into the slot.
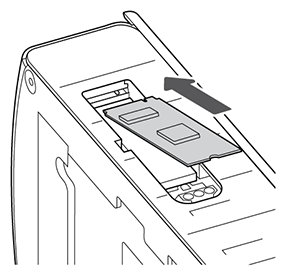
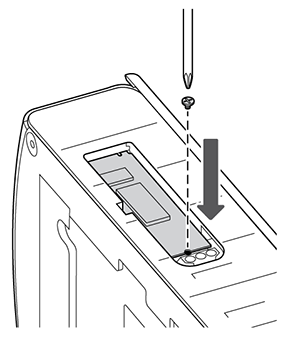
Hold the SSD down and secure it with the SSD mounting screw (M2 x 3 mm) using a Phillips screwdriver (PH1). Tighten only until secure.
Attach second thermal pad
Remove the second thermal pad from the sheet.
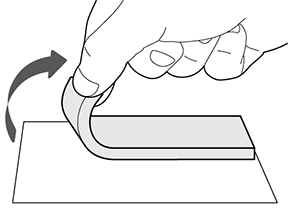
Place the thermal pad (sticky side down) over the SSD as shown. Press to fix the pad in place. Do not remove the film on top of the pad.
Replace cover
Turn FireCuda Forge over to view the bottom of the device. Position the cover and secure it with the four M3 screws (5 mm).
Connect power
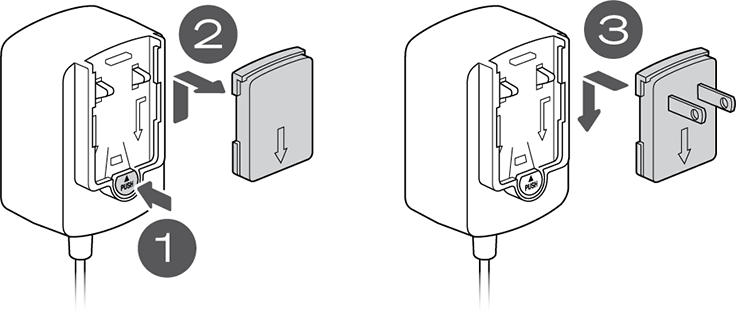
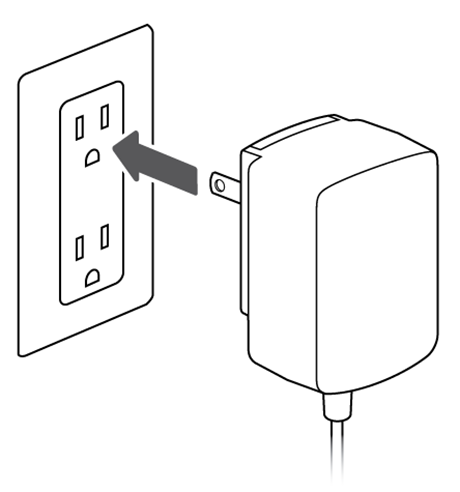
- On the power supply, press the plug adapter release tab.
- Remove the dummy plate from the power supply.
- Slide the plug adapter for your location onto the power supply until it locks into place.
- Connect the power supply to a power outlet.
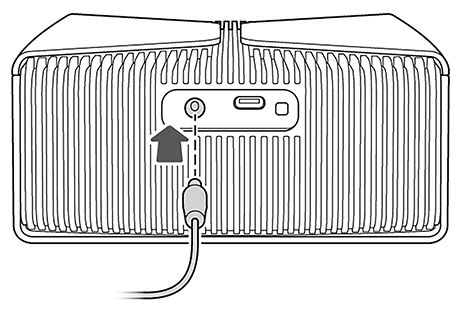
- Connect the power cable to FireCuda Forge.
Connect to computer
- Connect one end of the included USB4 cable to FireCuda Forge.
- Connect the other end of the cable to a USB-C port on your computer.
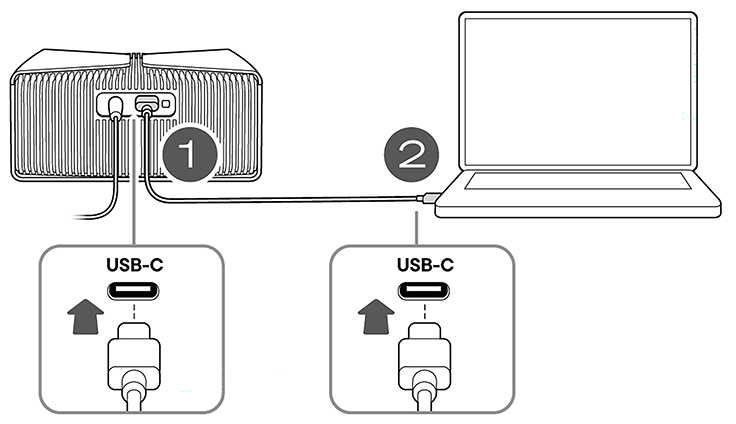
Optimal performance for FireCuda Forge requires a PC with one of the following ports: USB4, Thunderbolt 3, Thunderbolt 4 or Thunderbolt 5.
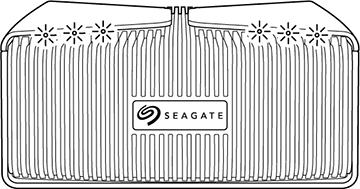
During startup, the RGB LEDs illuminate white while FireCuda Forge boots.
Volume format
| Windows® | FireCuda Forge formats the volume as NTFS for Windows. |
| macOS® | The volume will appear as read-only since it is formatted as NTFS. Go to Disk Utility to format the volume for macOS. |
Replacing an SSD or hard drive
All data will be lost and unrecoverable if the SSD or the hard drive are physically removed and/or updated. FireCuda Forge creates a single volume from the combined SSD and hard drive. Changing or removing the SSD or hard drive erases all existing data from the storage volume and does not allow for file recovery.