Heeft deze informatie u geholpen?
Hoe kunnen we dit artikel nog verbeteren?
Een NVMe SSD-uitbreidingsschijf installeren
Upgrade uw FireCuda Gaming Dock met hoogwaardige krachtige flashopslag. Seagate raadt de FireCuda NVMe SSD aan.
De SSD-sleuf in de Seagate FireCuda Gaming Dock is van het type PCIe Gen 3. PCIe Gen 4 en recentere SSD's bieden geweldige prestaties, maar ze kunnen alleen PCIe Gen 3-overdrachtssnelheden bereiken wanneer ze in de Seagate FireCuda Gaming Dock worden geplaatst.
Houd rekening met de onderstaande voorzorgsmaatregelen voordat u uw NVMe SSD installeert, om schade te voorkomen. Werp het FireCuda Gaming Dock-volume veilig uit vanuit het besturingssysteem en koppel de kabel los van uw computer.
Voor uw veiligheid wordt de FireCuda Gaming Dock automatisch uitgeschakeld als u de afsluitdop verwijdert.
Voorzorgsmaatregelen
Uw schijf kan na het uitpakken worden blootgesteld aan risico's die verband houden met hanteren en elektrostatische ontlading (ESD). Neem de volgende voorzorgsmaatregelen in acht:
- Bewaar de NVMe SSD in de elektrostatische-ontladingszak (ESD) totdat u klaar bent voor de installatie, om de blootstelling van de schijf aan ESD te beperken.
- Zorg ervoor dat de FireCuda Gaming Dock is uitgeschakeld en losgekoppeld voordat u de afsluitdop verwijdert.
- Draag gedurende de hele installatieprocedure een goed geaarde antistatische polsband. Polsband is niet inbegrepen.
- Houd de NVMe SSD alleen vast aan de randen of het frame. Raak de connectorpennen of de printplaat niet aan. Laat de NVMe SSD plat op een zacht antistatisch oppervlak rusten totdat u deze monteert.
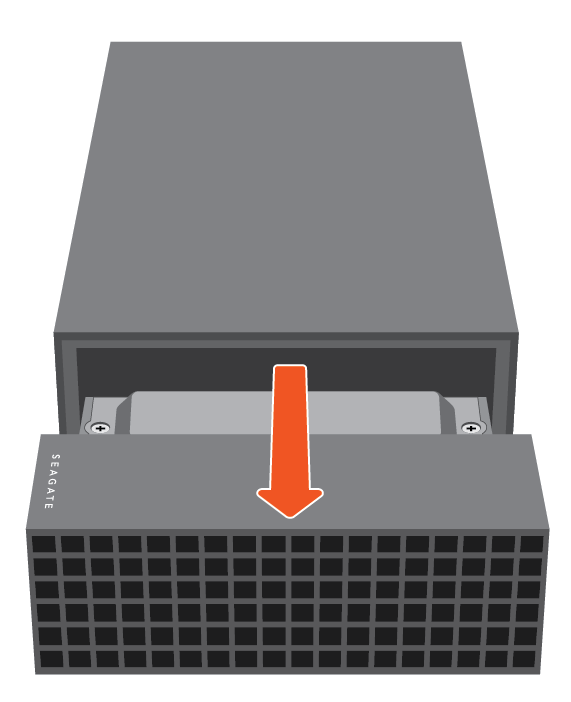
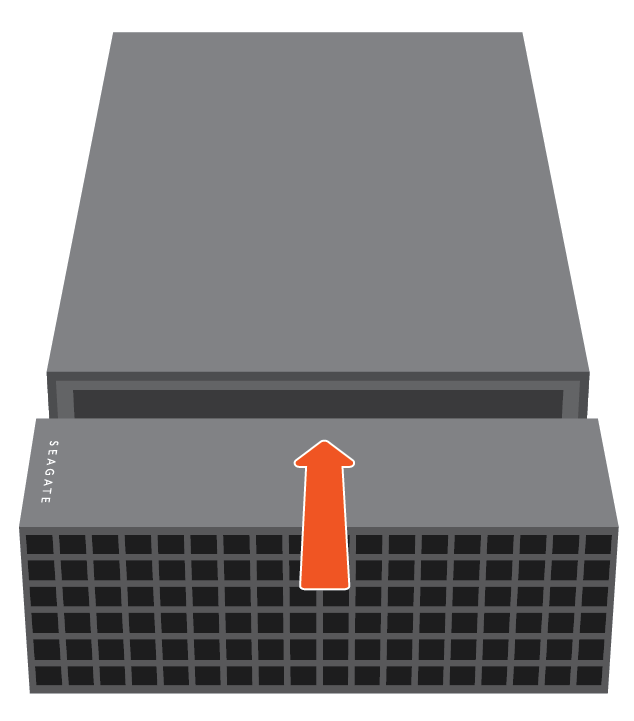
 Verwijder de afsluitdop.
Trek voorzichtig aan de afsluitdop om deze los te maken en te verwijderen.
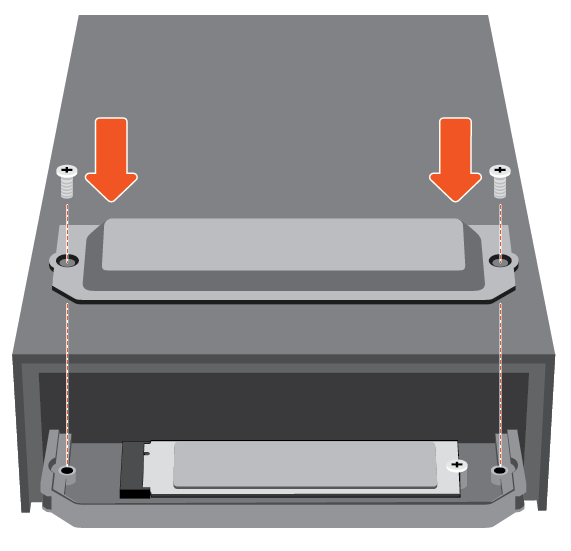
 Verwijder de beschermplaat.
Verwijder de twee schroeven waarmee de beschermplaat aan de lade is bevestigd. Verwijder de beschermplaat.

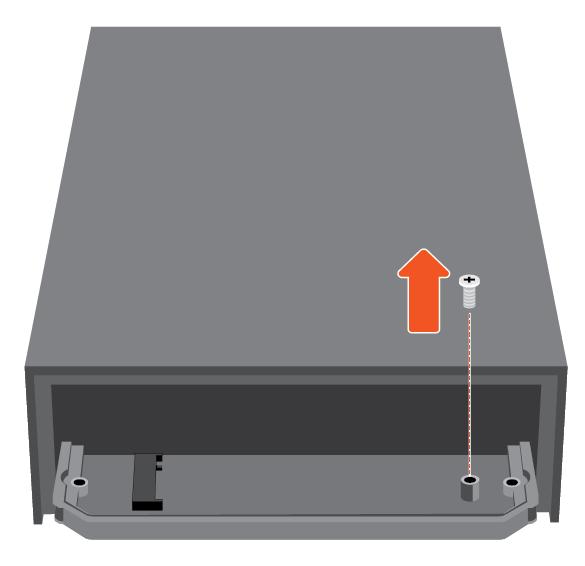
 Verwijder de montageschroef.
Verwijder de montageschroef uit de lade.
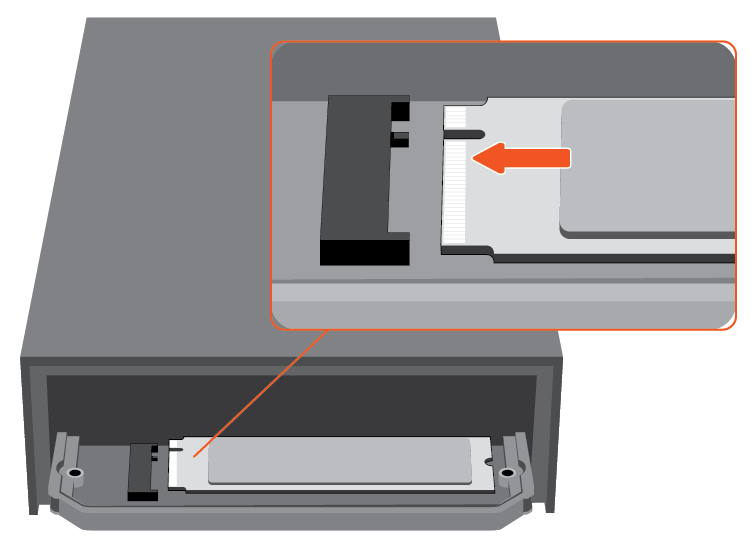
 Plaats de NVMe SSD-kaart.
Controleer of de inkeping op de NVMe SSD correct is uitgelijnd met de verdeler in de sleuf. Duw de NVMe SSD voorzichtig in de sleuf totdat deze stevig vastzit.
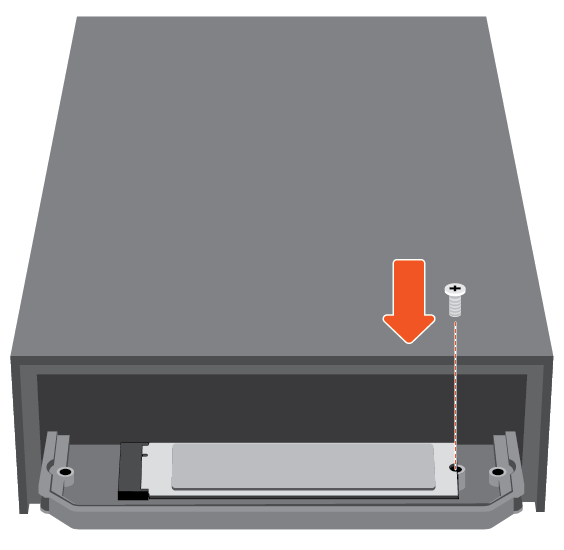
 Plaats de montageschroef terug.
Houd de NVMe SSD ingedrukt terwijl u de montageschroef vastdraait. Controleer of de SSD goed op zijn plaats zit.
 Plaats de beschermplaat terug.
Bedek de SSD met de beschermplaat en plaats de twee schroeven terug.
 Plaats de afsluitdop terug.
Duw de afsluitdop voorzichtig in de behuizing om deze terug te zetten in de oorspronkelijke positie.
 Controleer de formattering.
Als uw NVMe SSD niet is geformatteerd, gebruikt u het schijfhulpprogramma van uw besturingssysteem om deze te formatteren voor de beste prestaties.