Was this content helpful?
How could we make this article more helpful?
Getting Started
Connect the USB cable
Use the USB-C cable to connect FireCuda X Vault to a computer’s USB-C port.
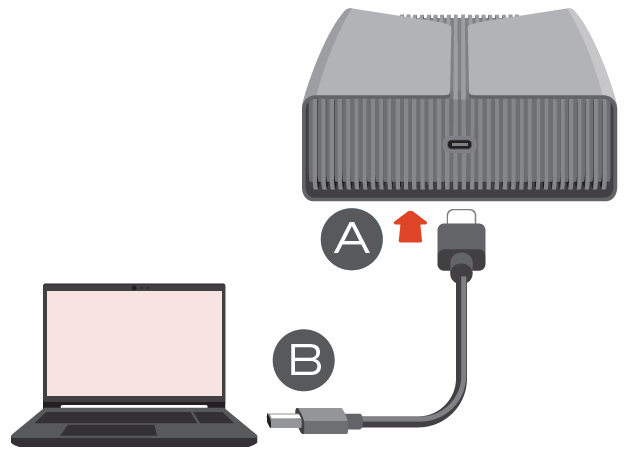
Once connected, it may take 30 seconds or more for the drive volume to appear and be accessible.
LED activity
- Gaming LED
- Status LED
Gaming LED
The fully customisable Gaming LED lets you personalise the look and feel of your drive to match your play environment. You can adjust colours, brightness, and lighting patterns using Seagate Toolkit, which provides an easy way to fine‑tune effects to your preference. If you prefer managing lighting through your system settings, Windows Dynamic Lighting also supports customisation of the Gaming LED. For more information on LED setup:
- See RGB and Status LED Management in the Seagate Toolkit User Manual.
- See Control Dynamic Lighting Devices in Windows.
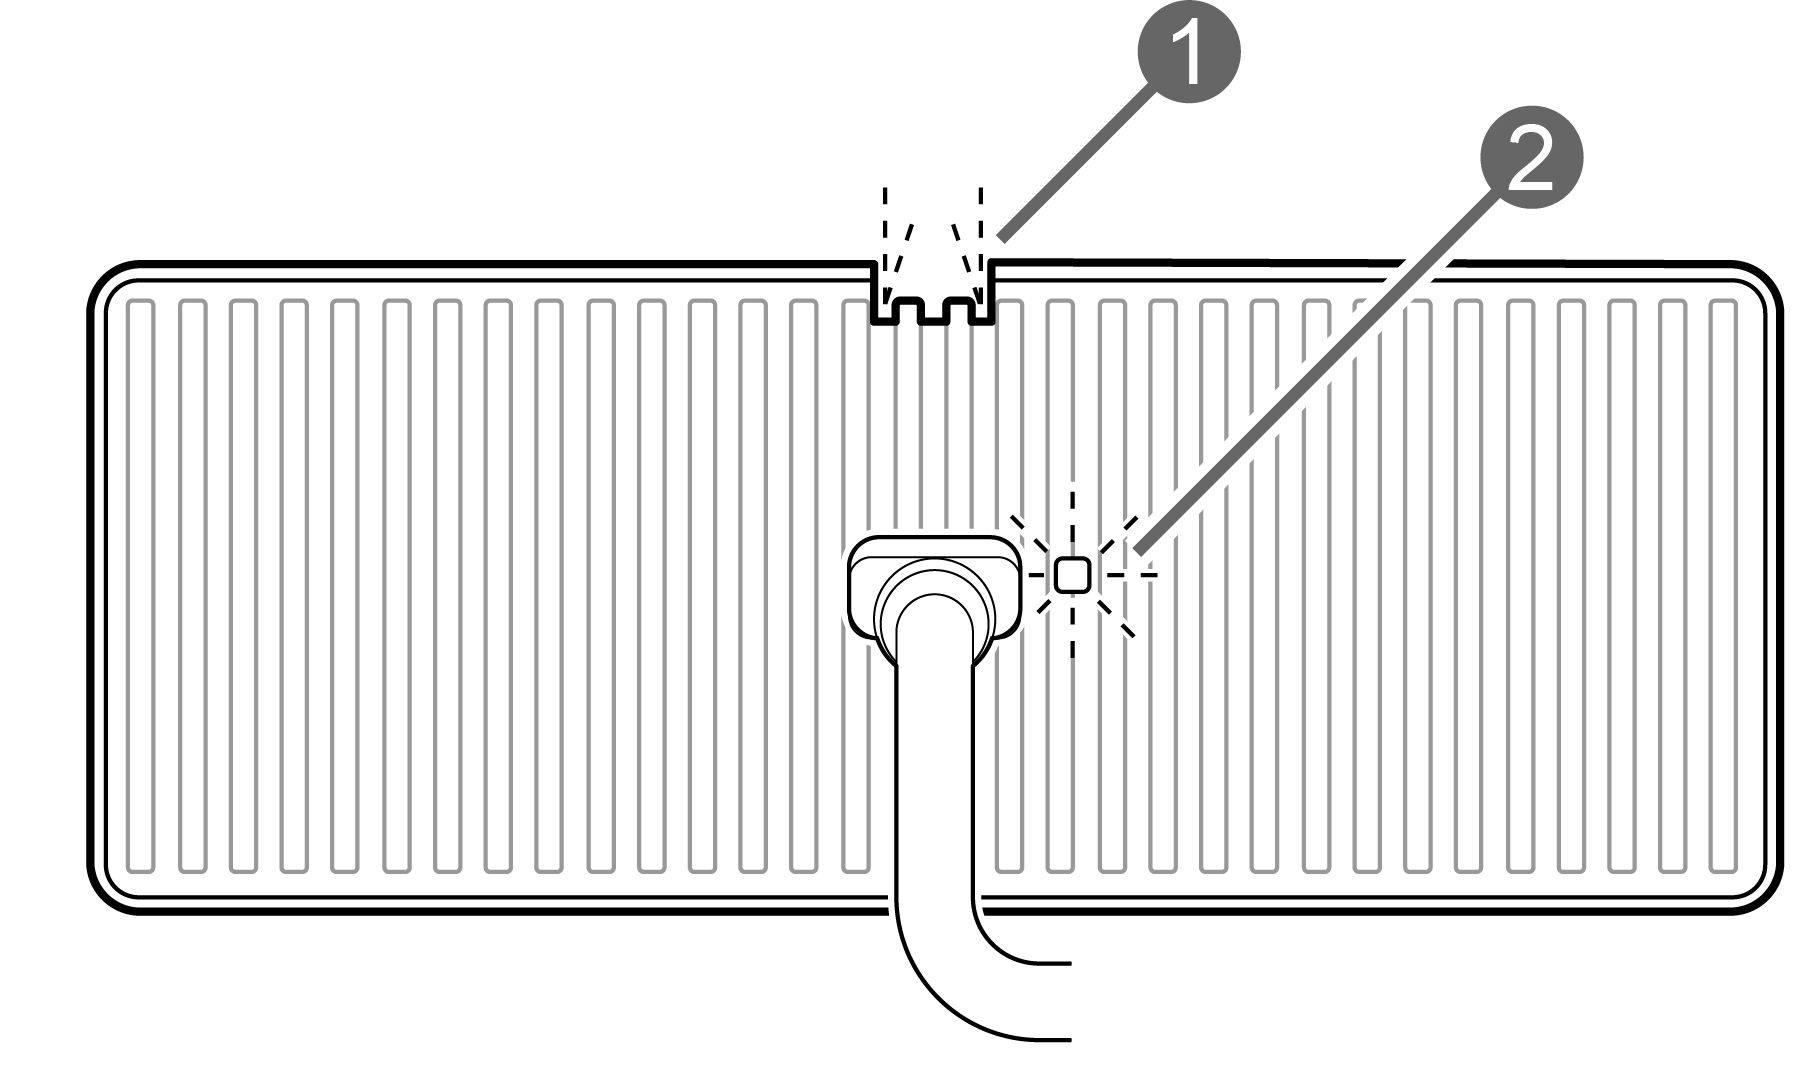
Status LED
The status LED indicates FireCuda X Vault status and activities.
| LED | County |
|---|---|
| On (white) | The device is ready. |
| Slow blinking (white) | a. Drive is being accessed. b. Drive has entered power-saving mode. |
| Off | a. Device is unavailable because the drive has been in power-saving mode for an extended period of time. b. Device has been safely removed from the computer. |
| Fast blinking (red) | Host computer port is not providing a minimum 15 W of power. |
Set up FireCuda X Vault
The Quick Start Guide in your package includes a QR code for fast, convenient registration using your mobile phone or tablet:
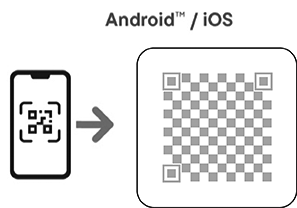
Scan the code in the Quick Start Guide and follow the on‑screen steps to register FireCuda X Vault and access partner offers.
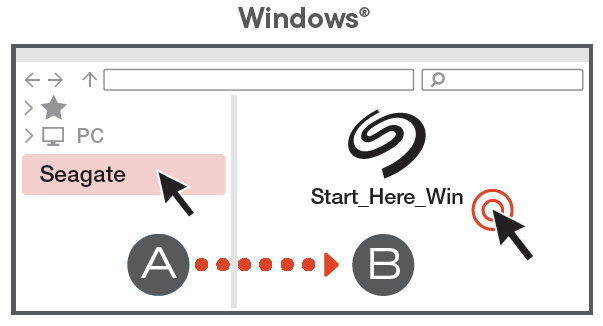
Alternative setup using a computer
Using a file manager such as File Explorer, open FireCuda X Vault and double-click Start_Here_Win.
- Register FireCuda X Vault. Enter your information and select Register.
- Download Toolkit. At the prompt, select Download to download the Toolkit installer.
- Using a file manager such as File Explorer, go to the folder where you receive downloads. Double-click SeagateToolkit.exe to launch the application.
Shortcuts
If you can no longer access the registration QR code or Start_Here on the drive, use the following URLs:
| Register | www.seagate.com/register |
| Install Toolkit | www.seagate.com/toolkit |
Power-saving mode
FireCuda X Vault can conserve energy by entering power-saving mode. Managed by your computer, power-saving mode can extend the life of the hard drive by sparing it from working during extended periods of inactivity.
You can initiate power-saving mode on your computer by performing one of the following:
- Placing the host computer in sleep mode.
- In Windows:
- Go to Control Panel > Hardware and Sound > Power Options.
- Select a power plan and click Change plan settings.
- Select Change advanced power settings.
- Click on Hard disk and Turn off the hard disk after.
- Choose the amount of time the computer should wait before putting FireCuda X Vault in power-saving mode.
- Click Apply.
To exit power-saving mode, review the table below:
| Entering power-saving mode | Exiting power-saving mode |
|---|---|
| The host computer placed the product into power-saving mode due to inactivity. | Access the FireCuda X Vault volume from the host computer. For example, copy files to the volume. |
| The computer is in sleep mode. | Wake up the computer. Note that it may take 30 seconds or more for the volume to appear when waking from sleep. |