Was this content helpful?
How could we make this article more helpful?
Volume Expansion And Hard Disk Repair: Protected Volumes
Review the instructions below before adding or replacing hard drives.
Removing healthy disks from a protected volume
A protected volume can be:
- SimplyRAID (single or double security)
- RAID 1/RAID 1+Spare (two disks minimum)
- RAID 5/RAID 5+Spare
- RAID 6/RAID 6+Spare
- RAID 10/RAID 10+Spare
Removing a healthy hard disk from a protected volume while the NAS OS device is powered on will render the volume unprotected. If the volume has double-disk security, removing two healthy disks while the device is powered on will render the volume unprotected. While removing healthy disks is not recommended, you can avoid breaking the RAID by shutting down the NAS first. Return the hard drives to their proper slots before powering on the NAS.
If a healthy disk has been removed while the NAS is powered on, you can reinsert it into its slot and NAS OS will synchronize the RAID. It is important to note that during synchronization:
- NAS performance is reduced due to a heavier demand upon the CPU
- RAID protection is not available until the synchronization is complete
- Older hard drives can fail, especially models that are not constructed for NAS
Important info on NAS backup: It is recommended that all users back up data to DAS or another NAS as further protection against disk failure or secondary points of failure (e.g. hardware, network, etc.). See Backup Jobs for details.
Hard disk expansion/replacement with protected volumes
Consider the following before expanding a RAID volume:
- Apart from RAID 10, protected RAID volumes can be expanded with new disks. However, it is not possible to add new disks with inferior capacity. For example, a RAID 5 or SimplyRAID volume with three 2TB disks supports the addition of a fourth disk that is 2TB or higher. NAS OS will alert you if a disk cannot be added to the volume.
- Volumes can be expanded by up to 8TB at one time. While If a hard drive in a protected volume fails and you do not have a replacement disk, you can reset the RAID using the New network volume wizard. Resetting the RAID will delete all data stored on the volume. Make certain to back up all your files before you reset the RAID you can expand a volume by more than 8TB, it must be done using multiple steps. For example, if you want to expand a 2TB volume with four 3TB drives, the expansion must be performed two times. That is, expand the volume with 6TB on the first pass and the remaining 6TB on the second pass.
- While a volume can be created with a very large capacity (see Maximum Elements by Feature), it cannot be expanded beyond 16TB. For example, a 14TB volume will not accept 3TB of additional capacity for expansion. In such a case, back up the data from the volume that you want to expand to another volume or another storage device. When all the data has been backed up, delete the volume and create a new volume with the larger capacity.
- It is possible to expand a RAID 1 or RAID 5 volume with new hard drives and upgrade to RAID 6 for double security. However, the upgrade to RAID 6 is a complex operation and can take a significant amount of time, especially if you have a lot of data and high capacity disks. For example, upgrading a RAID 1 volume with two 4TB disks to RAID 6 using two new 4TB disks can take over a week. In such a case, you will save time by:
- Copying or backing up the data on the RAID 1/RAID 5 volume to a connected DAS or another NAS.
- Once all the data is securely copied to another storage device, delete the RAID 1/RAID 5 volume.
- Create a new RAID 6 volume using the hard drives from the RAID 1/RAID 5 volume and the new hard drives (if applicable).
- Copy the data to the RAID 6 volume.
Important info: If a hard disk that you have purchased from Seagate fails, contact Seagate customer support.
Expand a volume's storage capacity: add disks to the enclosure
The instructions below pertain to storage expansion in a NAS OS device with available or empty drive slots. If you are exchanging an existing hard disk in your enclosure for a hard disk of greater capacity or, repairing a failed disk, follow the instructions in Repair a failed disk or expand storage capacity below.
NAS OS gives you the freedom to configure volumes and RAID for your network. While it is not possible to list every option for expansion, review the examples below and apply them to your NAS OS device.
Adding hard disks: Make certain to add a new hard drive without data. While data on the NAS volume is safe, performing the steps below will delete files stored on the new hard drive you are adding to the volume.
SimplyRAID
Important info: Always back up your data before performing the steps below.
- Insert one or more hard drives into available drive slots on your NAS. Review the hardware user manual for your NAS for instructions.
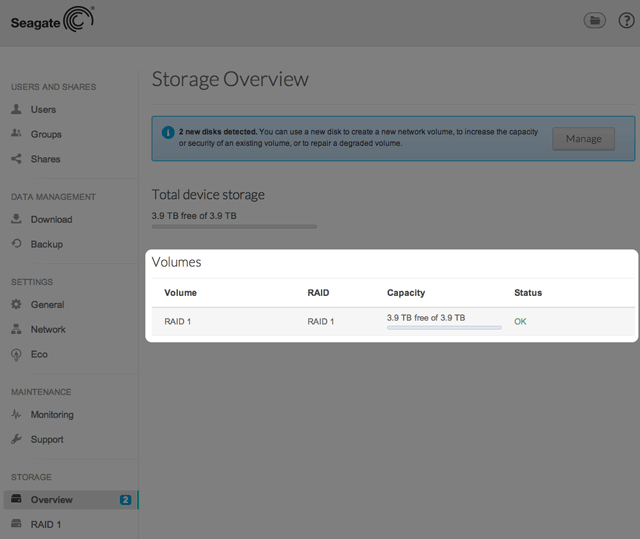
- Go to NAS OS in an Internet browser and choose Storage > Overview. Important: Do not choose Manage on the Storage Overview page.
- On the Storage Overview page, click on the volume that you want to expand with the new disks. The volume's storage page will load in the browser.
- Choose Manage.
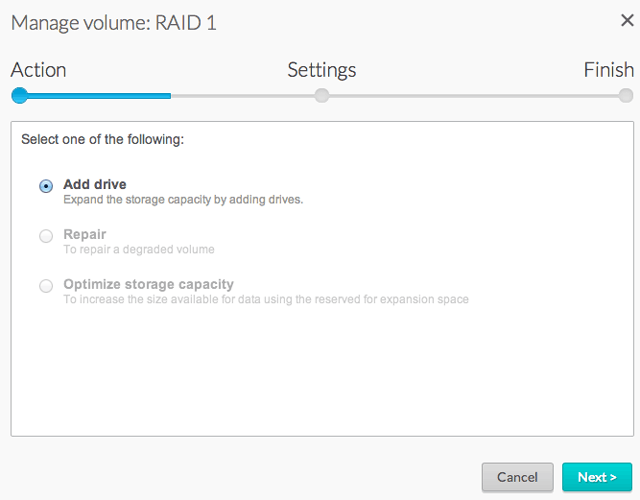
- Choose Add drive and Next.
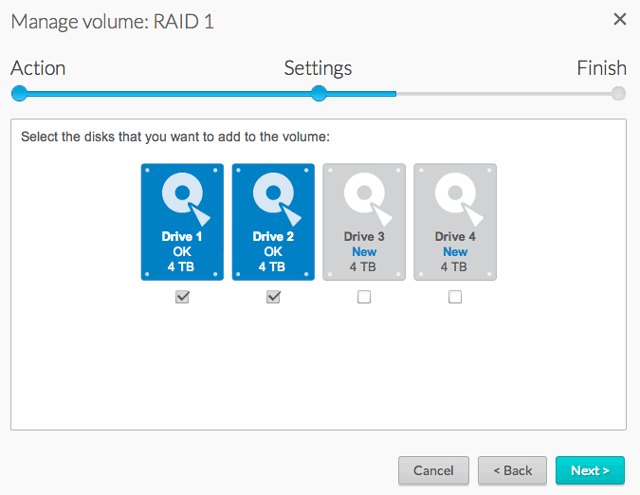
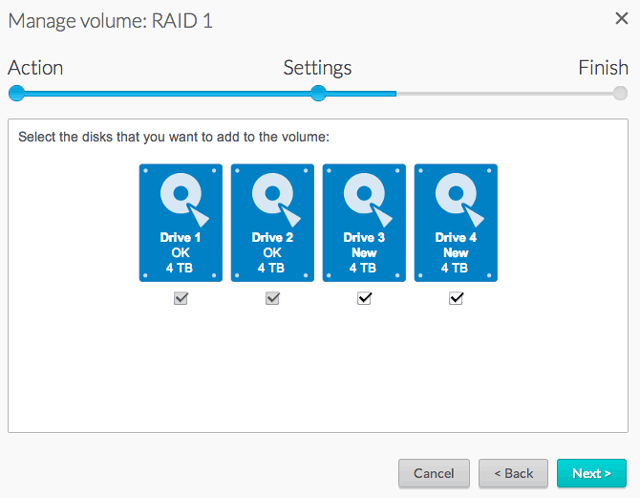
- In the Select disks window, disks with white checkboxes can be selected to expand the volume. Disks with grey checkboxes are being used by an existing volume and cannot be selected. Select the box under each disk that you want to use to expand the volume and choose Next. Important: All data on the disks that you select will be deleted.
- Review the summary and choose Finish. A popup window cautions you that all data on the selected disks will be deleted. Choose Yes to continue.
You can use the volume while it synchronizes the data. NAS performance can be affected during synchronization.
Custom: RAID 1, RAID 5, and RAID 6
Important info: Always back up your data before performing the steps below.
- Insert one or more hard drives into available drive slots on your NAS. Review the hardware user manual for your NAS for instructions.
- Go to NAS OS in an Internet browser and choose Storage > Overview. Important: Do not choose Manage on the Storage Overview page.
- On the Storage Overview page, click on the volume that you want to expand with the new disks. The volume's storage page will load in the browser.
- Choose Manage.

- Choose Add drive and Next.
- In the Select disks window, disks with white checkboxes can be selected to expand the volume. Disks with grey checkboxes are being used by an existing volume and cannot be selected. Select the box under each disk that you want to use to expand the volume and choose Next. Important: All data on the disks that you select will be deleted.
- Select an option and choose Next.
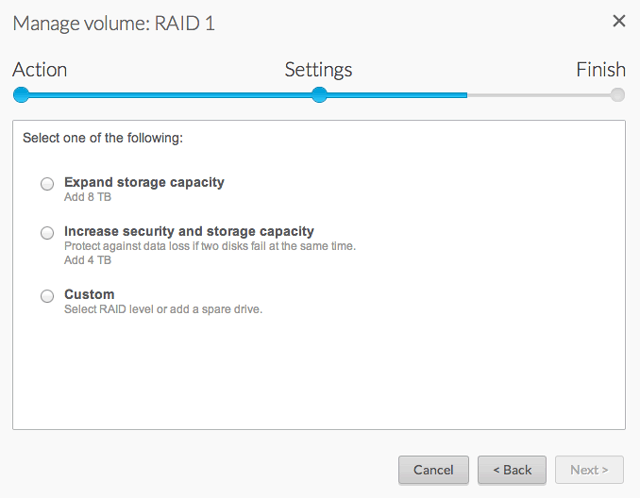
- Select Expand storage capacity to add the new disks to the RAID. Data will be synchronized with the new disks.
- Select Increase security to migrate the RAID to another level. Select Increase security to migrate the RAID to another level. For example, upgrade the level from RAID 1 to RAID 5/6 or, RAID 5 to RAID 6.
- Select Custom to create a new RAID volume. All data will be deleted to create the new RAID volumes.
- Review the summary and choose Finish. A popup window cautions you that all data on the selected disks will be deleted. Choose Yes to continue.
You can access data while the volume is resized. The total capacity of the volume will be available once the synchronization is complete.
Repair a failed disk or expand storage capacity
Follow the instructions below to:
- Replace a failed hard disk.
- Expand a volume's total storage capacity by removing a hard disk and replacing it with a larger capacity hard disk.
Important info: It is not possible to replace existing hard disks with lower capacity hard disks.
Important info: All data stored on the replacement disk will be deleted.
Hot-swapping
If your volume is protected, you can remove one hard disk from the volume while the product is turned on without losing data. This process is referred to as “hot-swapping”. It is highly recommended that hot-swapping be performed when replacing or expanding a hard disk that is part of a protected volume.
When replacing or expanding hard drives in a protected RAID volume:
- Perform the operation while the NAS is powered on (hot-swapping).
- Use clean hard drives (without data).
SimplyRAID
Important info: Always back up your data before performing the steps below.
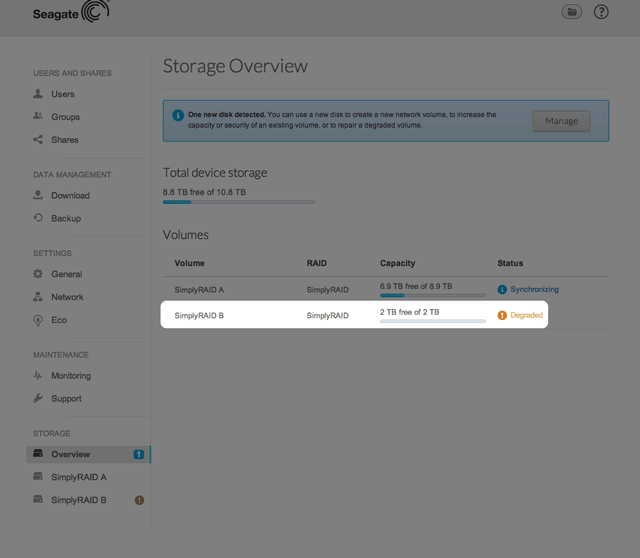
- Remove the disk that you want to replace. The Storage Overview page will alert you that the volume is no longer protected.
- Insert the replacement disk into the enclosure per the instructions provided in the NAS's hardware user manual. Important: NAS OS will detect the new drives. Do not choose Manage on the Storage Overview page.
- On the Storage Overview page, click on the volume that you want to expand or repair with the new disks. The volume's storage page will load in the browser.
- Choose Manage.
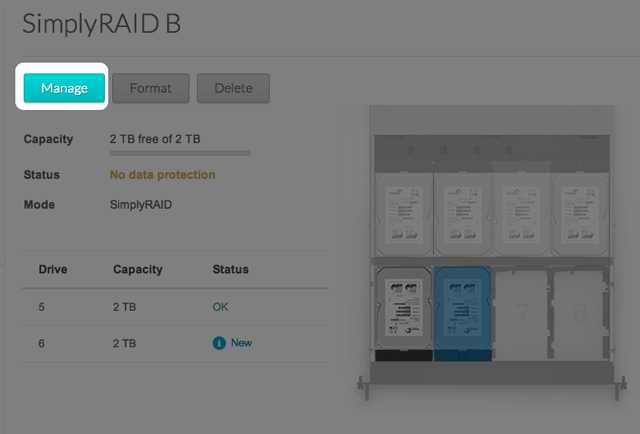
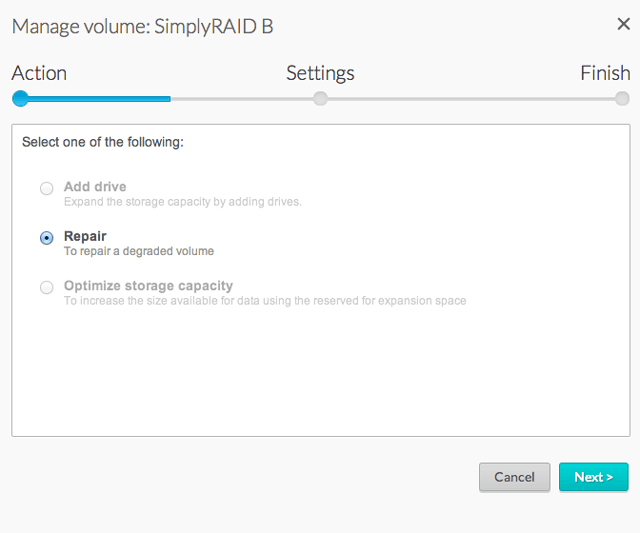
- Select Repair and choose Next.
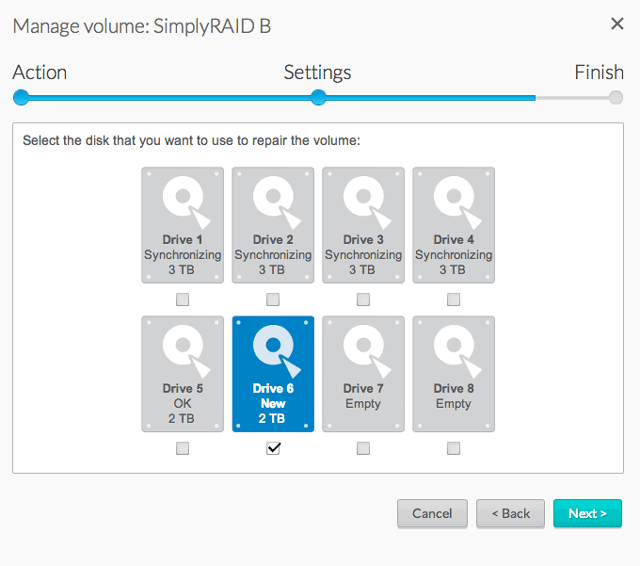
- In the Select disks window, disks with white checkboxes can be selected to expand the volume. Disks with grey checkboxes are being used by an existing volume and cannot be selected. Select the box under the disk that you want to use to expand or repair the volume and choose Next. Important: All data on the disk that you select will be deleted.
- Review the summary and choose Finish. A popup window cautions you that all data on the selected disk will be deleted. Choose Yes to continue.
The time to synchronize the volume depends upon the amount of disks and the total capacity. The Storage page will update the volume capacity following the synchronization. You can continue to access files stored on your NAS during the RAID synchronization.
Custom: RAID 1, RAID 5, and RAID 6
Use the instructions below when swapping an existing hard disk in your custom RAID for a failed or higher capacity disk.
Note on Custom RAID expansion and synchronizing: The volume must synchronize twice when expanding capacity on a Custom RAID volume.
Important info: Always back up your data before performing the steps below.
- Remove the disk that you want to replace. The Storage Overview page will alert you that the volume is no longer protected.
- Insert the replacement disk into the enclosure per the instructions provided in NAS's hardware user manual. Important: NAS OS will detect the new drives. Do not choose Manage on the Storage Overview page.
- On the Storage Overview page, click on the volume that you want to expand or repair with the new disks. The volume's storage page will load in the browser.
- Choose Manage.
- Select Repair and choose Next.
- In the Select disks window, disks with white checkboxes can be selected to expand the volume. Disks with grey checkboxes are being used by an existing volume and cannot be selected. Select the box under the disk that you want to use to expand or repair the volume and choose Next. Important: All data on the disk that you select will be deleted.
- Review the summary and choose Finish. A popup window cautions you that all data on the selected disk will be deleted. Choose Yes to continue.
- Depending upon the amount of disks and the total capacity, the synchronization can take a few hours to several days.The synchronization is complete once the Status is OK. However, the volume must still be optimized for the additional capacity.
- On the Storage Overview page, click on the volume that you want to optimize. The volume's storage page will load in the browser.
- Choose Manage.
- Select Optimize storage capacity and choose Next.
- Choose Finish.
- The volume will synchronize once more to update the storage capacity.
You can access files stored on your NAS during the RAID synchronization.
No replacement disk: reset the volume's RAID
If a hard drive in a protected volume fails and you do not have a replacement disk, you can reset the RAID using the New network volume wizard. Resetting the RAID will delete all data stored on the volume. Make certain to back up all your files before you reset the RAID.
To reset the RAID:
- Go to NAS OS in an Internet browser and choose Storage > Overview.
- On the Storage Overview page, click on the volume that you want to reset. The volume's storage page will load in the browser.
- Choose Delete.
- Go to New network volume wizard for instructions on how to create a new RAID volume.