Was this content helpful?
How could we make this article more helpful?
Hard Drive Maintenance
The Seagate NAS Pro 2-Bay | 4-Bay | 6-Bay is a desktop hard drive enclosure. Review the details below for hard drive module locations and, where applicable, replacement.
Important info: Refer to the product's Warranty before performing any hardware repairs or maintenance that is not described in this manual.
Precautions
- The hard drives for the Seagate NAS Pro 2-Bay | 4-Bay | 6-Bay are hot swappable. However, performing other types of hardware maintenance within the enclosure is not supported and can void your product’s warranty.
- During operation, all provided hardware (including the drives in their frames) should remain in place for optimal airflow.
- Observe all conventional ESD precautions when handling the NAS’s parts. Avoid contact with backplane components and module connectors, etc.
- Never remove the NAS Pro’s enclosure cover. Potential hazards of opening the cover while the product is operating include, but are not limited to, rotating fans and hot surfaces. Removing the cover can void your product’s warranty.
Adding/replacing a hard drive
Follow the instructions below to perform one of the following:
- Insert a new hard drive into an empty bay
- Expand storage space with a higher-capacity hard drive
- Replace a failed hard drive
Hard drives in protected RAID volumes are hot swappable (e.g. SimplyRAID, RAID 1, RAID 5, and RAID 6). However, it is not possible to hot-swap more than one drive at a time. If you are replacing more than one hard drive in a volume, wait for synchronization to successfully complete before moving to the next hard drive.
Always confirm that the hard drive you are replacing can be removed without harming a RAID array. For example, you want to expand a hard drive from 2TB to 3TB. You know that the 2TB hard drive is part of a RAID 5 array composed of four hard drives. You will lose data if you remove the 2TB hard drive and another hard drive in the array has failed. Therefore, use NAS OS to check the health of all the hard drives in the RAID array. In this example, you can replace the 2TB hard drive if it is the only hard drive in the array that has failed and/or the other hard drives in the array are healthy.
Consider the points below before following the instructions:
- Replace an existing or faulty hard drive with a hard drive of equal or greater capacity.
- When handling hard drives, make sure that they are placed (and stored) on a cushioned surface.
- If you are replacing a 3.5-inch hard drive with a 2.5-inch hard drive, make certain to use the screws included with the NAS.
Note: Seagate hard drives are optimized for use with your NAS. See Seagate NAS HDD for further information.
3.5-inch hard drive
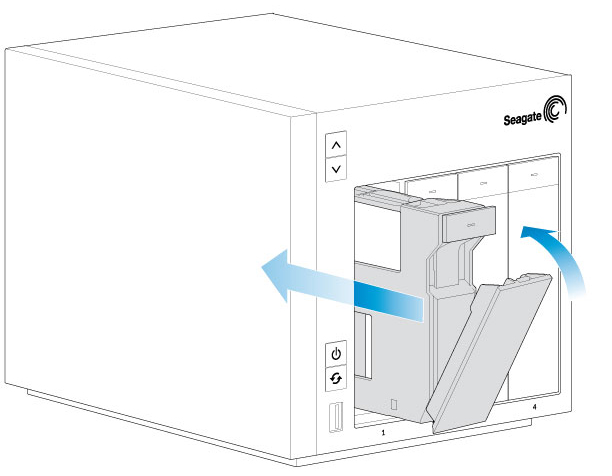
- Push the hard drive tray’s lock button to open the latch and remove the hard drive tray.Important: Make certain that you remove the correct hard drive tray.
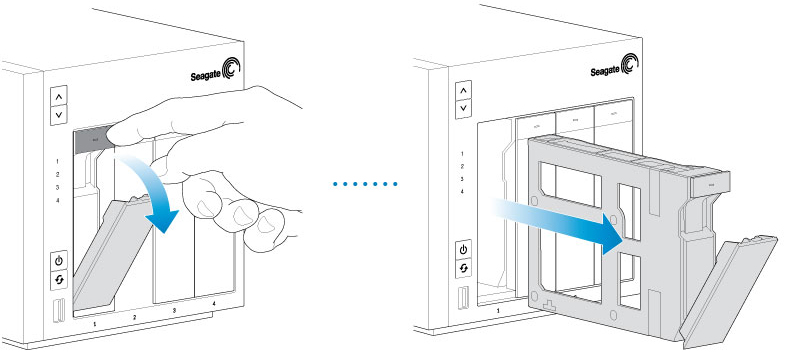
- Insert a new hard drive or replace the current hard drive:
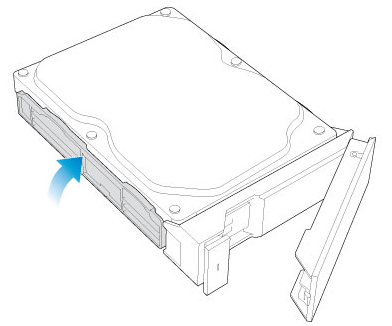
- Empty tray: gently bend the left side of the tray and connect the hard drive to the two pins on the right.

- Full tray: Unfasten the four pins and remove the hard drive from the tray. To insert the new hard drive, gently bend the left side of the tray and connect it to the two pins on the right.
- Empty tray: gently bend the left side of the tray and connect the hard drive to the two pins on the right.
- Release the left side of the tray and connect the remaining two pins to the hard drive.
- Insert the hard drive tray into the NAS Pro’s bay. Push it into the bay as far as it will go before closing the tray handle.
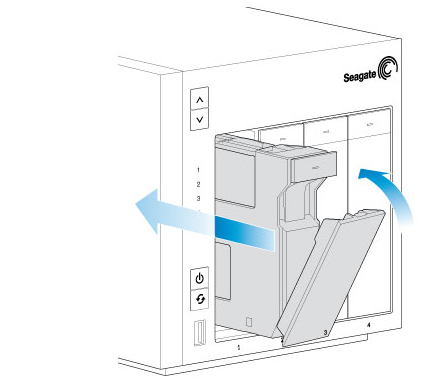
- If necessary, power on the NAS.
- Manage the new storage using NAS OS.
2.5-inch hard drive/SSD
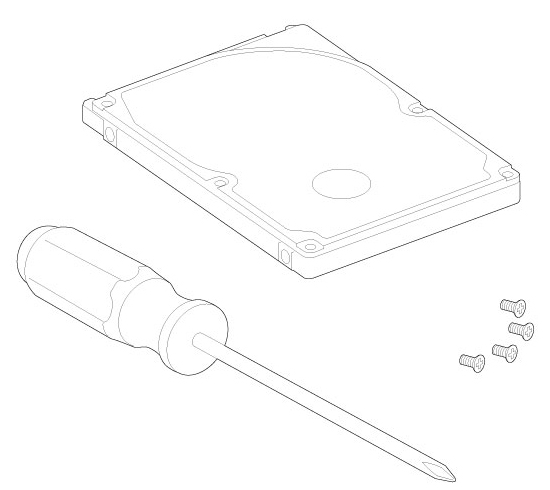
Installing a 2.5-inch hard drive/SSD requires the following:
- Screws included with your Seagate NAS Pro
- One or more 2.5-inch hard drives or SSD
- A standard Philips head screwdriver
You can add the 2.5-inch hard drive or SSD to an empty hard drive tray or replace an existing disk. Make certain that the capacity of the 2.5-inch hard drive is equal to or greater than the disk you are replacing.
- Remove a hard drive tray from the Seagate NAS Pro. It can be empty or filled with a hard drive you want to replace.
- If applicable, remove the hard drive by unfastening the four pins and extracting it from the tray
- The hard drive tray has an SSD adapter switch on the bottom right (Image A). Push it down (Image B).

Image A
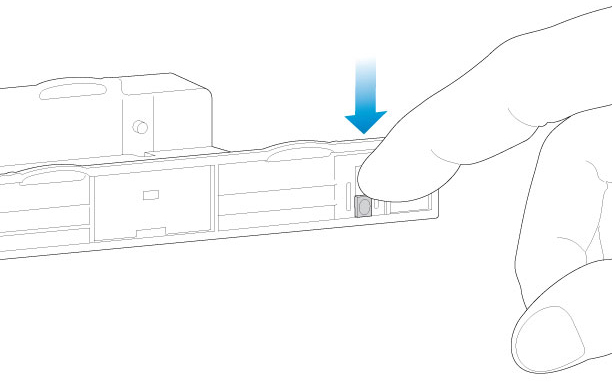
Image B
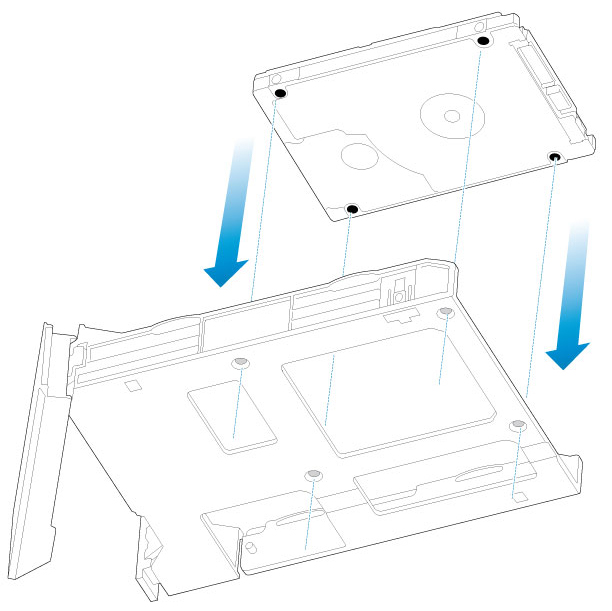
- Align the screw holes on the hard drive tray with the screw holes on the bottom of the 2.5-inch hard drive or SSD.
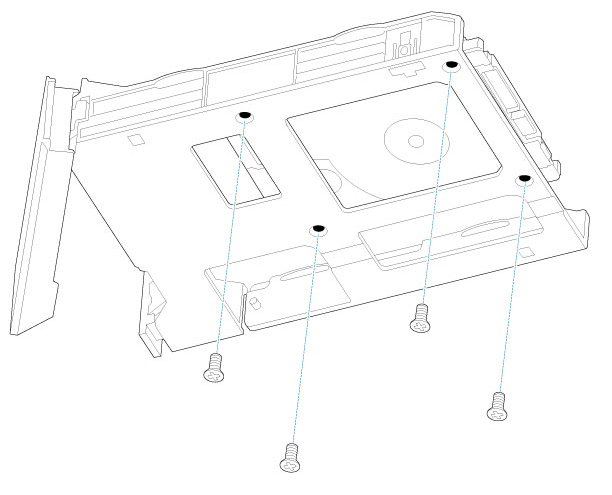
- Use the included screws to fix the 2.5-inch hard drive or SSD to the hard drive tray. Use four screws.
- Insert the hard drive tray into the empty slot.
- Repeat the steps above for each 2.5-inch hard drive or SSD.
- Run Seagate NAS OS to manage the new storage.