Was this content helpful?
How could we make this article more helpful?
Connect LaCie 8big Pro5
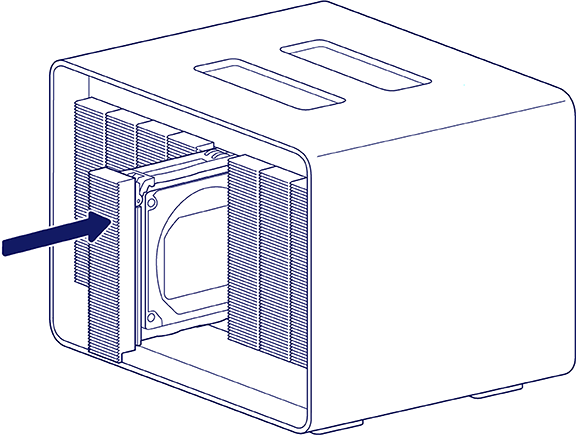
Reseat drive drawers
Drive drawers can shift during shipment. Before you connect 8big Pro5, carefully remove and reinsert each drawer to make sure it is securely seated in its bay.

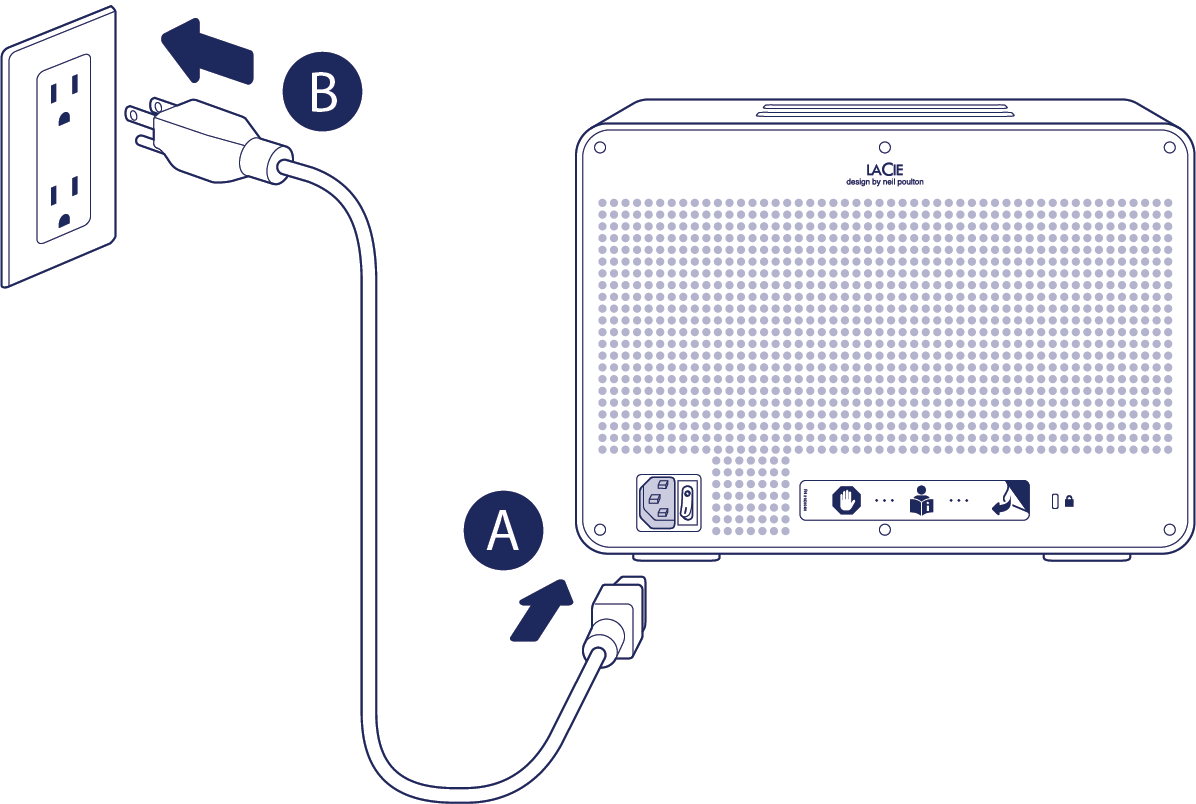
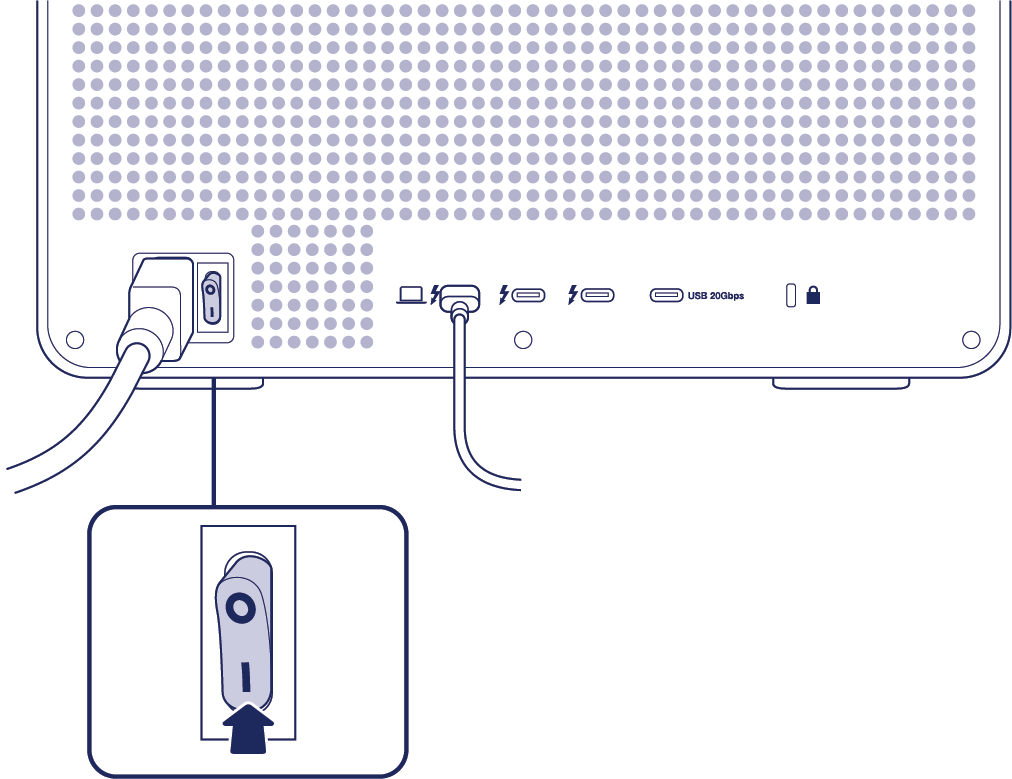
Connect power cord
- Connect power cord to the power input port.
- Connect the power cord to a live power socket.
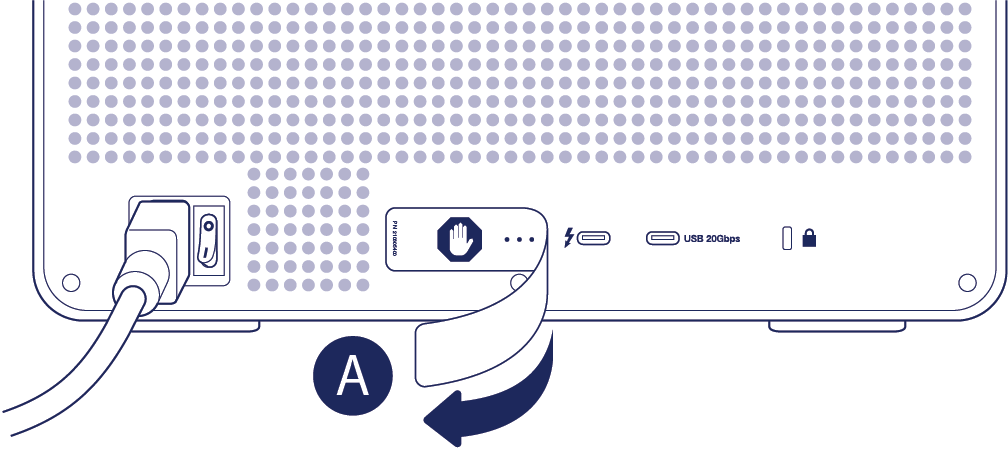
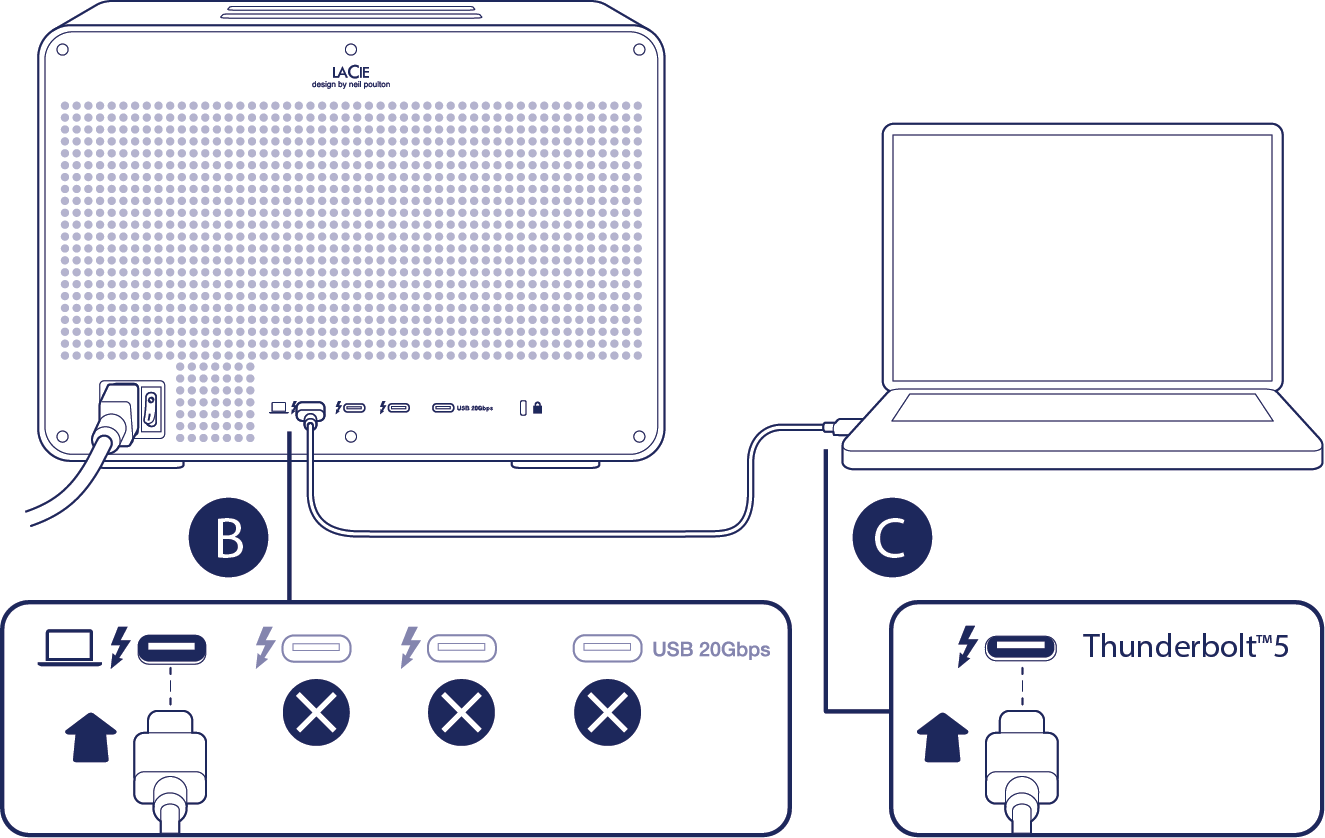
Connect Thunderbolt cable
- Remove the sticker covering the ports on the back panel.
- Connect the Thunderbolt 5 cable to the host port on the back panel. Do not connect it to one of the downstream ports.
- Connect the other end of the cable to a Thunderbolt 5 port on your Mac or Windows PC. 8big Pro5 also supports connection to a Thunderbolt 3, Thunderbolt 4, or USB4 port.
Power on
Before powering on 8big Pro5, confirm the following:
- All hard drive trays are firmly seated in their bays.
- 8big Pro5's host port is connected to a Thunderbolt 5, Thunderbolt 4, Thunderbolt 3, or USB4 port on your computer.
- The power cable is connected to a powered outlet.
When 8big Pro5 meets the conditions above, turn the power switch to the on position.
Install LaCie RAID Manager
Installing LaCie RAID Manager provides a driver required to access and set up LaCie 8big Pro5. LaCie RAID Manager also helps you:
- Configure RAID arrays
- Check the health of the storage
- Troubleshoot hard drive issues
To install LaCie RAID Manager:
- Go to www.seagate.com/raid-manager to download the installer.
- Launch the installer on the computer that is connected to 8big Pro5.
- Follow the on-screen instructions to complete the installation.
Once the driver has been installed, the host computer recognises 8big Pro5 as a storage device.
macOS users — On macOS, 8big Pro5 may not be recognised immediately because the required Driver Extension (DEXT) may be disabled by default. To enable the driver:
- Open System Settings.
- Select General, then navigate to Login Items & Extensions.
- Under Extensions, locate LaCie Driver Installer.
- Click the Info icon and enable the LaCie driver.
- Enter administrator credentials when prompted.
- Restart the computer if required.
Format 8big Pro5
8big Pro5 is delivered unformatted with all eight drives configured as a single RAID 5 array. A spare drive is not assigned to the array. RAID 5 provides data redundancy, helping to protect your files if a hard drive fails. Because some capacity is reserved for redundancy, the usable storage is less than the total device capacity.
Because 8big Pro5 is delivered unformatted, the operating system may prompt you to initialise the device for use when it's first detected. In macOS and Windows, the term initialise refers to preparing a disk for use by creating a file system, also known as formatting the storage.
Using the default RAID 5 configuration
If you are using the preconfigured default RAID 5 array, you can format the storage and begin using 8big Pro5.
You can format the array using the operating system’s native disk management utility:
- Disk Utility on macOS
- Disk Management on Windows
LaCie RAID Manager also includes an option to format the array. This option uses the same operating system formatting mechanisms as the native disk utilities.
Choosing a different RAID level
You can choose a different RAID level to optimise 8big Pro5 for performance or for additional data protection, depending on your working environment. Before allowing macOS or Windows to format 8big Pro5:
- Review the RAID chapter to determine which RAID level best suits your needs.
- If you choose a different RAID level, use LaCie RAID Manager to select and apply the new RAID level. See instructions in the RAID Manager User Manual.
- Parity‑based RAID levels require initialisation. See Initialisation and Formatting for details.