Was this content helpful?
How could we make this article more helpful?
Getting Started
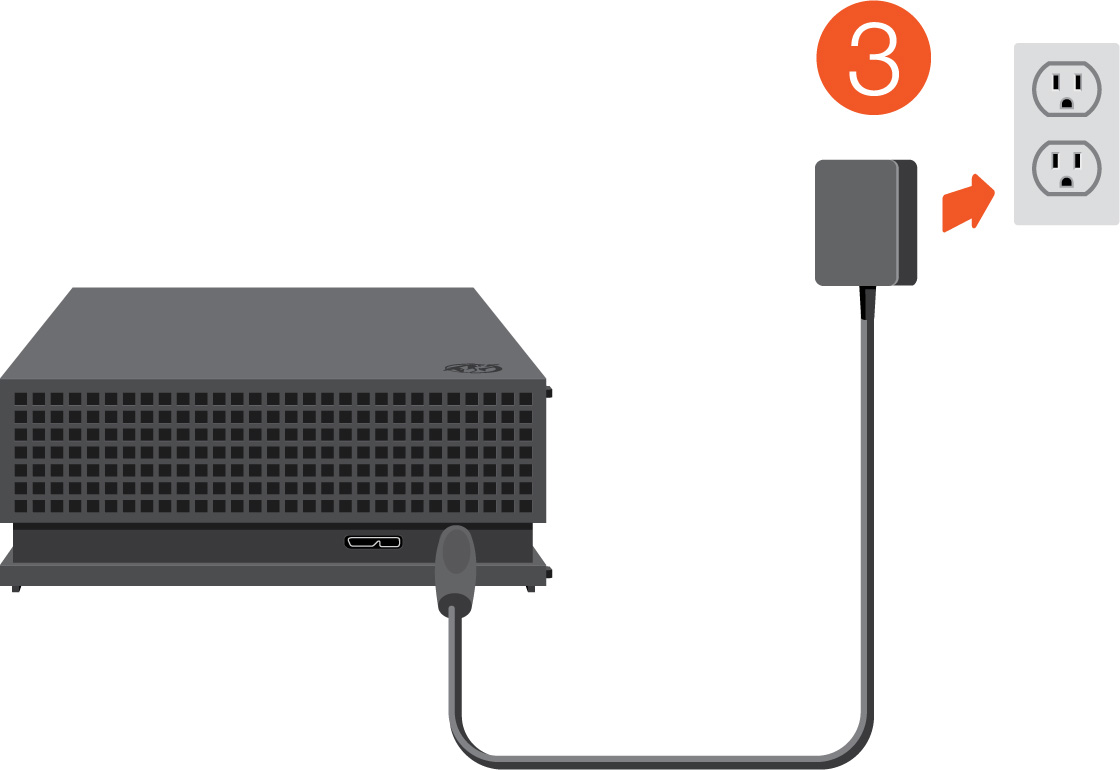
Connect power
- Place the adapter plug for your location into the channel on the power supply. Slide it down to lock it in place.

- Connect the power cable to Seagate FireCuda Gaming Hub.

- Connect the power supply to a live power outlet.
Connect to computer
- Connect the USB micro-B end of the cable to the USB micro-B port on FireCuda Gaming Hub.
- Connect the USB-A end of the cable to your computer’s USB-A port.

You can connect your Seagate device to a USB-C port on your computer. The USB-C port must support USB 3.0 or higher. A USB micro-B to USB-C cable is not included with this device.
Set up FireCuda Gaming Hub
The setup process lets you:
| Register Seagate FireCuda Gaming Hub | Get the most from your drive with easy access to information and support. |
| Install Toolkit |
Customize RGB settings, set up backup plans, and more. |
Your computer must be connected to the internet to register your device and install Toolkit.
Start here
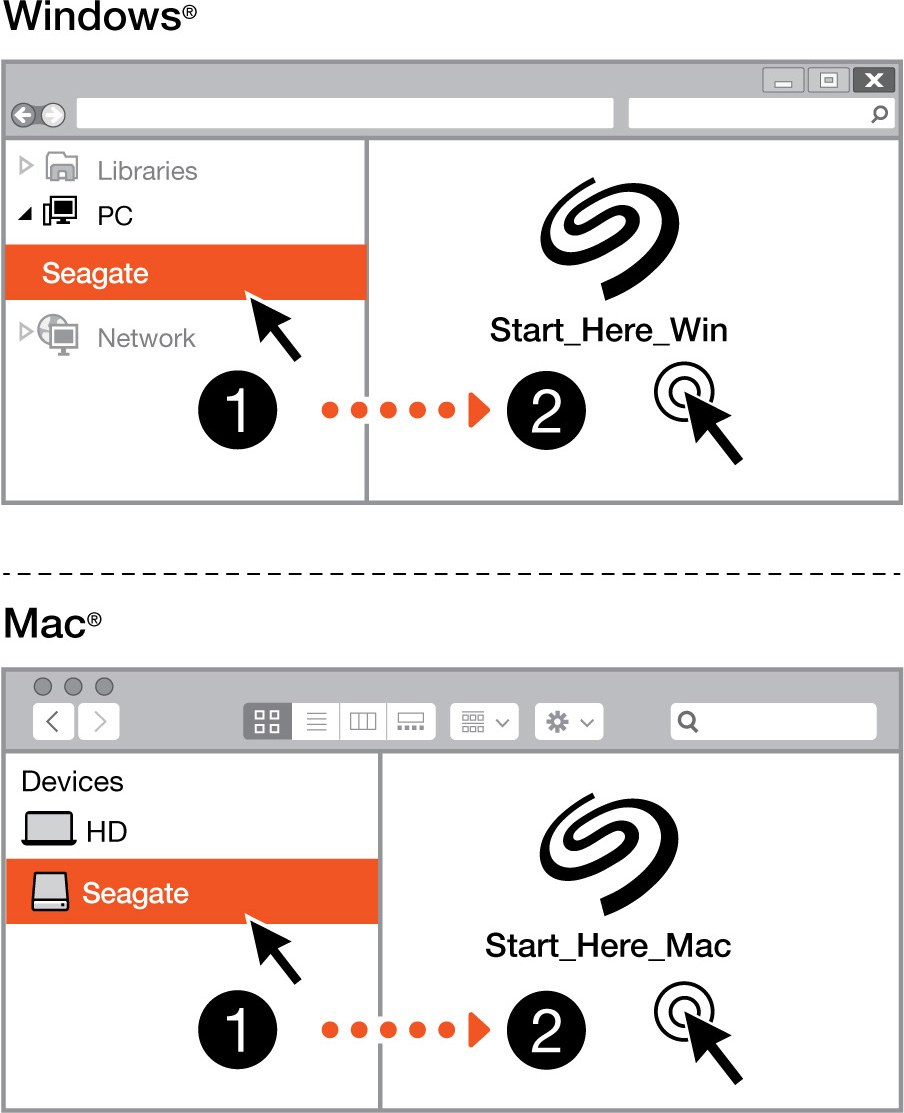
Using a file manager such as Finder or File Explorer, open FireCuda Gaming Hub and launch Start Here Win or Start Here Mac.
Register your device
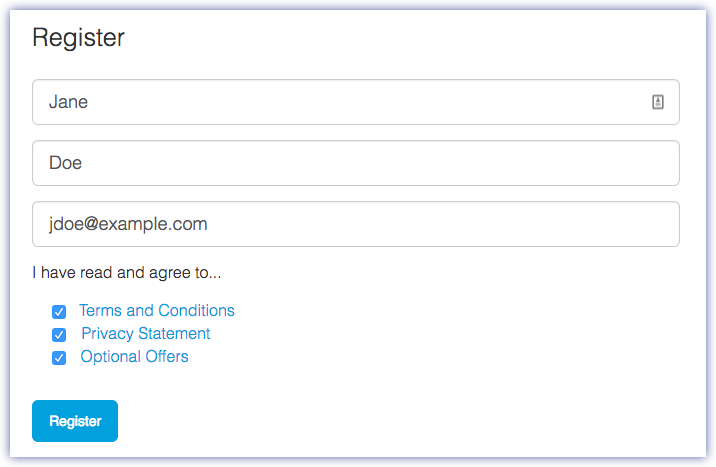
Enter your information and click Register.
Download Toolkit

Click the Download button.
Install Toolkit
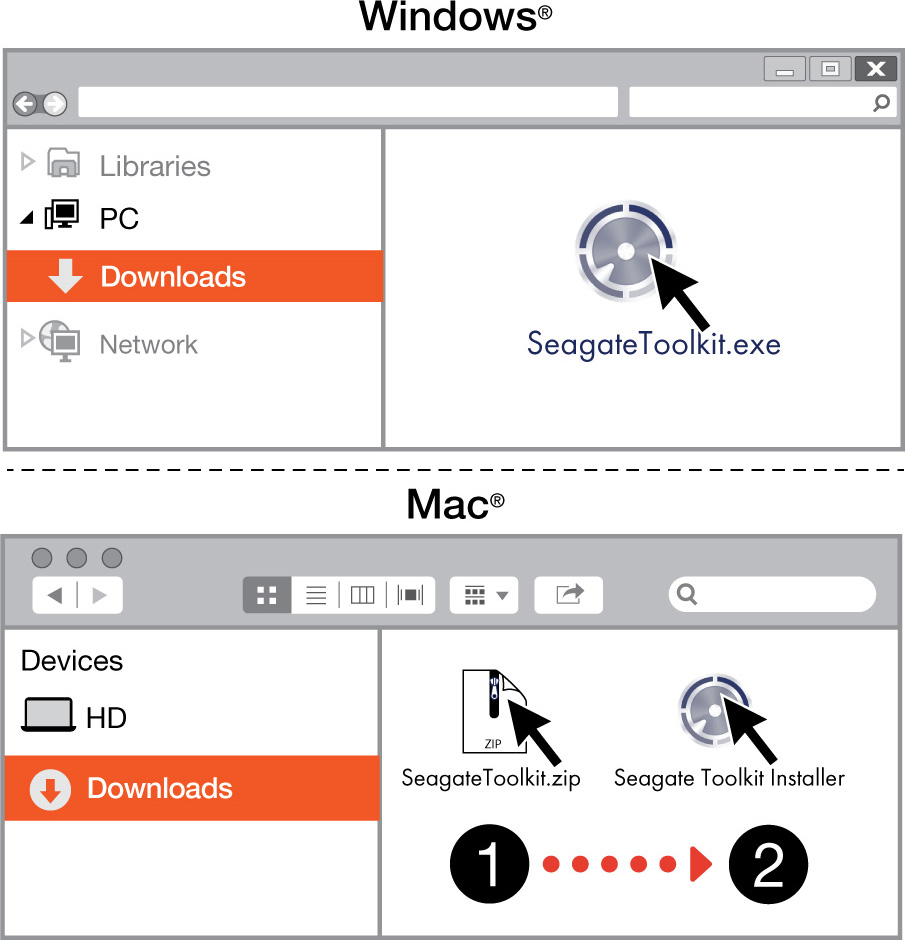
Using a file manager such as Finder or File Explorer, go to the folder where you receive downloads.
![]() Open the SeagateToolkit.zip file. Click on the Seagate Toolkit Installer to launch the application.
Open the SeagateToolkit.zip file. Click on the Seagate Toolkit Installer to launch the application.
Your computer must be connected to the internet to install and update Toolkit.