This article provides instructions on how to check and modify the RAID level of the LaCie Rugged RAID
Check the RAID level
Before proceeding with the RAID level modification, it’s recommended to confirm what RAID level your Rugged RAID drive is at. There are two methods of checking the RAID level listed below.
Note: The factory default RAID level is RAID 0.
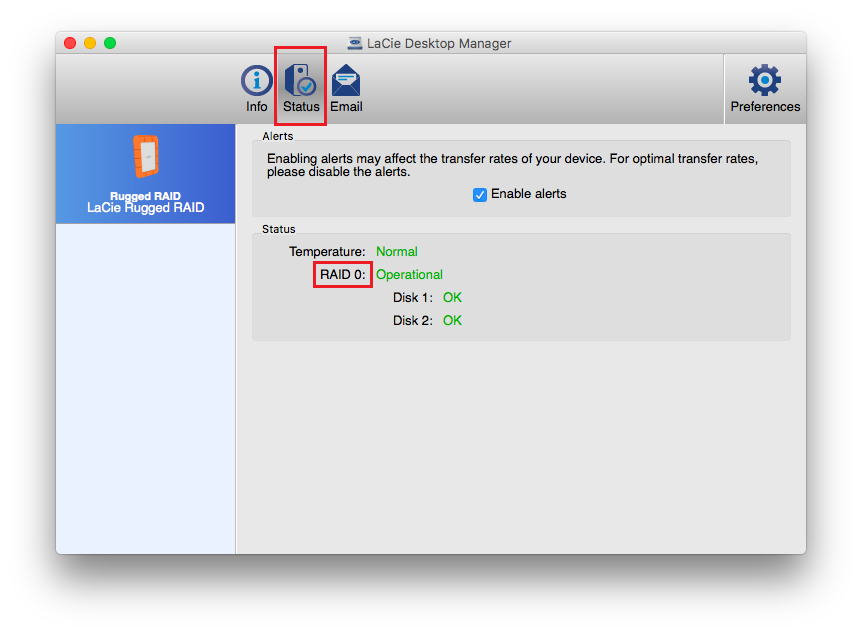
Checking the RAID level using LaCie Desktop Manager software:
- Connect your Rugged RAID to the computer.
- Launch LaCie Desktop Manager.
- Click on Status.

Checking the RAID level using the RAID select button:
- Connect your Rugged RAID to the computer.
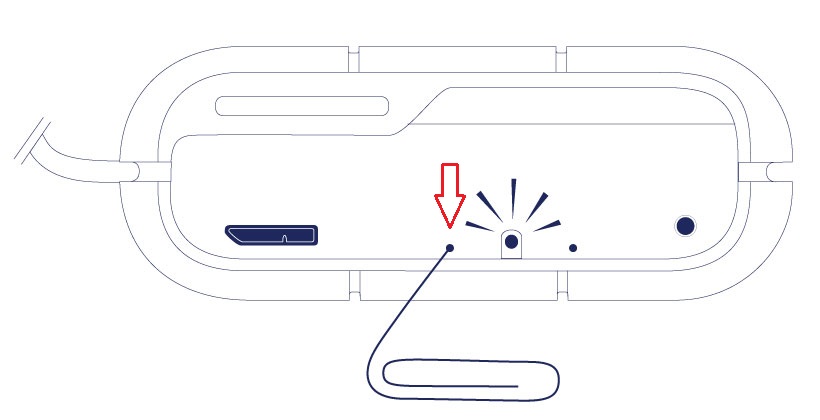
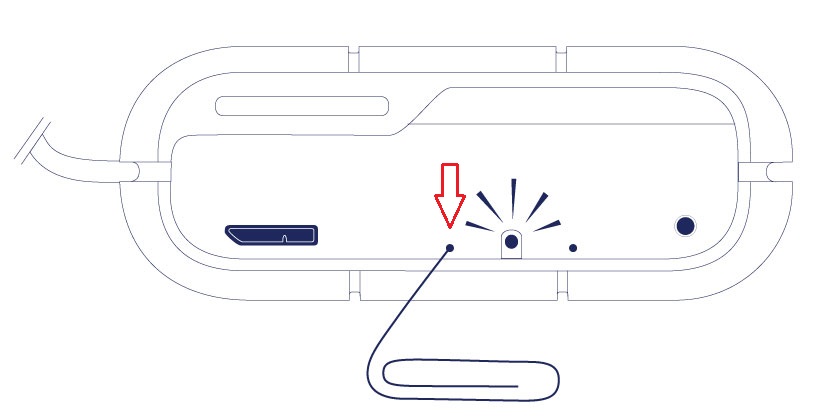
- Use a thin object such as the end of a paperclip to push the RAID select button.
- The select button is the first hole located next to the USB port of your Rugged RAID. See image below:

- Note the RAID LED
- Turns solid if the device is set to RAID 0
- Blinks if the device is set to RAID 1
Modify the RAID level
Warning: Changing the RAID level deletes data stored on the LaCie Rugged RAID. Backup all your data before adjusting the RAID.
Follow the steps below to modify the RAID level of your LaCie Rugged RAID:
- Connect your Rugged RAID to your computer.
- Using a thin object such as the end of a paperclip to push the RAID select button two times.

Note: You may see a message reporting that the device was not ejected properly. Don't be concerned about this message since you will have to format the device after changing the RAID mode.
- Note the RAID LED:
- Turns solid if the device will be changed to RAID 0
- Blinks if the device will be changed to RAID 1
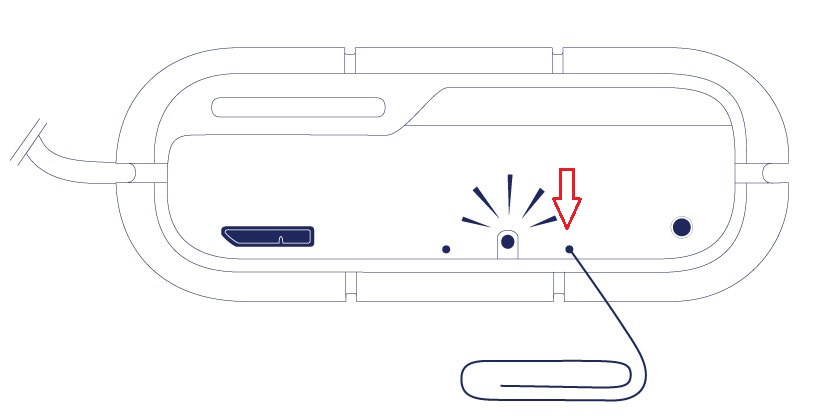
- Push the confirm button within 5 seconds after pushing the RAID select button from the previous step.

- The Rugged RAID restarts. The activity LED located above the USB port will start to blink indicating that the restart process is ongoing. The restart is completed once the LED becomes solid.
- It's recommended to check the RAID level using one of the two methods described earlier in the document. In case the RAID mode has not been changed, you can proceed with the “Modify the RAID level” steps again.
Now your Rugged RAID must be formatted before it can be used again. For additional information on how to format your Rugged RAID drive, please visit Optional Formatting and Partitioning.


