Was this content helpful?
How could we make this article more helpful?
Direct-Attached Storage (DAS) Connections
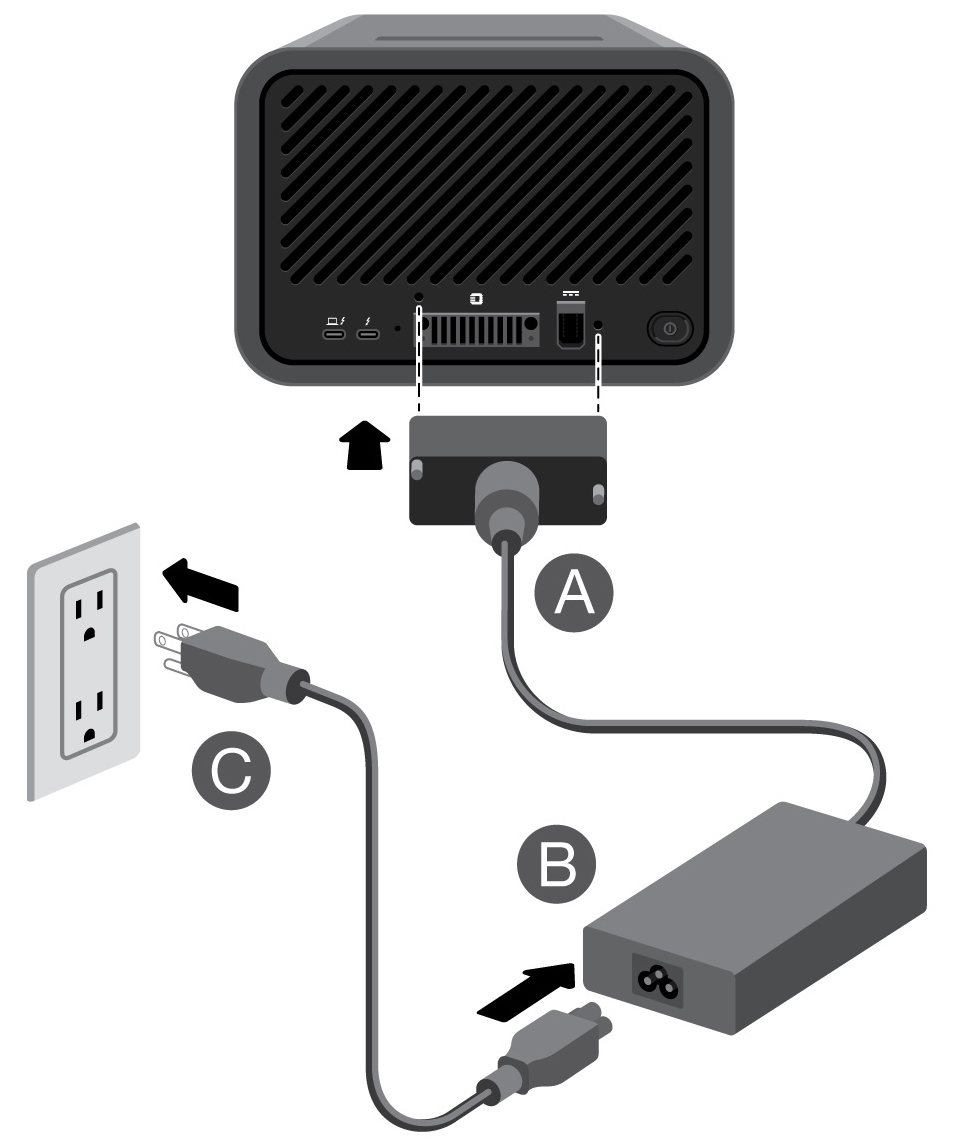
Connect power
Connect the included power supply in the following order:
- Connect the power supply to Lyve Mobile Array's power input.
- Connect the power cord to the power supply.
- Connect the power cord to a live power outlet.
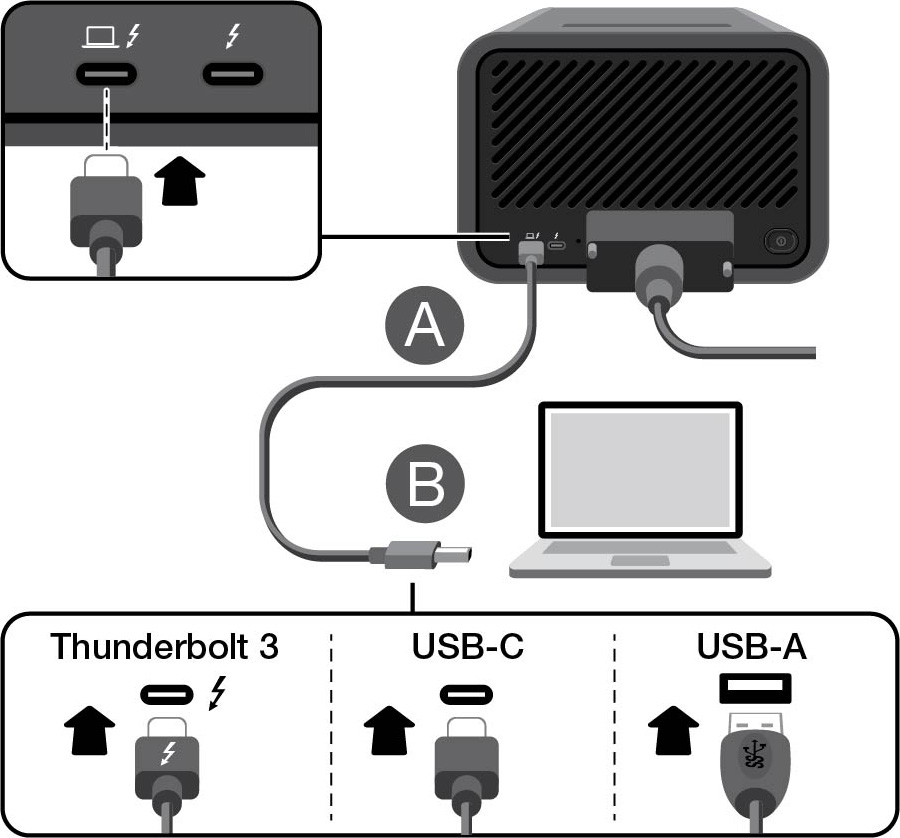
Connect to host computer
Lyve Mobile Array is shipped with three types of cables to connect to host computers. Review the following table for cable and host port options.
| Cables | Host port |
| Thunderbolt 3 | Thunderbolt 3, Thunderbolt 4 |
| USB-C to USB-C | USB 3.1 Gen 1 or higher |
| USB-C to USB-A | USB 3.0 or higher |
Connect Lyve Mobile Array to a computer in the following order:
- Connect the Thunderbolt 3 cable to Lyve Mobile Array's Thunderbolt 3 host port located on the left side of the back panel.
- Connect the other end to an appropriate port on the host computer.
Windows Prompt: Approve Thunderbolt Device
When you first connect Lyve Mobile Array to a Windows PC that supports Thunderbolt 3, you may see a prompt requesting to authenticate the recently connected device. Follow the onscreen prompts to approve the Thunderbolt connection to Lyve Mobile Array. For more details on Thunderbolt connectivity to your Windows PC, see the following knowledge base article.Unlock the device
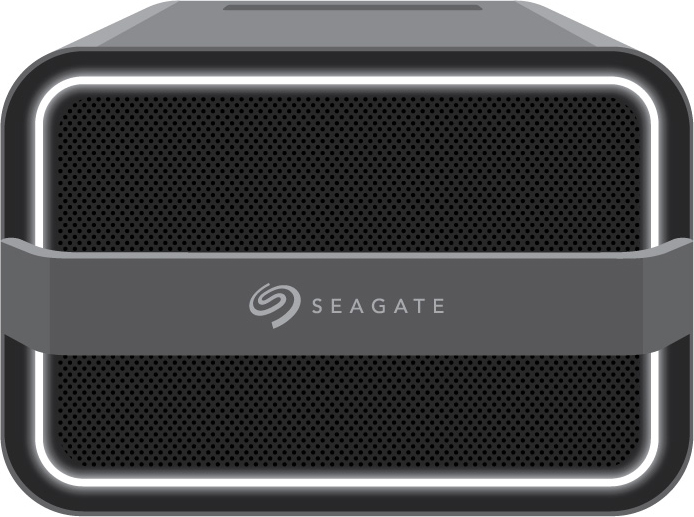
The LED on the device blinks white during the boot process and turns solid orange. The solid orange LED color indicates the device is ready to be unlocked.
Make sure the Lyve Client app is running on the host computer. The host computer will automatically unlock the device if it connected to it in the past and is still authorized for security. If the host computer has never unlocked the device, you will need to enter your Lyve Management Portal username and password in the Lyve Client app. See Setup Requirements.
Once Lyve Client has validated permissions for the device connected to the computer, the LED on the device turns solid green. The device is unlocked and ready for use.
Power button
Power on—A direct connection to a computer is not required to power on Lyve Mobile Array. It automatically powers on when connected to a power outlet.
Power off—Before powering off Lyve Mobile Array, make certain to safely eject its volumes from the host computer. Apply a long press (3 seconds) to the power button to turn off Lyve Mobile Array.
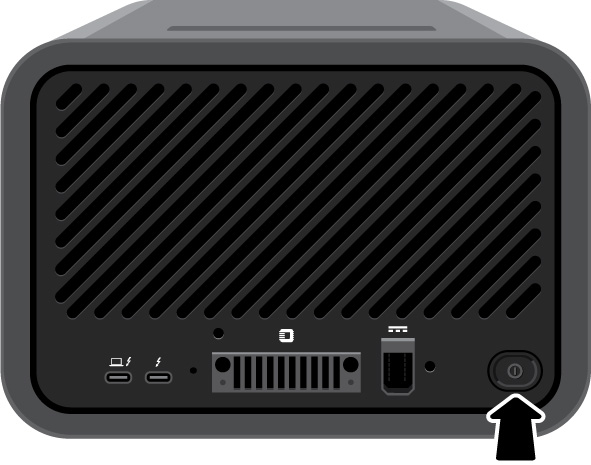
If Lyve Mobile Array is off but still connected to power, you can turn Lyve Mobile Array back on by applying a short press (1 second) to the power button.
Cycle power when switching connection types
Switching from one DAS connection type (Thunderbolt, USB, or PCIe Adapter) to another can result in missing volumes. Windows users can also experience a blue screen error.
To avoid these issues, use the following procedure when changing connection types:
- Safely eject the volume.
- Power off Lyve Mobile Array.
- Change the connection as needed.
- Power on Lyve Mobile Array.