To do this, follow the below instructions:
Step 1: Creating a Storage Pool
Create a Storage Pool from SATA, USM, or USB Drives:
- Make sure all physical disks needed for the pool are installed.
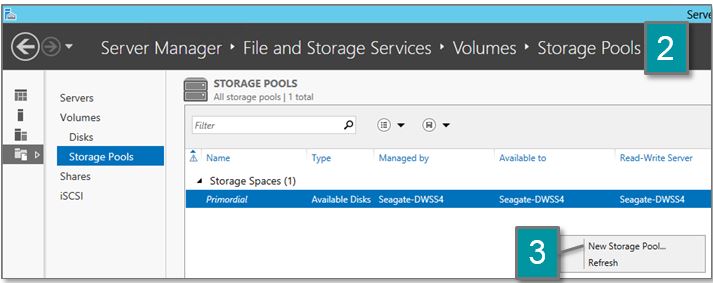
- Go to Server Manager > File and Storage Services > Volumes > Storage Pools.
- Right-click in the window and select “New Storage Pool”.
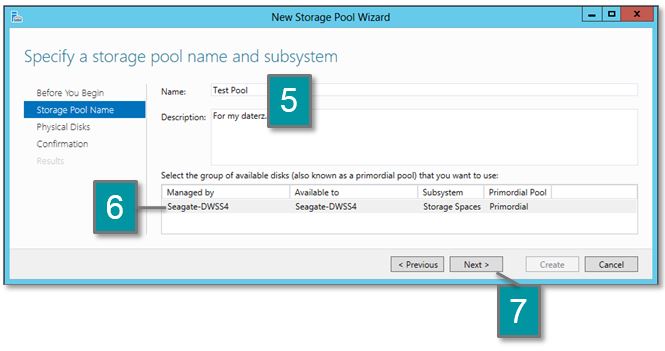
- Click “Next”.
- Type a name and description.
- Choose the NAS.
-
Click “Next”.
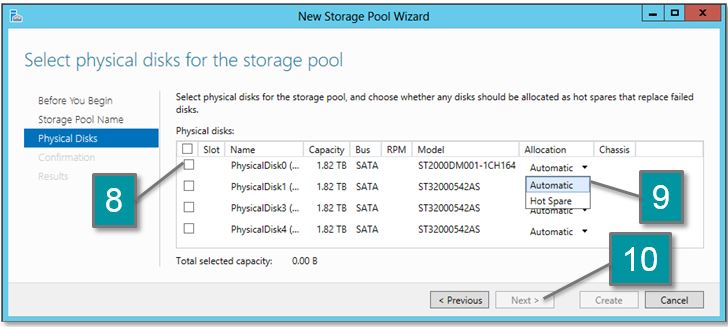
- Check the disks you want for the Pool.
- Choose whether you want the drive to be automatically configured or designate it as a Hot Spare (to immediately replace a failed drive).
-
Click “Next”.
-
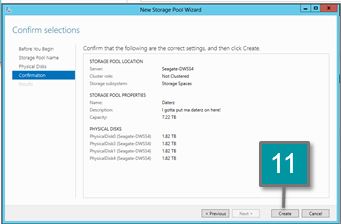
Select "Create".
-
Your new Storage Pool should show in Server Manager.

Step 2: Create a Storage Space
Create a Storage Space (Virtual Drive) Using the Storage Pool:
-
Right-click on the Storage Pool you would like to use for the Virtual Disk and select New Virtual Disk.

- Click “Next”.
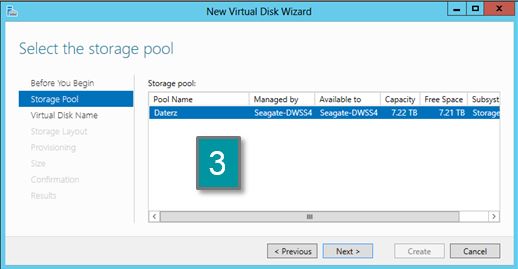
- Select the Storage Pool and click “Next”.
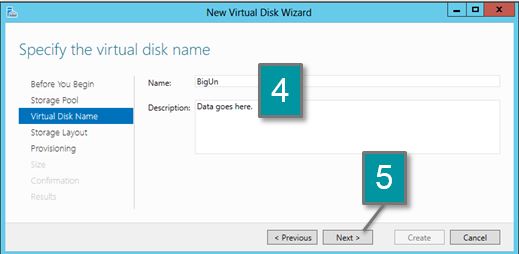
- Type in a Name for the Volume and a Description.
-
Click “Next”.
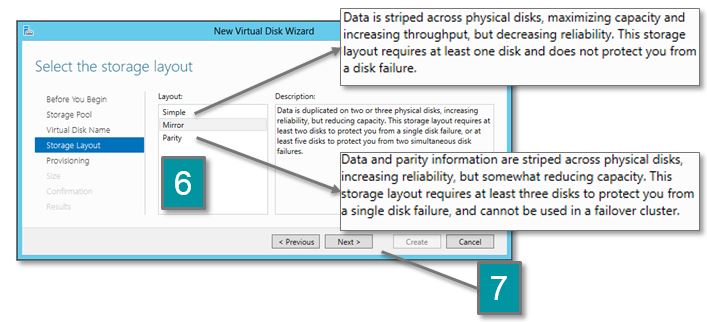
- Choose the Layout (Simple [Striped], Mirror, Parity [Similar to RAID-5]).
-
Click “Next”.
-
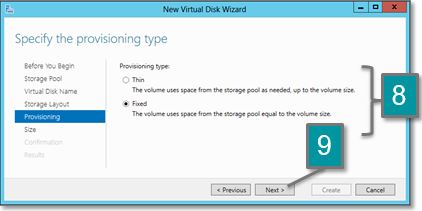
Choose Thin or Fixed provisioning.
- Thin: Uses space, as needed, from the storage pool. Drives can be added to the storage pool and that space would be available for the thinly provisioned virtual disk.
- Fixed: Choose a set amount of space from the pool for the volume. Data usage can’t go over that.
- Click “Next”.
- Choose the Size of the virtual disk.
- Note that for thin-provisioned drives, you can set the capacity to larger than you have in the pool at the moment.
- Click “Next”.
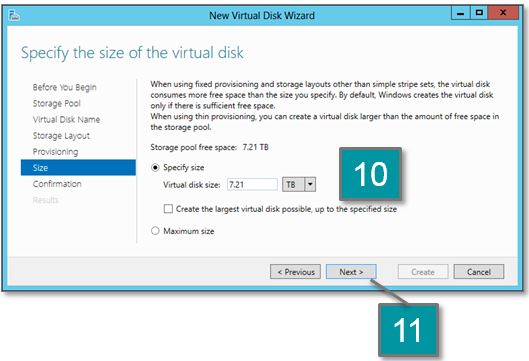
- Then select Create on the next screen.
Step 3: Create a Volume on the Virtual Drive
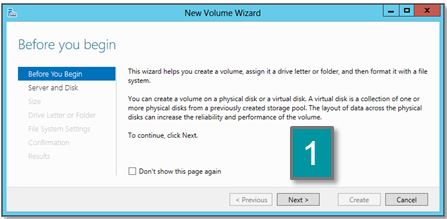
The New Volume Wizard Appears After Virtual Disk Creation:
- Click “Next”.
-
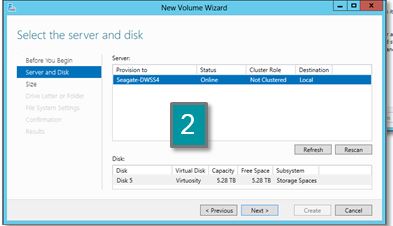
Select the Server and the virtual disk, which will be using this partition, and click "Next".
-
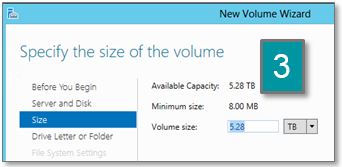
Choose the Size (capacity) and click "Next".
-
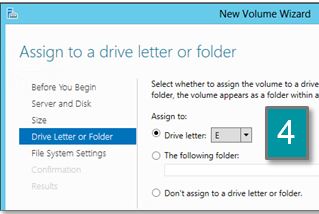
Choose the Drive letter or folder and click "Next".
-
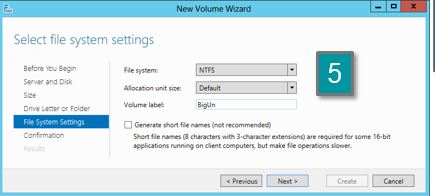
Choose the File system settings, and click "Next".
- Select Create on the confirmation screen.


