Was this content helpful?
How could we make this article more helpful?
Installation
Install FireCuda 520 SSD
- Before installing FireCuda 520 SSD, power down your computer and unplug any cables attached to it.
- Open the case or cabinet.
- If an existing SSD drive is installed in the M.2 PCIe slot you intend to use for FireCuda 520 SSD, you'll need to remove it.
- Power on your computer.
- Access the BIOS setup while the computer is booting. Ensure that a PCIe device is set in the BIOS boot sequence or boot priority list.
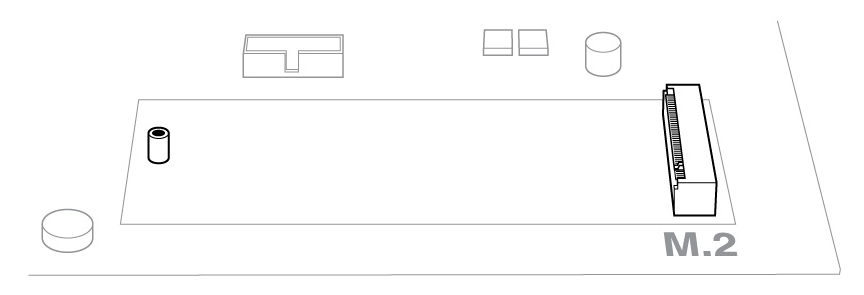
- Power down the computer and locate the M.2 PCIe slot on your motherboard.
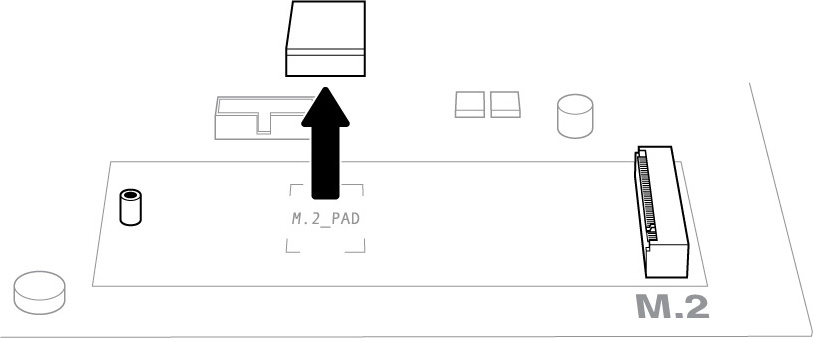
Note—Some motherboards have a pad installed in the M.2_PAD space by default. This pad can be removed to ensure a better fit for FireCuda SSD.
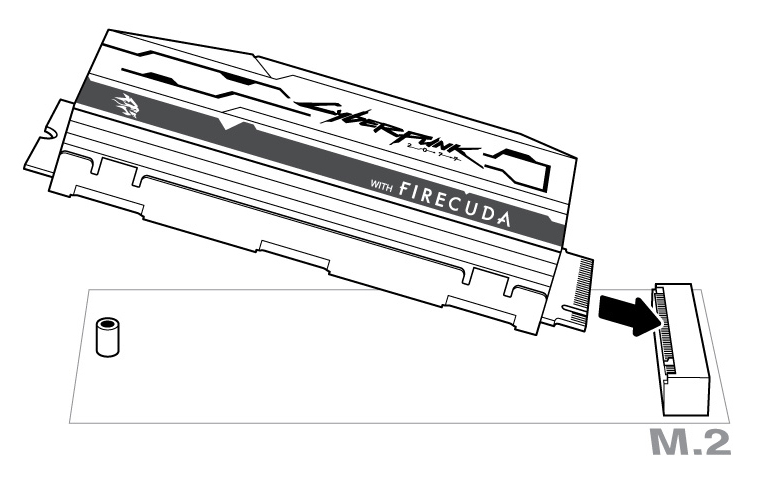
- Check to make sure that the notch on FireCuda SSD is correctly aligned with the divider in the slot. Gently push FireCuda SSD into the slot until it's firmly seated.
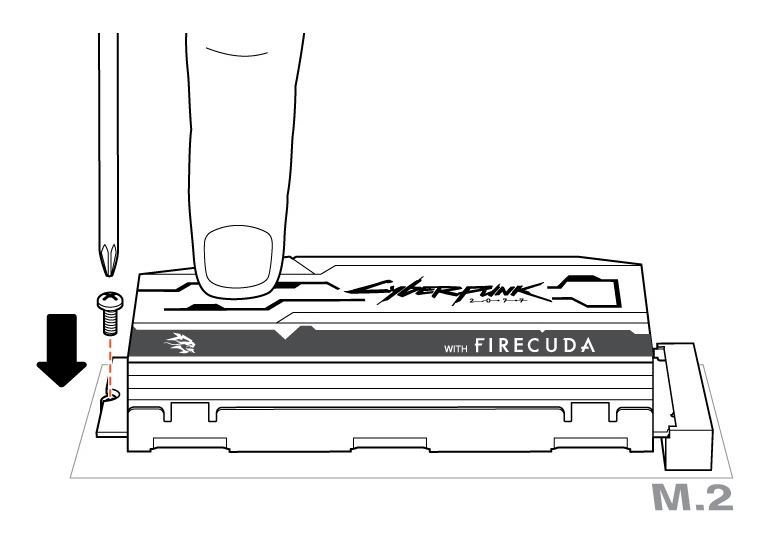
- Hold down FireCuda SSD while you fasten the mounting screw. Make sure the SSD is secured in place.
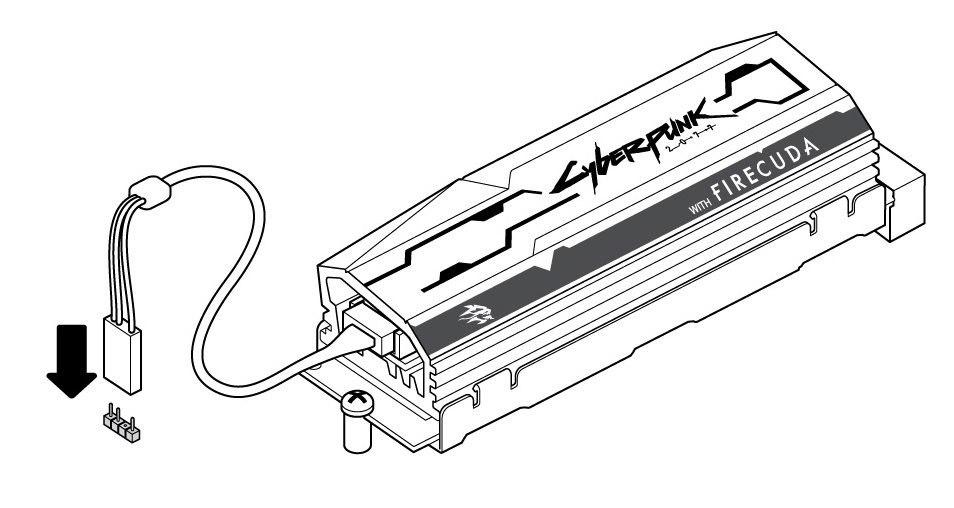
Optional RGB LED connection
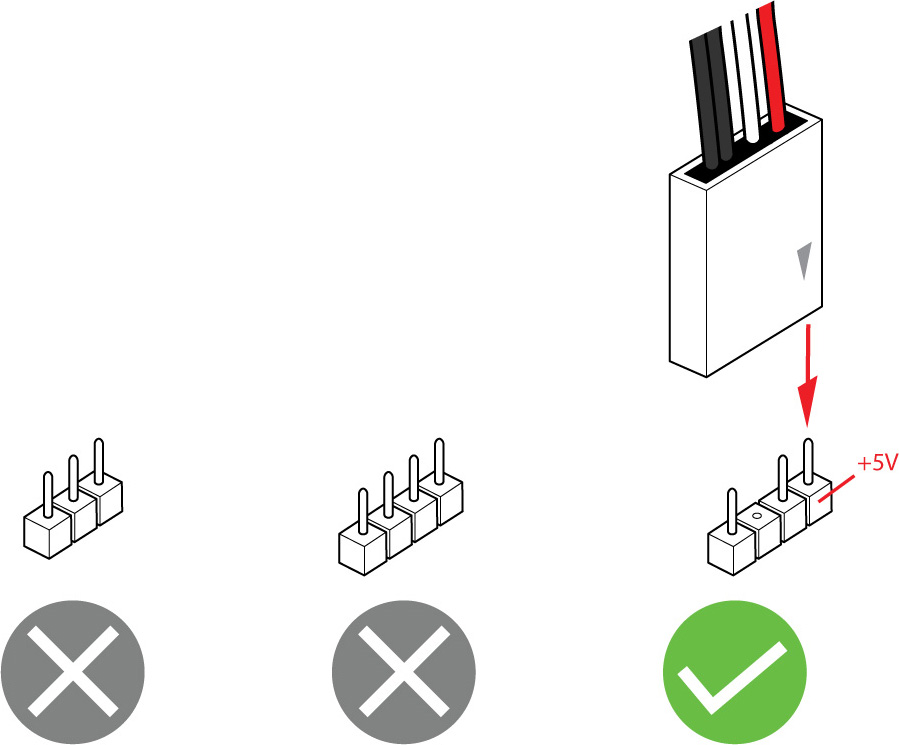
- Attach the 5V addressable RGB cable to the connector under the heatsink.

- Connect the other end of the cable to the 5V addressable header on the motherboard. The power pin (marked with a triangle and identified by the red cable) must be connected to the 5V pin 1. Refer to your motherboard documentation for detailed instructions on how to connect RGB capable components to your motherboard. Incorrect connection can damage the RGB connector on the heatsink as well as the computer's LED function.
- Close the case or cabinet and reassemble your computer.
- Power on your computer.
- Install the computer operating system on FireCuda SSD if you want to use it as the primary drive.
RGB Color and Pattern Control
Refer to the manufacturer of your motherboard for details on the software used to control RGB colors and patterns