Was this content helpful?
How could we make this article more helpful?
Windows Server Setup
Requirements
The Lyve Client app is required to authorize a host computer to access Lyve Mobile Array and compatible devices. Download the Lyve Client installer for Windows and macOS at www.seagate.com/support/lyve-client and install it on the server. For more information, see the Lyve Client Software user manual.
SAS initial setup on the host side
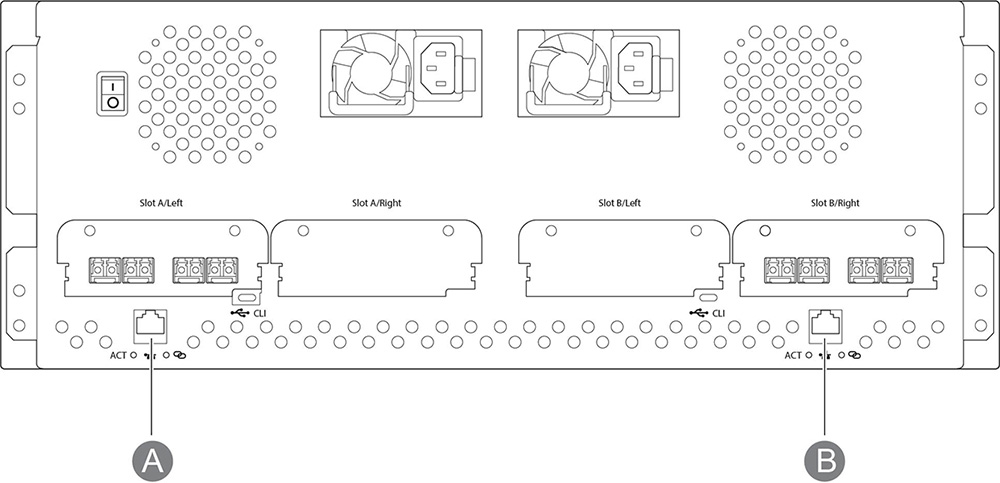
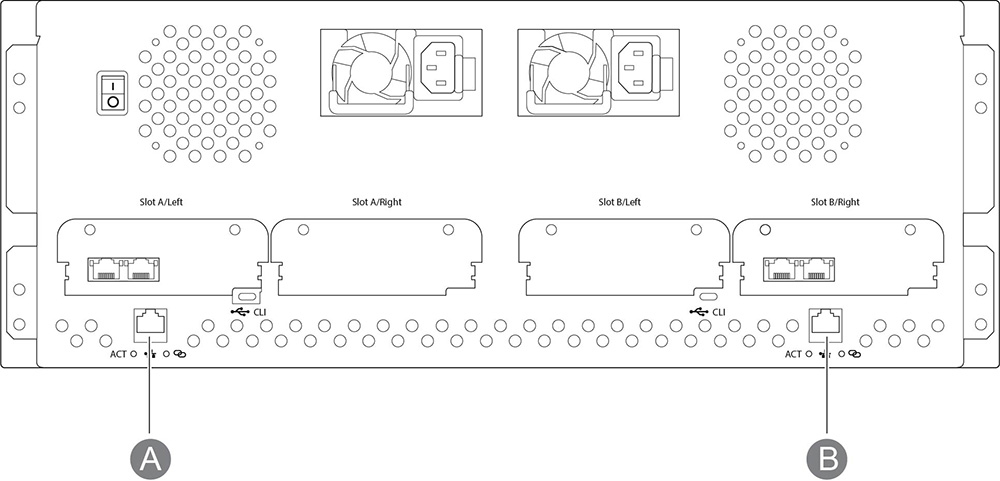
- Connect an Ethernet cable to Ethernet management port A or B on Lyve Mobile Rackmount Receiver.
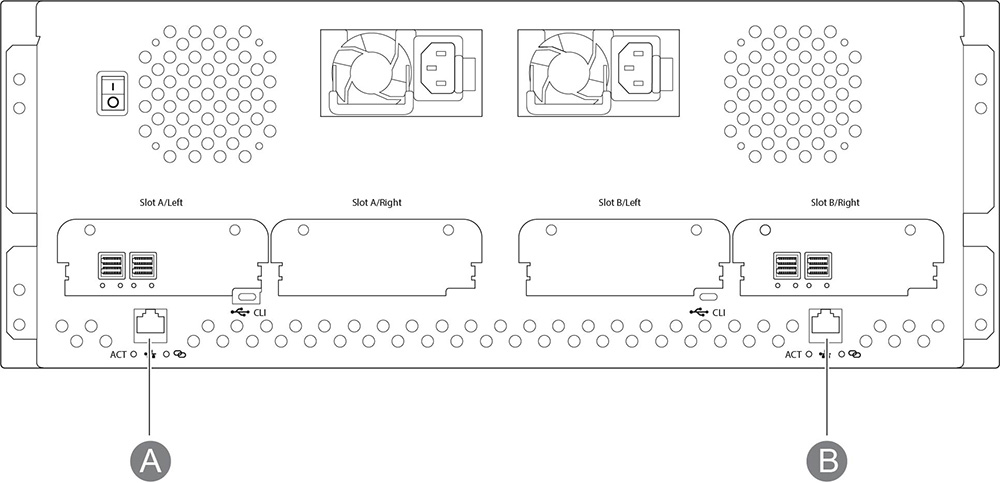
- Connect SAS cables to the server. Connect the other ends to SAS ports connected to slot A or B on Lyve Mobile Rackmount Receiver.
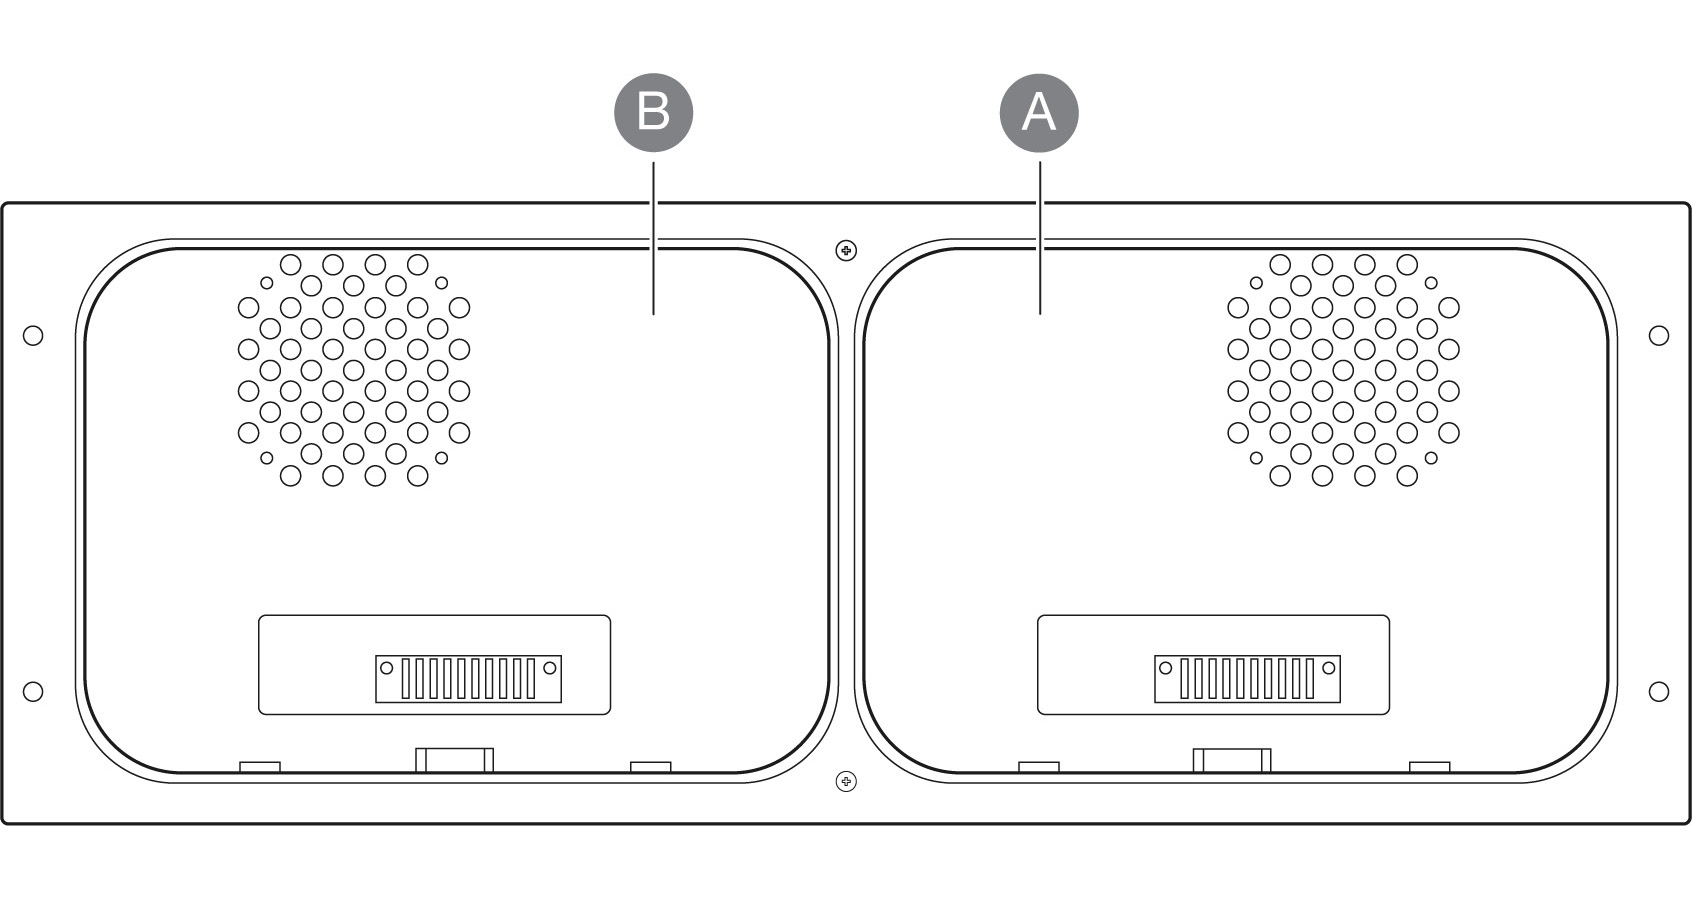
- Insert Lyve Mobile Array into slot A or B on Lyve Mobile Rackmount Receiver. Be sure to select the correct slot for the SAS connections behind Rackmount Receiver.
- Open Lyve Client. You may be prompted to unlock Lyve Mobile Array if this is the first connection to the host.
- Click the Devices tab.
- Click on the Mobile Array card with the Rackmount Receiver » SAS connection.
Lyve Client automatically completes your SAS connection configuration.
Manual SAS Setup
Typically, Lyve Client will configure SAS connections for Mobile Array devices in Mobile Rackmount Receivers. If an SAS connection must be manually configured, refer to the following instructions.
- Open Server Manager.
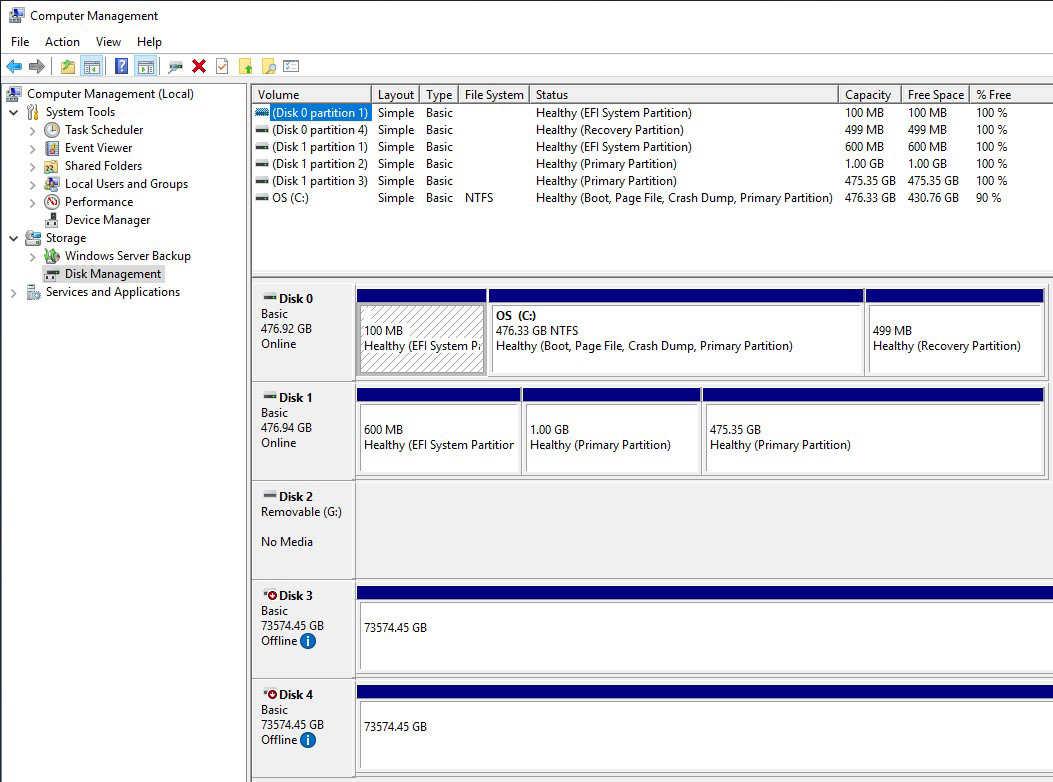
- Open Computer Management.
- Select Disk Management.
- If more than one Offline drive exists, continue steps 5-9. If there's only a single Offline drive, go to step 10.
- Open the Server Manager and install Multipath I/O (MPIO).
- Open MPIO.
- Click on the Discover Multi-Paths tab.
- Check Add support for SAS devices and click Add.

- Reboot the server.
- Open Disk Management.
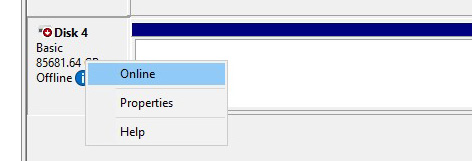
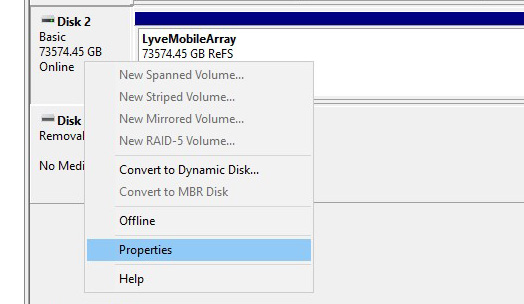
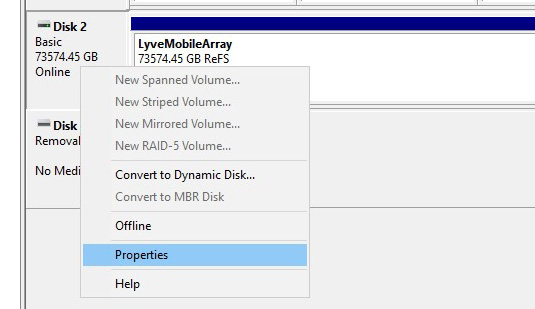
- Right-click the Lyve Mobile Array disk marked Offline and select Online.
- If MPIO is enabled, right-click the Lyve Mobile Array disk and select Properties. If it is not enabled, go to step 15.
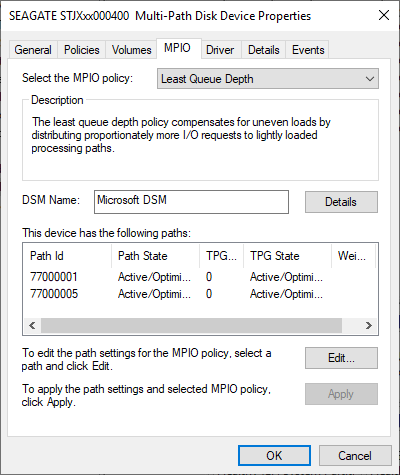
- Click on the MPIO tab.
- Select your preferred MPIO policy.
- Right-click on the Lyve Mobile Array volume and select Change Drive Letters and Paths....
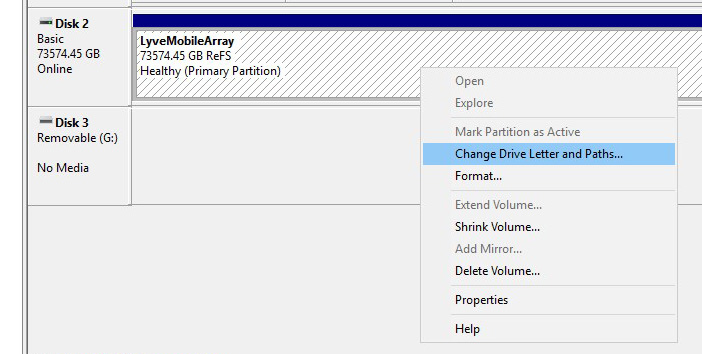
- Click Add and select your preferred letter.
FC initial setup on the host side
- Connect an Ethernet cable to Ethernet management port A or B on Lyve Mobile Rackmount Receiver.
- Connect FC cables to the server. Connect the other ends to FC ports connected to slot A or B on Lyve Mobile Rackmount Receiver.
- Insert Lyve Mobile Array into slot A or B on Lyve Mobile Rackmount Receiver. Be sure to select the correct slot for the FC connections behind Rackmount Receiver.
- Open Lyve Client. You may be prompted to unlock Lyve Mobile Array if this is the first connection to the host.
- Click the Devices tab.
- Click on the Mobile Array card with the Rackmount Receiver » FC connection.
Lyve Client automatically completes your FC connection configuration.
Manual FC Setup
Typically, Lyve Client will configure FC connections for Mobile Array devices in Mobile Rackmount Receivers. If an FC connection must be manually configured, refer to the following instructions.
- Open Server Manager.
- Open Computer Management.
- Open Disk Management.
- If more than one Offline drive exists, continue steps 5-9. If there's only a single Offline drive, go to step 10.
- Open the Server Manager and install Multipath I/O (MPIO).
- Open MPIO.
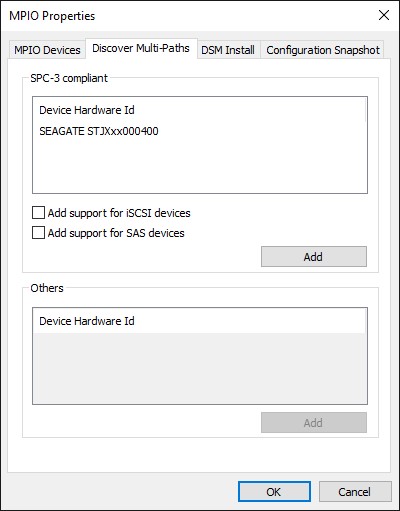
- Click on the Discover Multi-Paths tab.
- Click on the Seagate device to highlight it and click Add.
- Reboot the server.
- Open Disk Management.
- Right-click the Lyve Mobile Array disk marked Offline and select Online.
- If MPIO is enabled, right-click the Lyve Mobile Array disk and select Properties. If it is not enabled, go to step 15.
- Click on the MPIO tab.
- Select your preferred MPIO policy.
- Right-click on the Lyve Mobile Array volume and select Change Drive Letters and Paths....
- Click Add and select your preferred letter.
iSCSI initial setup on the host side
- Connect an Ethernet cable to Ethernet management port A or B on Lyve Mobile Rackmount Receiver.
- Connect Ethernet (copper/fiber) cables to the server. Connect the other ends to iSCSI ports connected to slot A or B on Lyve Mobile Rackmount Receiver.
- Insert Lyve Mobile Array into slot A or B on Lyve Mobile Rackmount Receiver. Be sure to select the correct slot for the iSCSI connections behind Rackmount Receiver.
- Open Lyve Client. You may be prompted to unlock Lyve Mobile Array if this is the first connection to the host.
- Click the Devices tab.
- Click on the Mobile Array card with the Rackmount Receiver » iSCSI connection.
- Enter the IP address for each of the channels in use.
- Click Test IP for each channel in use.
Lyve Client automatically completes your iSCSI connection configuration.
Manual iSCSI Setup
Typically, Lyve Client will configure iSCSI connections for Mobile Array devices in Mobile Rackmount Receivers. If an iSCSI connection must be manually configured, refer to the following instructions.
- Launch the iSCSI Initiator.
- If prompted to start the service, select Yes.
- Click on the Discovery tab.
- Click Discover Portal to add a target portal.
- Enter the IP address or DNS name of one of the Lyve Mobile Rackmount Receiver's iSCSI ports.
- Click Advanced....
- For Local adapter:, select Microsoft iSCSI Initiator.
- For Initiator IP:, select the IP address of the Microsoft Windows Server iSCSI adapter.
- Configure additional connection settings here which you may have already configured on your Lyve Mobile Array:
- CRC / Checksum
- Enable CHAP log on
- CHAP log on information
- Click OK to close dialogs.
- Click on the Targets tab.
- Select the Discovered target.
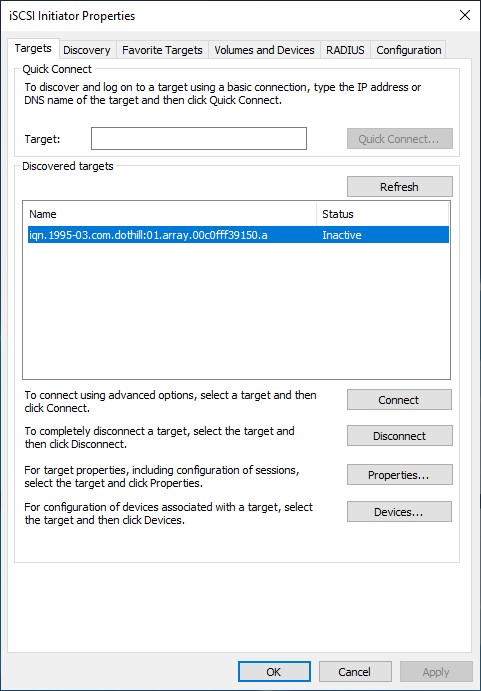
- Click Properties.
- Click Add session.
- If multiple adapters are plugged into the same network or multiple routes exist to the target, check Enable multi-path.
- Click Advanced....
- For Local adapter:, select Microsoft iSCSI Initiator.
- For Initiator IP:, select the IP address of the Microsoft Windows Server iSCSI adapter.
- For Target portal IP:, select the IP address of Lyve Mobile Rackmount Receiver's iSCSI port.
- Configure additional connection settings here which you may have already configured on your Lyve Mobile Array:
- CRC / Checksum
- Enable CHAP log on
- CHAP log on information
- Click OK to close dialogs.
- Click MCS... if you want to set Multiple Connected Session (MPS) policy:

- If you have multi-path configuration (multiple connections to the same network), click Add session... and check Enable multi-path. If you don'thave a multi-path configuration, proceed to the next step.
- Click Advanced....
- For Local adapter:, select Microsoft iSCSI Initiator.
- For Initiator IP:, select the IP address of a different Microsoft Windows Server iSCSI adapter (if applicable).
- For Target portal IP:, select the IP address of a different Lyve Mobile Rackmount Receiver iSCSI port (if applicable).
- Configure additional connection settings here which you may have already configured on your Lyve Mobile Array:
- CRC / Checksum
- Enable CHAP log on
- CHAP log on information
- Click OK to close dialogs.
- Select the Identifier of the newest session and click MCS... if you want to set the MCS policy.
- Click OK to close dialogs.
- Open Server Manager.
- Open Computer Management.
- Select Disk Management.
- If more than one Offline drive exists, continue with steps 36-41. If there's only a single Offline drive, go to step 42.
- Open Server Manager and install Multipath I/O (MPIO).
- Open MPIO.
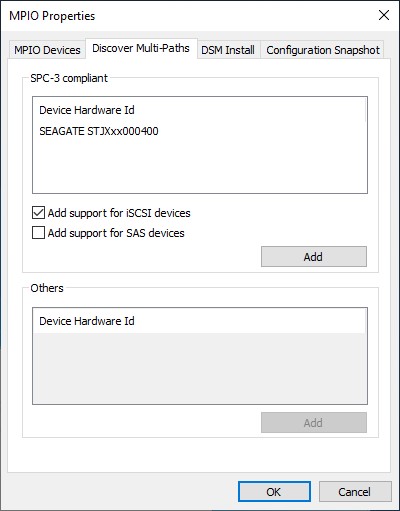
- Click on the Discover Multi-Paths tab.
- Check Add support for iSCSI devices and click Add.
- Click OK to close dialogs.
- Reboot the server.
- Open Disk Management.
- Right-click the Lyve Mobile Array disk marked Offline and select Online.

- If MPIO is enabled, right-click the Lyve Mobile Array disk and select Properties. If it is not enabled, go to step 47.
- Click on the MPIO tab.
- Select your preferred MPIO policy.

- Right-click on the Lyve Mobile Array volume and select Change Drive Letters and Paths....
- Click Add and select your preferred letter.