Was this content helpful?
How could we make this article more helpful?
Recording
Schedule
Configure recording mode
- Click Schedule
- Click the Recording mode tab.
- Set the recording mode.
- To remove the oldest video files when storage space is low, select Automatic recycle.
It is highly recommended to enable automatic recycling when storage space is less than 10%.
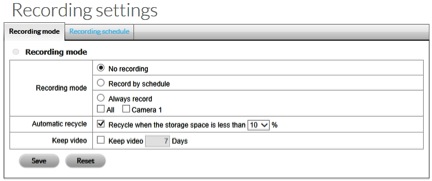
Important info: When both Automatic recycle and Keep video are enabled, Automatic recycle has priority.
Schedule recordings
- Click Schedule.
- Click the Recording schedule tab.
- Select the frequency.
- Day–Record daily at the same time.
- Week–Record daily at different times.
- Select a camera.
- Click Configure.
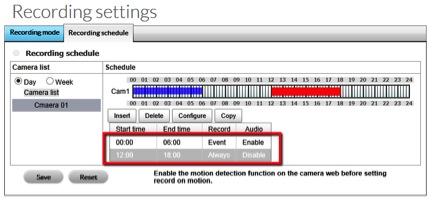
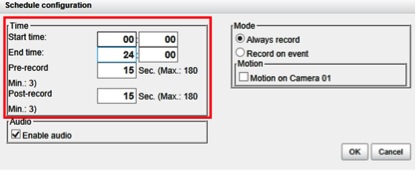
- Configure the start and ends times and the recording mode.
Note: If you select Record on event, the motion that triggers the event must already be configured.
- Click Save.
Important info: When changing a camera’s motion detection settings, make sure to disconnect it first. Reconnect it once the settings have been adjusted.
Important info: When setting an event, Motion or Digital inputs can be triggered from other cameras. For example, a camera can be set to begin recording when motion or a digital input occurs on other cameras or I/O Boxes.
Important info: You can drag the time bar to set a camera’s schedule.
Events
Set up an event
- Click Events.
- Click Event & Action.
- Select the camera.
- Select an event on the left. The event list shows events that the camera supports.
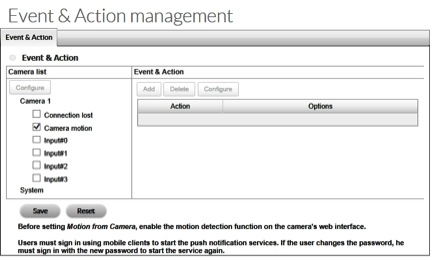
Important info: Before choosing Camera motion, make certain to configure the camera’s motion detection settings. - Click Configure.
- In the Event configuration window, configure the event.
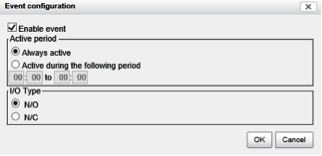
- Click OK.
- Click Add to select an action for the event.

- To modify an action, click it and then click Configure.
- Click Save to confirm the settings.
Important info: After selecting camera events, the event information displays when it is triggered.
Set up I/O box input actions
- Click Events.
- Click Event & Action.
- Select an I/O Box input from the list.
- Click Add to select an action.
- To modify the action, click it and then click Configure.

- Click Save.
Set up system events and actions
- Click Events.
- Click Event & Action.
- Click System to view the list of system events.
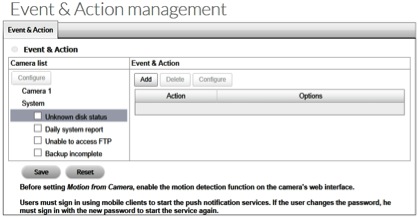
- Click Add to set up the actions for the event. Follow the steps in Set up Event & Action.
- Click Save.
Notifications
Add event contacts
- Click Notifications.
- Click the Contacts tab.
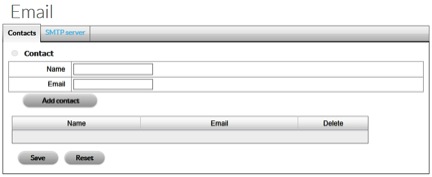
- Enter the contact information.
- Click Add contact.
- Click Save.
Edit the SMTP server
- Click Notifications.
- Click the SMTP server tab.
- Make your changes.
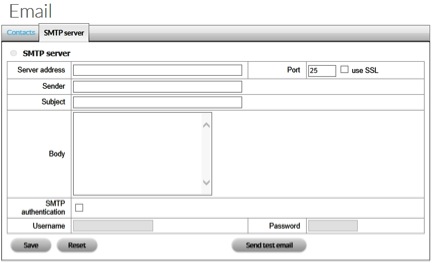
- Click Send test mail and confirm that the email arrived.
- Click Save.