Was this content helpful?
How could we make this article more helpful?
Accessing Devices with Lyve Token Security
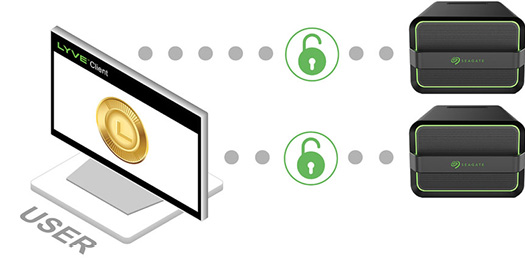
The Lyve Token Security option lets you configure a registered computer installed with Lyve Client to automatically unlock assigned Lyve Mobile devices. Once configured, Lyve Client will unlock devices, even when there’s no access to Lyve Management Portal.
Requirements
- Product admin has set up projects and added devices to projects.
- Devices have been delivered to the product end user.
- End user has downloaded and installed Lyve Client on the computer they will use to unlock Lyve Mobile devices.
"
Important—Lyve Token Security must be enabled in the Lyve Client settings. See Settings.
Process
Product end user opens Lyve Client on a host computer and creates a registration file. End user sends the registration file to a product admin.
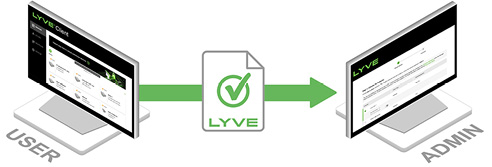
Admin uploads the registration file to the Lyve Management Portal and registers the Lyve Client installation as an unlocker.

Admin assigns devices to the unlocker and downloads an encrypted Lyve Token file authorizing the unlocker to access Lyve Mobile devices.
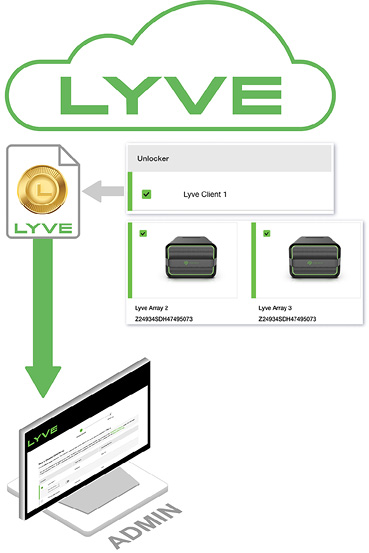
Admin sends the token file to the user.
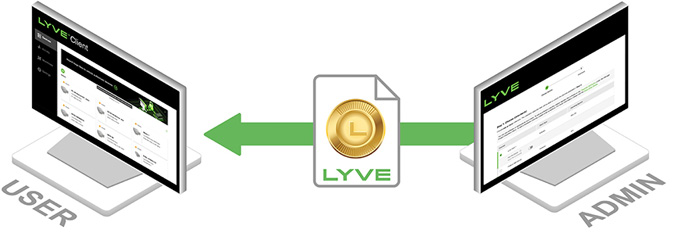
User imports the token file into Lyve Client. Lyve Client is now authorized to unlock assigned Lyve Mobile devices with no connection to Lyve Management Portal.
End user initial tasks
Create a registration file
You will need a registration file for each host computer/Lyve Client installation used to access Lyve Mobile devices.
- Open Lyve Client.
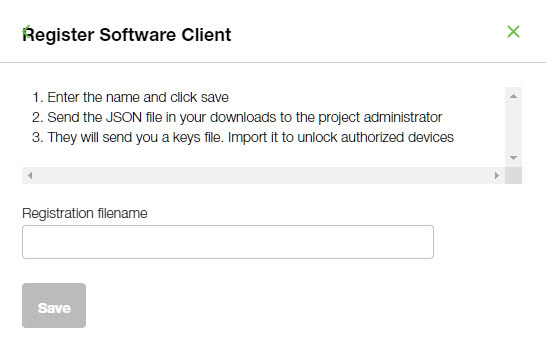
If you’re opening Lyve Client for the first time, click Get Started on the Welcome screen, and then click Register Lyve Client under Lyve Token Security. - In the dialog, enter a filename and click Save.
- Confirm the location for the download and click Save. A JSON (.json) file is downloaded to the location you specified.
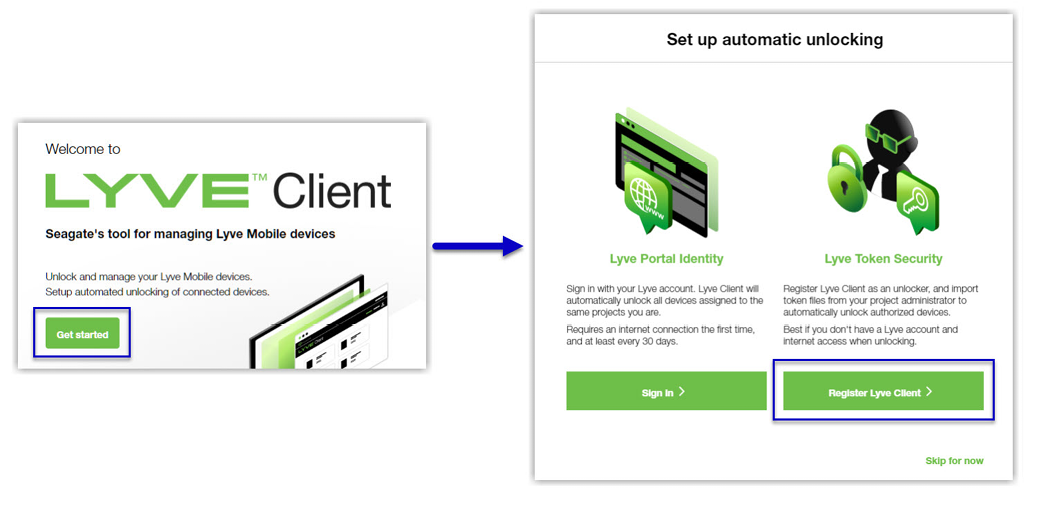
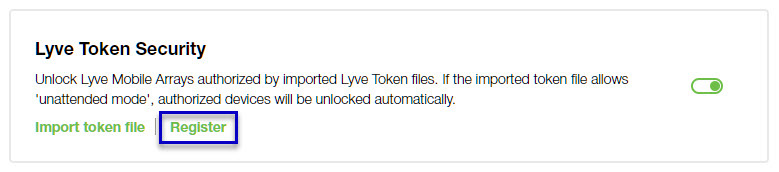
If Lyve Client was opened previously, click on the Devices tab, and then click the banner:

.
Send the registration file to your product admin
Using a file browser such as File Explorer or Finder, locate the downloaded registration file. Share it with your product admin using your preferred means of business communication (such as email, chat, or sending on a USB drive).
Admin tasks
Register the Lyve Client installation as an unlocker
- Go to lyve.seagate.com and sign in.
- Click Projects in the navigation bar.
- Click on a project.
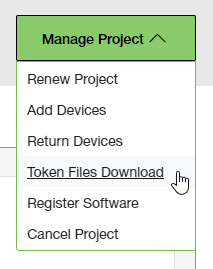
- On the Project Details page, click on the Manage Project dropdown and select Register Software.
- In the Register Software Client dialog, click Attach File.
- Navigate to the location where you are storing the registration file you received from a product end user. Select the file and click Attach File.
- Enter a name for the Lyve Client installation. Choose any friendly name that helps you differentiate one product end user/Lyve Client installation from another.
- Click Register.
- When the registration is completed, click Close.
You must upload a registration file and enter a name before you can click Register.

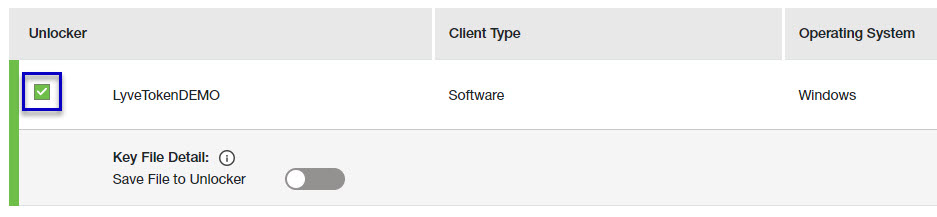
Choose unlockers and assign devices
- In the confirmation dialog, click the Token Files Download link.
- Click checkboxes to select one or more unlockers. Selected unlockers will be permitted to unlock the devices you specify.
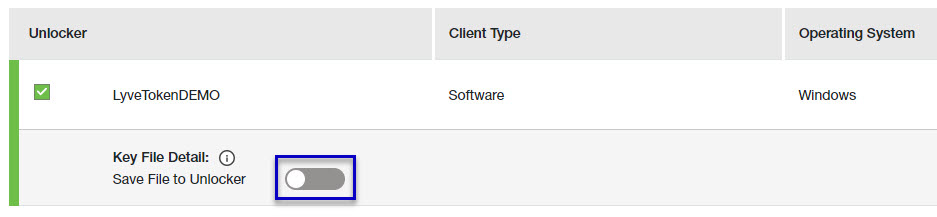
- For each unlocker, use the Save File to Unlocker toggle to specify whether or not the product end user can store the unlocker in the Lyve Client app.
- Enabled—Lyve Token file can be imported and stored in Lyve Client, allowing the host computer to unlock assigned devices whenever they’re connected.
- Disabled— Lyve Token file may only be used to unlock assigned drives for the current session. The file is not deleted from its location on the host computer, but it must be reselected each time the end user wants to use it.
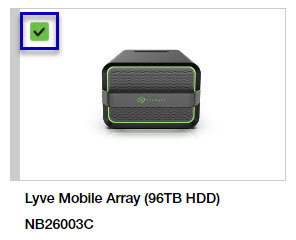
- Click checkboxes to select one or more devices. Selected devices can be unlocked by any of the unlockers selected in step 1.
- Click Continue.
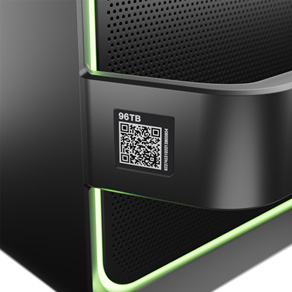
Do not confuse the QR code on the handle with the QR code on the back of Lyve Mobile Array, which is clearly marked PSID. The PSID is not the same as the serial number.
If the serial number on the handle is unreadable or doesn't work, use the Lyve Virtual Assistant icon to start a support session.
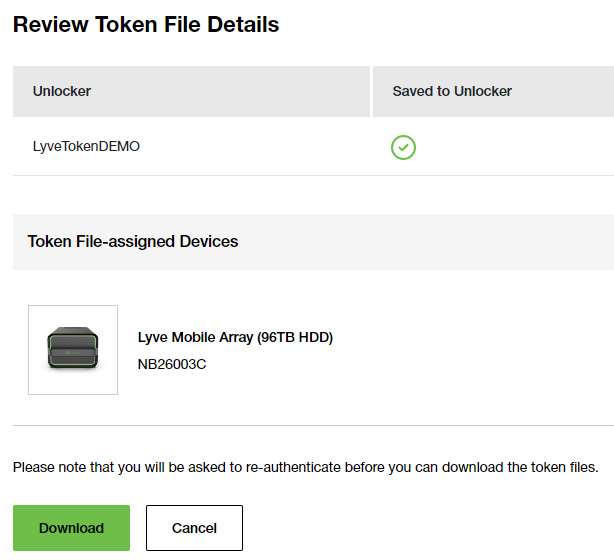
Download Lyve Token files
- Review the details of the Lyve Token file you created.
- Click Download.
- At the prompt, enter your Lyve Management Portal password and click on the icon to continue.
- A dialog informs you that the Lyve Token file has been downloaded. Click Close.
- Using a file browser such as File Explorer or Finder, locate the file in the folder where you receive downloads.
Send the Lyve Token file to the product end user
Share the Lyve Token file you downloaded with the appropriate product end user using your preferred means of business communication (such as email, chat, or sending on a USB drive).
End user final tasks
Download the Lyve Token file
Download the Lyve Token file you received from your product admin to the appropriate host computer that will be accessing Lyve Mobile devices.
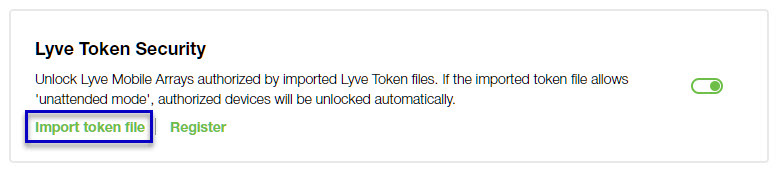
Import Lyve Token file and/or unlock devices
- On the host computer, open the Lyve Client app.
- Click on the Devices tab and then click the banner.
- Use the folder tree to find the location of the downloaded Lyve Token file (.json). Select the appropriate file and click Inspect File.
- Review the details of the file:
- Click one of the following:

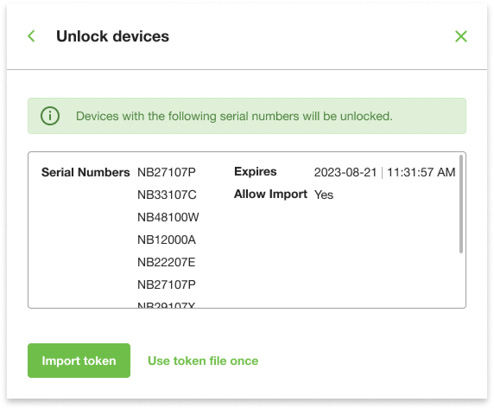
The following information is available:
| Detail | Description |
| Serial Numbers | Specific devices the Lyve Token file is permitted to unlock. |
| Expires | Date/time when the Lyve Token file becomes invalid. |
| Allow Import | Yes—Lyve Token file can be stored in the Lyve Client app. No—Lyve Token file may only be used to temporarily unlock drives. |
Do not confuse the QR code on the handle with the QR code on the back of Lyve Mobile Array, which is clearly marked PSID. The PSID is not the same as the serial number.
If the serial number on the handle is unreadable or doesn’t work, use the Lyve Virtual Assistant icon to start a support session.
| Import Lyve Token file | Imports the Lyve Token file to Lyve Client, allowing for automatic unlock of assigned devices. Once imported, the file is removed from its location and is no longer available for selection. |
| Use Lyve Token file once | Allows Lyve Client to unlock assigned devices for the current session. The file is not deleted from its location. You must reselect it each time you want to use it. |
Viewing Lyve Token files
You can view an image of the most recent Lyve Token file imported into Lyve Client.
- Open Lyve Client.
- Click on the Settings tab.
- Click View token file.
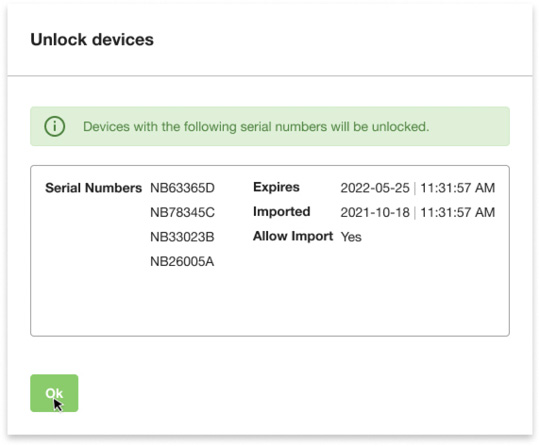
- Review details of the recently imported file:
- Click OK.

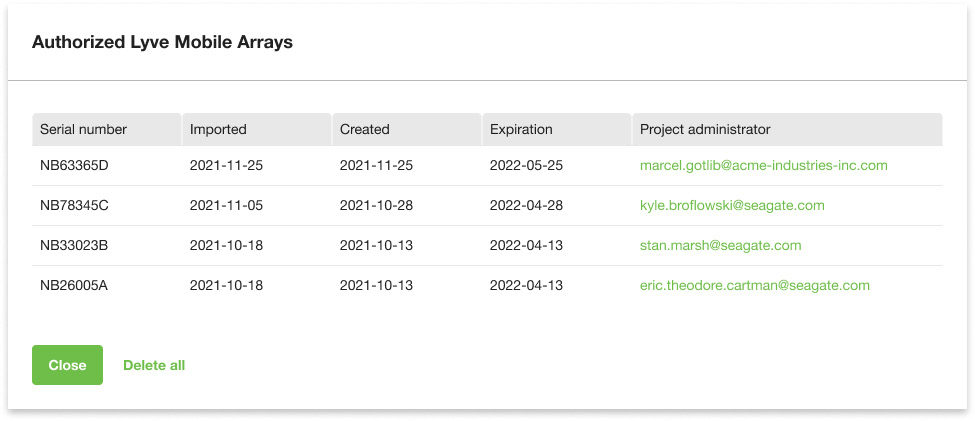
Viewing authorized devices
You can view an image of the most recent Lyve Token file imported into Lyve Client.
- Open Lyve Client.
- Click on the Settings tab.
- Click Authorized Devices.
- Review details of the devices Lyve Client is currently authorized to access:
- Click Close.


Deleting Lyve Token device authorizations
You can delete specific device authorizations from Lyve Client.
- Open Lyve Client.
- Click on the Settings tab.
- Click Authorized Devices.
- Review the list of devices Lyve Client is currently authorized to access:
- Hover over the device and click the Delete icon.
- Confirm that you want to continue with the deletion.
- Delete additional devices, or click Close


File issue notifications
Issues with a Lyve Token file may prompt the following messages:
| Message | Notes |
| Devices with the following serial numbers were found in the token file, but failed to unlock: [serial numbers] | A device or configuration issue is preventing the device from being accessed. Contact Lyve Mobile support using the Lyve Virtual Assistant |
| The file you’ve selected is corrupt or is not a token file at all. It cannot be imported or used to unlock devices. | Lyve Client does not recognize the file as a Lyve Token file. Select a different Lyve Token file or request a new Lyve Token file from your product admin. |
| The selected Lyve Token file cannot be used with this installation of Lyve Client. Select a different token file or register Lyve Client and request a new token file from your project administrator. | This Lyve Client installation is not designated as the unlocker in this Lyve Token file. Select a different Lyve Token file or request a new Lyve Token file from your product admin. |
| The selected Lyve Token file does not authorize Lyve Client to unlock this device. Devices with the following serial numbers will be unlocked. | The Lyve Token file you attempted to import is not authorized to unlock the selected device. Select a different Lyve Token file or request a new Lyve Token file from your product admin that assigns the device to this installation of Lyve Client. |
| This token file has expired. Request a new token file from your project administrator. | The Lyve Token file you attempted to import is not authorized to unlock the selected device. Select a different Lyve Token file or request a new Lyve Token file from your product admin that assigns the device to this installation of Lyve Client. |