Was this content helpful?
How could we make this article more helpful?
Advanced Storage: Direct-Attached Storage and iSCSI
You can use your NAS OS device to share direct-attached storage (DAS) on the network and to create iSCSI volumes. For details and instructions, see:
NAS ports and direct-attached storage
Use the USB and, if applicable, eSATA ports on your NAS OS device to connect external storage and compatible peripherals.
Direct-attached storage (DAS)
Connect
A DAS connected to the NAS OS device via USB is listed at Device Manager > Storage Overview. If you do not see your DAS, confirm that it has been formatted using one of the following file systems:
- FAT32
- NTFS
- HFS+
- EXT2, EXT3, EXT4
- XFS
Unlike volumes created within NAS OS, the name of the DAS cannot be changed on its storage page.
DAS share
By default, a DAS becomes a public share when it is connected to the NAS OS device.
You can change the DAS from a public share to a private share:
- Choose Shares.
- Pass the cursor to the far right of the DAS share's row to make the Edit pull-down menu visible.
- Choose Change to private share.
- Configure access to the share by following the instructions in Shares.
Disconnect
To avoid damaging your DAS's file system, follow the instructions below to properly disconnect the device from the NAS OS device.
- On the Storage section at the lower left, choose the volume you want to eject.
- Choose Eject.
- Disconnect the DAS.
Ingest or back up DAS content
You can copy content on a connected DAS using:
- Filebrowser ingest. Use the Filebrowser to copy data from your USB storage to the NAS. Ingest is a good option when copying select files or images. For example, ingest images from a camera. See Filebrowser.
- Backup Manager backup. Use Backup Manager to back up all or select files stored on your USB storage. Backup Manager is a good option for large and recurring backups. See Backup Manager.
Multimedia indexing
You can take an inventory of available multimedia files on your NAS and all connected DAS. See Media Server for details.
USB printer
Your NAS OS device features a printer server service. See Services for details.
iSCSI
iSCSI (Internet Small Computer System Interface) provides local storage performance for network shares similar to that of a traditional direct attached storage device (DAS). A DAS can be an external hard drive such as a disk that connects via USB. NAS OS can reserve all or part of a volume as an iSCSI volume for a computer to use via the network. The computer that connects to the iSCSI volume is called the initiator. The iSCSI volume is called the target. When the initiator connects to the target, the computer reads and writes to the iSCSI volume the same way it would access a DAS.
iSCSI works on top of the Transport Control Protocol (TCP) and allows SCSI commands to be sent along a local area networks (LAN), wide area network (WAN) or the Internet. It transports block-level data between an iSCSI initiator (client computer) and an iSCSI target (storage device). The iSCSI protocol is made of SCSI commands and, to send them on a network, assembles the data in packets.
Since it accesses data at the block level, iSCSI can offer enhanced performance for your NAS. Further, iSCSI writes data directly to the volume rather than at the file level placing a lower demand upon the NAS OS device. Managing IP and networking protocols such as AFP and SMB places a burden upon the processor.
Review the list below to determine the capacity you can assign to iSCSI volumes:
- Seagate NAS: up to 8TB
- Seagate NAS Pro and rackmounts: up 16TB
Target volumes can be simple iSCSI volumes called SimplyiSCSI. Use SimplyiSCSI when creating an iSCSI target that does not require multiple LUNs, or logical unit numbers. A LUN is an allotment of virtual storage that can be created from the NAS OS device’s pool of available space. It is highly recommended to create iSCSI targets on protected volumes, such as SimplyRAID or RAID 5.
NAS OS supports advanced iSCSI configurations that allow you to assign several LUNs to a single target. The iSCSI wizard guides you through the configuration to help create iSCSI volumes suitable for your working environment.
Additionally, you can boost iSCSI performance by creating the target on a RAID 5 volume and configuring the LAN ports as bonding. See Network for further information.
Once an iSCSI initiator has connected to an iSCSI target, the target volume must be formatted as would happen with standard DAS. An iSCSI volume cannot be accessed through the NAS OS Filebrowser.
Setting up an iSCSI target
A volume must be available before using the iSCSI wizard. For instructions on how to create a volume, see Storage.
- Go to Device Manager and click iSCSI on the lower left.
- Click Manage to launch the iSCSI wizard.
- Follow the iSCSI wizard to create one of the following:
- SimplyiSCSI (simple iSCSI volume)
- LUN (the virtual volume)
- Target (what the Initiator connects to)
Review the descriptions below for further information regarding the iSCSI options.
SimplyiSCSI
Create one LUN associated with one target and limited options.
- Select SimplyiSCSI and click Next. Choose:
- A name for the iSCSI volume.
- Capacity. Use the slider or fill it in manually (GB).
- Select Thin provisioning to allocate more space than the volume’s current storage capacity. Use thin provisioning if you expect to add more storage to your device in the future. The new hard drive capacity can be integrated into the iSCSI volume once it is added to the enclosure.
- To password protect your iSCSI volume, you can configure CHAP (Challenge Handshake Authentication Protocol). CHAP restricts iSCSI access to initiators that supply the correct account name and password for the target.
- Select and configure Mutual CHAP to implement two-way authentication for both the initiator and target.
- Complete the wizard to create the SimplyiSCSI volume.
The time to create the iSCSI volume depends upon its capacity.
Create LUN
Create a new LUN that can be mapped to a target.
- Choose Create LUN.
- Choose how you want to create the LUN:
- New LUN creates a new LUN.
- Import LUN imports a LUN file from a share on the NAS OS device. The LUN must have been previously exported on the same NAS OS device.
- Clone LUN clones an existing LUN on the NAS OS device.
Review the details for each type of LUN below.
New LUN
- Choose New LUN and click Next.
- You can choose:
- A name for the LUN.
- Capacity. Use the slider to configure its capacity or fill it in manually (in GB).
- Select Thin provisioning to allocate more space than the volume’s current storage capacity. Use thin provisioning if you expect to add more storage to your device in the future. The new hard drive capacity can be integrated into the iSCSI volume once it is added to the enclosure.
- Click Next
- Choose the target you want to associate with the LUN., You can also leave the LUN empty by not associating it with a target. However, the LUN cannot be used until it is associated with a target. Click Next.
- Review the summary and click Finish.
Import LUN
Exporting a LUN
Before importing a LUN, you must export an existing LUN on the NAS OS device. Follow the steps below to export a LUN:
- Go to Device Manager and choose iSCSI. A table lists available iSCSI targets.
- Click the LUNs tab.
- Hover to the right of an existing LUN and click Edit > Export.
- Browse and choose the share and folder to store the LUN file.
- Choose a name for the .iscsi file and then click Save.
Importing a LUN
A LUN can only be imported if it is stored on one of the NAS OS device’s shares. See the instructions above for exporting an existing LUN to a share.
- Go to Device Manager and then choose iSCSI.
- Click Manage and then select Create LUN. Click Next.
- Select Import LUN and then click Next.
- Browse for the LUN file (.iscsi) and then click Next.
- Choose a target to map the LUN and then click Finish.
Create a Target
- Go to Device Manager and then choose iSCSI.
- Click Manage and then select Create a Target. Click Next.
- Review the options for your target. Only configure options that match your needs.
- Name the iSCSI Target.
- Password protect your iSCSI volume. Select CHAP (Challenge Handshake Authentication Protocol) to restrict iSCSI access to initiators that supply the correct account name and password. Select Mutual CHAP for two-way authentication between the initiator and target.
- Data digest. Increases data integrity. When data digest is enabled, the system performs a checksum over each PDU's data part and verifies using the CRC32C algorithm.
- Header digest. Increases data integrity. When header digest is enabled, the system performs a checksum over each iSCSI Protocol Data Unit’s (PDU’s) header part and verifies using the CRC32C algorithm.
- Multiple Sessions. Select this option only if your iSCSI target will be managed within a SAN cluster environment. The SAN cluster allows multiple iSCSI initiators to access the iSCSI target at once.
- Authorized initiator. Configure which iSCSI initiators are allowed to connect to this target.
- Click Next.
- Choose LUNs to map to this target and click Next.
- Click Finish.
iSCSI initiator: Example
The steps below demonstrate a single connection to an iSCSI target using Windows 7 as the initiator. For the example, a CHAP has been configured on the iSCSI target only. Configurations will vary but you can review the instructions below and make adjustments for your operating system and network.
- Search for and launch iSCSI Initiator or equivalent.

- Enter the network name or IP address of the server that hosts the iSCSI target. In this example, the NAS OS device.
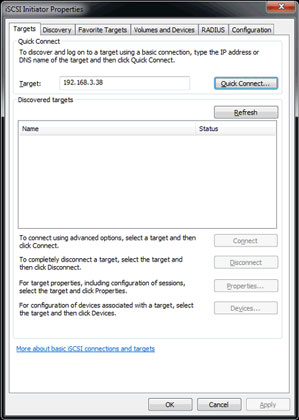
- Choose Quick connect or equivalent.
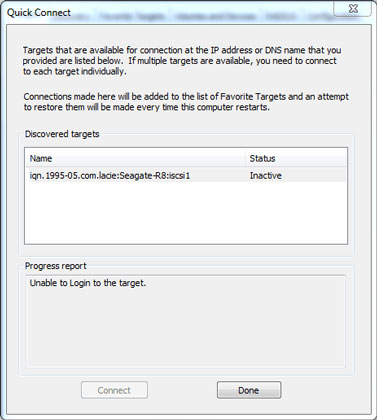
- Without and with CHAP:
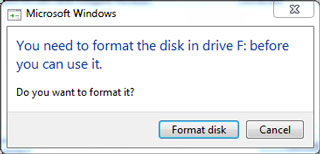
- If the iSCSI target does not include a CHAP, the connection is immediate. If it is the first time that the iSCSI target has connected to an initiator, you are prompted to format the disk.
- If the iSCSI target includes a CHAP, a prompt alerts you that a connection is not possible. Close the prompt.
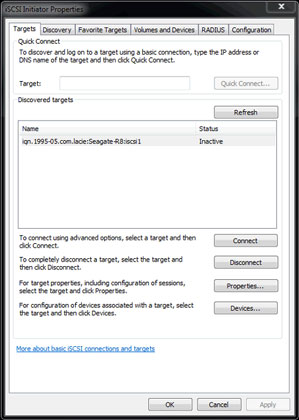
- Select the NAS's iSCSI target in the list of discovered agents and choose Connect.
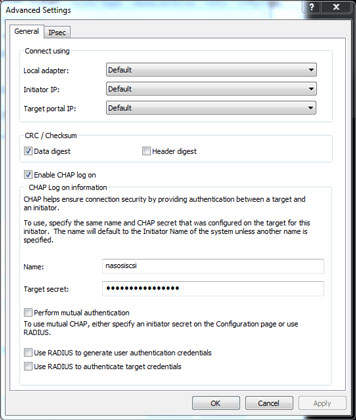
- Choose Advanced.
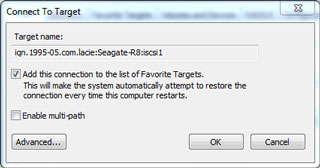
- Select Enable CHAP log on and enter the Name and Target secret (password) for the iSCSI target.
- A window may appear prompting you to add the target to your favorites. Make your selection and exit.
- If it is the first time that the iSCSI target has connected to an initiator, you are prompted to format the disk.
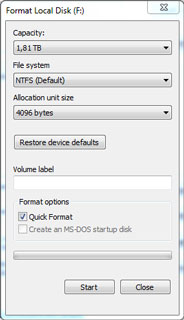
The iSCSI target appears in Computer/My Computer as a local disk.
iSNS: Internet Storage Name Service
The Internet Storage Name Service (iSNS) manages multiple iSCSI targets on a network. Certain versions of Windows Server include the iSNS feature. Using an iSNS can save time for each iSCSI initiator. For example, rather than searching the network for an iSCSI target, the initiator can look for a connection in a single location, the iSNS server. The iSNS server keeps tabs on all the iSCSI targets on the network, thus allowing the initiator to connect to one that is available.
Configure iSNS on your network server then review the instructions below to add your NAS's iSCSI target.
Enable iSNS server and enter its IP address:
- Go to Device Manager and then click iSCSI.
- Click the slider on the top right to enable iSNS.
- Enter the IP address for the iSNS and then click Save.
iSNS: iSCSI initiator
The steps below demonstrate a single connection to an iSNS server using Windows 7 as the initiator. Configurations will vary but you can review the instructions below and make adjustments for your operating system and network.
- Search for and launch iSCSI Initiator or equivalent.
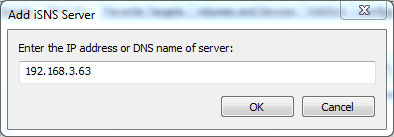
- Choose Discovery and Add server.
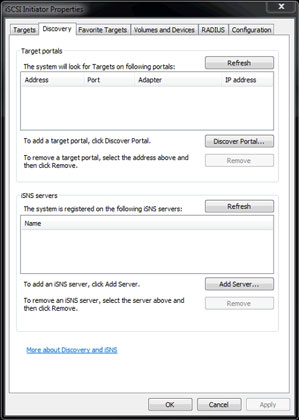
- Enter the iSNS server’s IP address.
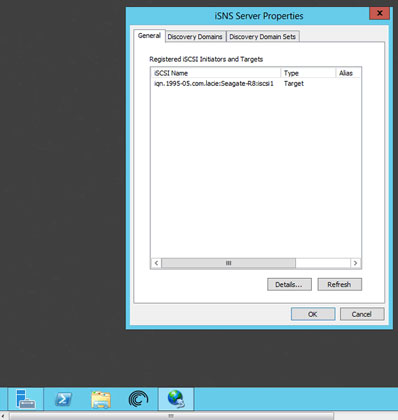
- The list of discovered targets shows the iSCSI targets that are connected to the iSNS server.
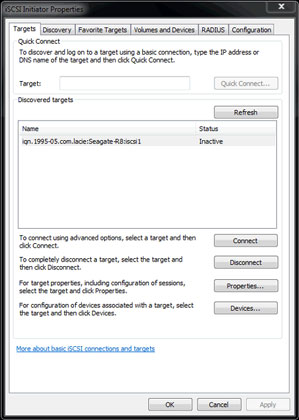
- To connect to the iSCSI target, follow the instructions in iSCSI initiator.