Was this content helpful?
How could we make this article more helpful?
NAS OS Setup
Once your Seagate NAS has been configured per the instructions of the included quick start guide, the NAS OS Setup Wizard will guide you through the remainder of the installation. The NAS’s administrator must complete the setup wizard since a password will be created to access the NAS OS management features. The time to complete the setup wizard varies based upon your NAS. Choose the option below that matches your Seagate NAS:
- Enclosure with disks: If you purchased an enclosure with disks, go to First Use: Enclosures with Disks.
- Enclosure without disks: If you purchased an enclosure that did not include disks, go to First Use: Empty Enclosure.
First use: Enclosure with disks
Before connecting to NAS OS, configure the Seagate NAS on your network. For instructions, review your NAS's user manual and quick start guide.
Enclosure without disks: If you purchased an empty enclosure, go to First use: Empty enclosure for instructions on how to set up Seagate NAS OS.
Consider the following before installing Seagate NAS OS:
- The NAS OS device's administrator should complete the installation steps.
- NAS OS checks for software updates during the installation. An error message informs you if it cannot check for updates due to a missing Internet connection. You have the option to search for updates after the installation.
- Power on the device. The device is ready to be accessed once the status LED turns solid.
- From a PC/Mac connected to the same network as your NAS, launch an Internet browser and type http://discover.seagate.com
- Follow the on-screen instructions.

During the setup, you can:
- Create or change the name of the device.
- Create or change the administrator login (the default is admin).
- Create a Seagate Access account for remote access.
- Configure or change the RAID level.
- Adjust the time zone.
Make certain to note your login and password for future use.
Next steps
- Simplify NAS access: Seagate recommends that you install the software utility Seagate Network Assistant before moving forward with the device configuration. Seagate Network Assistant gives you instant information on your Seagate NAS, such as firmware version, IP address, and MAC address. It will also provide quick access to shares and NAS OS. See Seagate Network Assistant for instructions.
- Configure your NAS: For details on how to configure and use your Seagate NAS, go to Shares: Access and Transfer Files and Device Manager.
- Install Sdrive for local and remote access: Sdrive gives you easy access to shares and NAS OS on local and offsite networks. For more information, see Remote Access.
First Use: Empty enclosure
Before connecting to NAS OS, configure the Seagate NAS on your network. For instructions, review your NAS's user manual and quick start guide.
Enclosure with disks: If you purchased an enclosure with disks, go to First Use: Enclosures with Disks for instructions on how to set up Seagate NAS OS.
Choose compatible hard drives
Seagate NAS are compatible with most SATA I, SATA II, and SATA III hard drives. Older hard drives that are not constructed for NAS can experience reduced performance or failure. If you have any questions regarding hard drive compatibility, contact Seagate customer support.
Seagate hard drives are specially prepared for use with your Seagate NAS. Choose the link below to view hard drives that are optimized for your Seagate NAS:
Install Seagate NAS OS
Important info: The Seagate NAS OS installer must format the hard drives inserted into the NAS. Data stored on the hard drives will be deleted. Make certain to back up data on the hard drives before installing them in the Seagate NAS enclosure.
Consider the following before installing Seagate NAS OS:
- The NAS OS device's administrator should complete the installation steps.
- Make certain to boot the NAS before inserting new hard drives. Since the boot order for the NAS starts with the hard drives, you can encounter a problem if it detects an earlier version of NAS OS or another operating system.
- Insert the hard drives once the diskless enclosure is powered on and the status LED is blinking.
- The NAS checks for software updates during the installation. An error message informs you if it cannot check for updates due to a missing connection to the Internet. You have the option to search for updates after the installation.
The instructions for hardware installation are available on the quick start guide and user manual for your Seagate NAS. Make certain to follow the instructions before continuing with the steps below.
- Power on your Seagate NAS device. The device is ready to be accessed once the status LED turns solid.
- From a PC/Mac connected to the same network as your NAS, launch an Internet browser and type http://discover.seagate.com
- Follow the on-screen instructions. The setup formats the drives and installs NAS OS. During the installation, you can:
- Create or change the name of the device.
- Create or change the administrator login (the default is admin).
- Create a Seagate Access account for remote access.
- Configure or change the RAID level.
- Adjust the time zone.
Make certain to note your login and password for future use. Upon completion, you are prompted to restart the NAS.
Upon reboot, the status LED turns on and begins to blink. The device is ready to be accessed once the status LED has turned solid and the welcome page appears on the NAS Setup Wizard.
Next steps
- Simplify NAS access: Seagate recommends that you install the software utility Seagate Network Assistant before moving forward with the device configuration. Seagate Network Assistant gives you instant information on your Seagate NAS, such as firmware version, IP address, and MAC address. It will also provide quick access to shares and NAS OS. See Seagate Network Assistant for instructions.
- Configure your NAS: For details on how to configure and use your Seagate NAS, go to Shares: Access and Transfer Files and Device Manager.
- Install Sdrive for local and remote access: Sdrive gives you easy access to shares and NAS OS on local and offsite networks. For more information, see Remote Access.
First Use: Update from NAS OS 3 to NAS OS 4
Your NAS OS 3 device alerts you when an update is available to NAS OS 4 or higher. You can update your Seagate NAS device by following the prompts to download and install NAS OS 4. The last step for the NAS OS update is rebooting the NAS OS device.
NAS OS 3 and volume encryption
The first time you log into NAS OS 4, a pop-up window appears with important information regarding support for volume encryption. Since NAS OS 3 does not recognize volume encryption and other new features, you can lose important data when attempting to restore a NAS OS 4 device with NAS OS 3.
For further information, go to: Seagate NAS OS Installer.
You can find software downloads and instructions on how to update the USB rescue key from the NAS OS 3 installer to the NAS OS 4 installer.
Seagate Network Assistant
Install Seagate Network Assistant on one or more computers connected to the same network as your NAS OS device. It is a software utility that helps you detect and access NAS OS devices on the network. Seagate Network Assistant gives you instant information on the NAS OS device's:
- IP address
- Version of software/firmware
- MAC address (hardware ID number)
Seagate Network Assistant can also help you:
- Launch NAS OS
- Mount one or more shares
- Auto-mount one or more shares
Important info on Seagate Network Assistant and NAS LAN Ports: Seagate Network Assistant will always provide information on LAN 1, even if you have connected the NAS to your network using LAN 2.
Note on LaCie NAS OS devices: Seagate Network Assistant recognizes LaCie NAS devices running LaCie NAS OS 2.0 or higher.
Install Seagate Network Assistant
To avoid NAS detection conflicts, make certain that you are running the latest version of Seagate Network Assistant.
- Download the Seagate Network Assistant installer for your operating system:
- Follow the wizard to complete the installation.
Launch Seagate Network Assistant
Windows:
- Select Seagate Network Assistant in Start > All Programs/Programs. The application icon will appear in the taskbar.
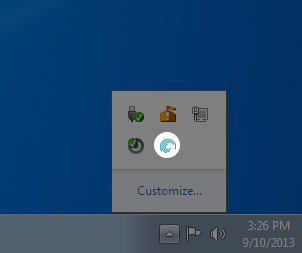
- Right-click on the icon in the taskbar.
Mac:
- Select Seagate Network Assistant at Go > Applications > Seagate Network Assistant. The application icon will appear in the menu bar.
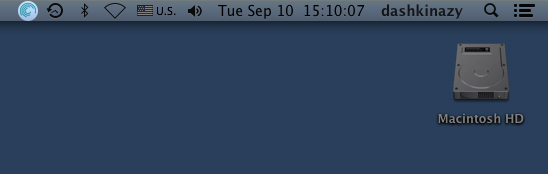
- Select the icon in the menu bar.
Find your Seagate NAS's address information
- Launch Seagate Network Assistant.
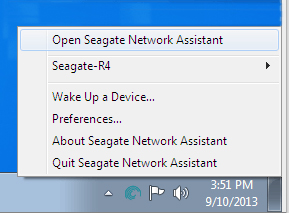
- Windows users: Right-click on the Seagate Network Assistant icon and choose Open Seagate Network Assistant. Mac users: Choose the Seagate Network Assistant icon in the menu bar to select Open Seagate Network Assistant.
- If you have multiple NAS OS devices, select the NAS you wish to access from the list on the left-hand column.
- Choose the Configuration tab.
- Review the device's:
- IP address
- Version of software/firmware
- MAC address (hardware ID number)
Access NAS OS with Seagate Network Assistant
- Launch Seagate Network Assistant.
- Choose your device:
- Windows: Right-click on the Seagate Network Assistant icon in the taskbar to select your Seagate NAS.
- Mac: Choose the Seagate Network Assistant icon in the menu bar to select your Seagate NAS.
- Select Web access to the NAS OS.
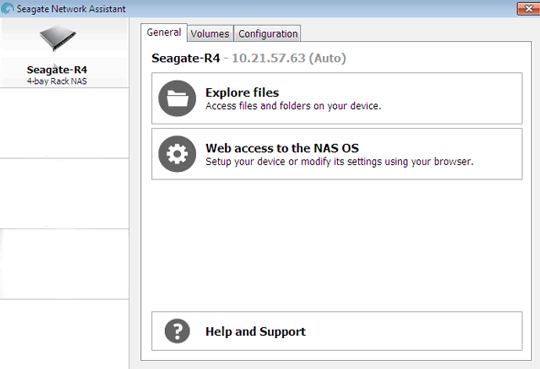
- The NAS OS login page will launch in an Internet browser.
Mount shares
Seagate Network Assistant gives you many options to access your Seagate NAS's public and private shares.
Quick access
- Launch Seagate Network Assistant.
- Choose your device:
- Windows: From the taskbar, right-click on the Seagate Network Assistant icon and move the cursor to your Seagate NAS. Available shares will be listed.
- Mac: From the menu bar, select the Seagate Network Assistant icon and move the cursor to your Seagate NAS. Available shares will be listed.
- Choose the share you want to access.
- The share will open in an Explorer window (Windows) or a Finder window (Mac). Public shares are available to everyone on the network. Private shares will prompt a user for a username and password .
- Administrator: Use the credentials created during the initial setup or NAS OS login.
- User: Type the login and password prepared by the administrator (see Users).
- Transfer files normally between your computer and the share. Mac users: If the share does not open in a Finder window, navigate in the Finder to SHARED > [machine name] > [share name].
Note on Quick Access to shares: Private shares require a valid username and password.
Mount
- Launch Seagate Network Assistant.
- Right-click on the icon in the taskbar (Windows) or choose the icon in the menu bar (Mac) and select Open Seagate Network Assistant.
- If you have multiple NAS OS devices, select the NAS you wish to access from the list on the left-hand column.
- Choose the Volume tab.
- Double-click the share you wish to access. The share will open in an Explorer window (Windows) or a Finder window (Mac). Transfer files normally from your computer to the share.
Technical note: Mac users: If the share does not open in a Finder window, navigate in the Finder to SHARED > [machine name] > [share name].
Note on mounting shares: Private shares require a valid username and password.
Authenticate private shares
- Launch Seagate Network Assistant.
- Right-click on the icon in the taskbar (Windows) or choose the icon in the menu bar (Mac) and select Open Seagate Network Assistant.
- If you have multiple NAS OS devices, select the NAS you wish to access from the list on the left-hand column.
- Choose the Volumes tab.
- Select Authentication.
- In the pop-up window, choose Registered User and enter your Username and Password. Select OK.
- All available shares will appear in the list of volumes. If you do not see your volume, confirm that you have access to it (see Shares). Only the NAS administrator can set access rights to shares.
- Select Mount as drive (Windows) or Mount (Mac) to open the share.
- The share will be available in an Explorer window (Windows) or a Finder window (Mac).
Auto-mount
- Launch Seagate Network Assistant.
- Right-click on the icon in the taskbar (Windows) or choose the icon in the menu bar (Mac) and select Open Seagate Network Assistant.
- If you have multiple NAS OS devices, select the NAS you wish to access from the list on the left-hand column.
- Choose the Volumes tab.
- If the shares you wish to auto-mount is private, choose Authentication to enter your credentials. In the pop-up window, choose Registered User and enter the Username and Password for the share.
- Choose OK. All available shares will appear in the list of volumes.
- Select the checkbox for Auto to open the share. The share will now mount each time you boot the computer. To cancel auto-mount, uncheck the box for Auto.
- Windows: The share will mount in Computer/My Computer automatically when the computer detects it on the network. Mac users: The share icon will appear in your Finder automatically when the computer detects it on the network.