- ASEAN (English)
- Australia/New Zealand (English)
- Belgique (Français)
- België (Nederlands)
- Brasil (Português)
- Canada (English)
- Canada (Français)
- Deutschland (Deutsch)
- España (Español)
- France (Français)
- India (English)
- Indonesia (Indonesian)
- Italia (Italiano)
- Latinoamérica (Español)
- Middle East/North Africa (English)
- Nederland (Nederlands)
- Polska (Polski)
- Portugal (Português)
- Singapore (English)
- Türkiye (Türkçe)
- United Kingdom (English)
- United States (English)
- 中国 (简体中文)
- 台灣 (繁體中文)
- 日本 (日本語)
- 대한민국 (한국어)
- Home /
- Lyve Cloud Object Storage Resources Guide /
- Rubrik
Was this content helpful?
How could we make this article more helpful?
- Acronis
- ActiveImage Protector
- Apostrophe CMS
- Bacula
- BorgBackup
- CloudBoost
- Cohesity
- Commvault
- CrossFTP
- Data Migration Overview
- Data Migration with AWS CLI
- Data Migration with Cloudsfer
- Data Migration with Flexify.IO
- Data Migration with Movebot
- Data Migration with Rclone
- Data Migration with StorageDNA Fabric
- Dell Networker Data Domain
- Duplicacy
- FileBrowser
- How to Create a Pre-Signed URL
- IBM Aspera HSTS Server and Desktop
- IBM Aspera with HSTS
- IBM Spectrum Protect
- Laravel
- LucidLink
- MinIO Client
- NAKIVO Backup and Replication
- qBackup
- Restic
- Rubrik
- S3cmd
- S3FS
- s5cmd
- ShareX
- Signiant Media Shuttle
- SmartFTP
- Starfish
- SyncBackPro
- Syncovery
- tntDrive
- Transmit
- UpdraftPlus
- Using SSE-C to Encrypt Objects
- Veritas Backup Exec
- Veritas NetBackup Media Server Deduplication (MSDP)
- Video Library
- WebDrive
- Commvault
- LucidLink
Lyve Cloud with Rubrik
Rubrik is validated for use with Lyve Cloud Object Storage.
Prerequisites
Before deployment, you will need the following:
- Set up a Lyve Cloud service account and create the bucket that Rubrik will use within Lyve Cloud. It's recommended that access key information given to Rubrik include admin permissions (read, list, write, and delete), because Rubrik will create and manage buckets.
- A Rubrik account.
You may have to contact Rubrik support to have them enable S3 compatible as a valid archive location. This option may not be enabled by default in Rubrik systems.
Create a new storage target on Rubrik
Using the credentials from your Lyve Cloud account, complete the following steps:
- Click the Rubrik Dashboard gear icon and select Archival Locations.

- Select + to add a new archival location. Enter the following details:
- Archive Type: Select Object Store.
- Object Store Vendor: Select S3 Compatible.
- Access Key: Enter your Lyve Cloud Access Key.
- Secret Key: Enter your Lyve Cloud Secret Key.
- Host Name: Enter the bucket endpoint URL.
- Bucket Prefix: Enter your bucket prefix.
If the bucket does not exist in Lyve Cloud, it will create new bucket(s) with a prefix. These buckets are prefixed with a naming convention: <prefix>-rubrik-<number>. For example, abc-rubrik-0.
- Number of Buckets: Enter the number of buckets associated with the prefix.
- Archive Location Name: Enter an archive location name.

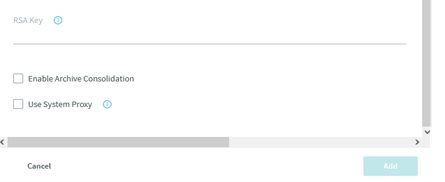
- RSA key: Enter the RSA key. If you do not have an RSA key, you must generate and paste the key. For more information, see Generating RSA key.
Select Add.
- Select SLA Domain in the menu. To create a new SLA Domain or edit a Rubrik SLA template, set the following:
- SLA Domain Name: Enter the domain name.
- Continuous Data Protection: Leave toggle in defaulted position.
- Advanced Frequencies: Leave toggle in default position.
- Take Snapshots: Set the frequency of snapshots for Hours, Days, and Months.
- Keep Snapshots: Set duration to keep snapshots for Days and Months.
- Snapshot Window: Specify the duration to take snapshots from and the first full snapshot.

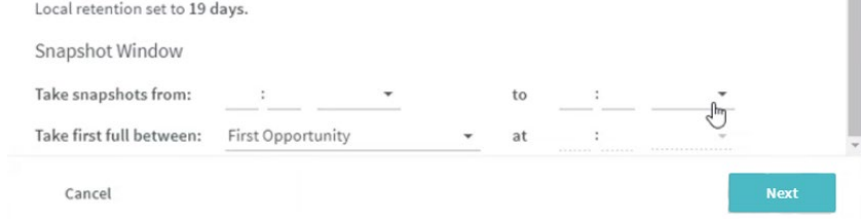
Select Next.
- Set Archiving and Replication Rules to customize archiving and retention periods on-premises or in the cloud.
Specify the following details:
- Retention on Brik: Set the on-premises retention period.
- Archiving: Toggle on. Choose the Archival Location Name from step 1 and select Enable Instant Archive.
- Replication: Leave toggle in the default position.
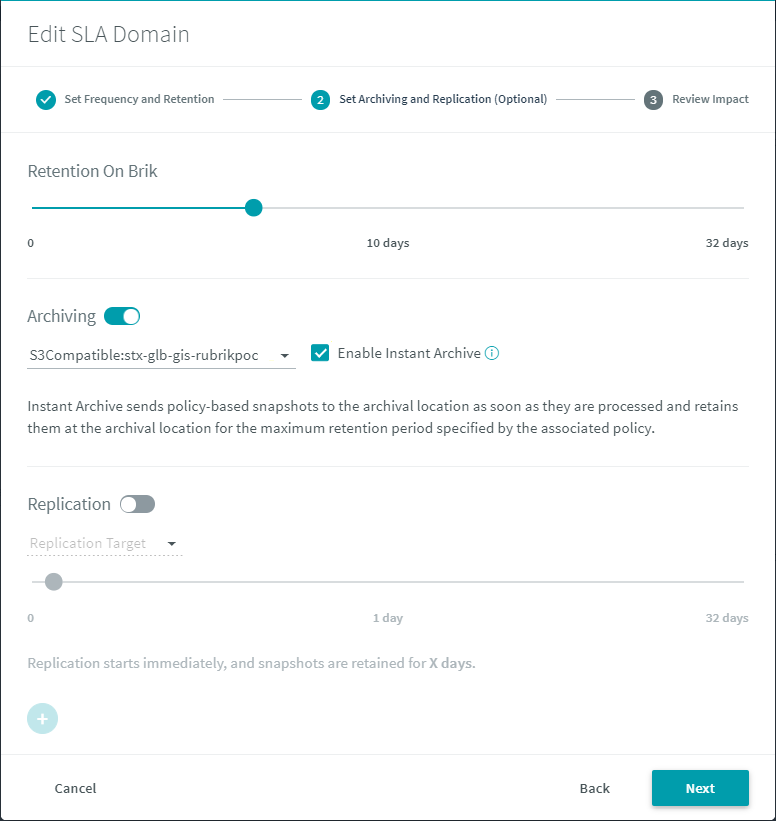
Select Next.
- Review settings under Review Impact and select Submit when finished.
For more information on Rubrik, visit www.rubrik.com.
Generate an RSA key
The RSA key is used for encryption. An RSA key can be generated on any system with the OpenSSL toolkit (common on Linux and Mac OS).
To generate an RSA key:
- Run the following command on the command line:
# sudo openssl genrsa -out rubrik_encryption_key.pem 2048
- The command generates the required key and writes it to a file called
rubrik_encryption_key.pem. To view the key, execute the following command:
# cat rubrik_encryption_key.pem
This image shows an example of an RSA key.
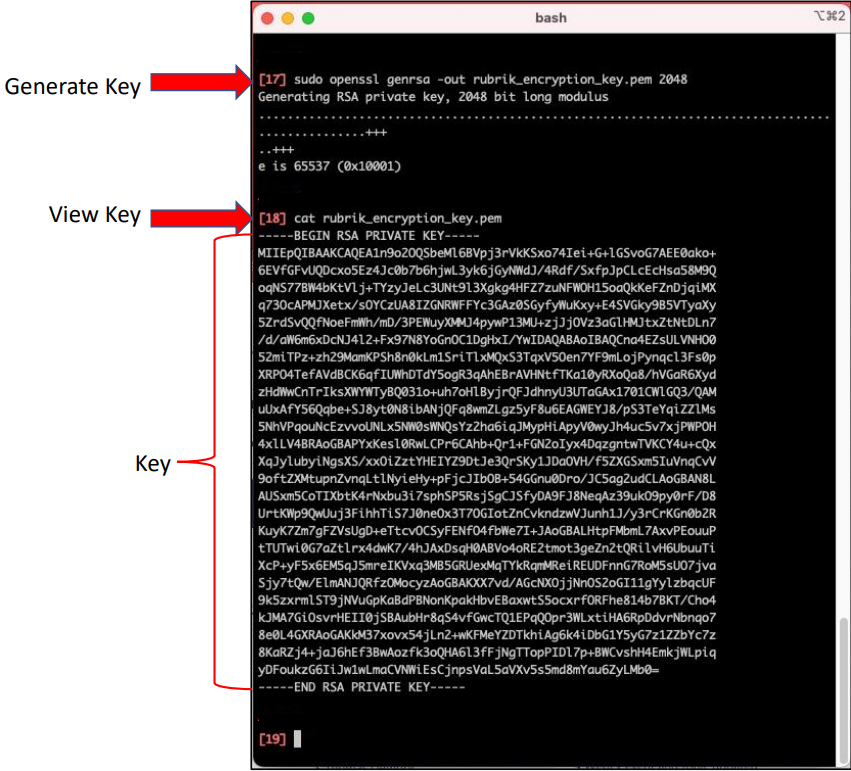
The key is the entire contents of the file, including the -----BEGIN RSA PRIVATE KEY----- and -----END RSA PRIVATE KEY----- markers.
- Copy and paste the content of key file in the RSA key field.
Lyve Cloud Object Storage Resources Guide