- ASEAN (English)
- Australia/New Zealand (English)
- Belgique (Français)
- België (Nederlands)
- Brasil (Português)
- Canada (English)
- Canada (Français)
- Deutschland (Deutsch)
- España (Español)
- France (Français)
- India (English)
- Indonesia (Indonesian)
- Italia (Italiano)
- Latinoamérica (Español)
- Middle East/North Africa (English)
- Nederland (Nederlands)
- Polska (Polski)
- Portugal (Português)
- Singapore (English)
- Türkiye (Türkçe)
- United Kingdom (English)
- United States (English)
- 中国 (简体中文)
- 台灣 (繁體中文)
- 日本 (日本語)
- 대한민국 (한국어)
- Home /
- Lyve Cloud Object Storage Resources Guide /
- Veritas Backup Exec
Was this content helpful?
How could we make this article more helpful?
OPEN MENU CLOSE MENU
- Acronis
- ActiveImage Protector
- Apostrophe CMS
- Bacula
- BorgBackup
- CloudBoost
- Cohesity
- Commvault
- CrossFTP
- Data Migration Overview
- Data Migration with AWS CLI
- Data Migration with Cloudsfer
- Data Migration with Flexify.IO
- Data Migration with Movebot
- Data Migration with Rclone
- Data Migration with StorageDNA Fabric
- Dell Networker Data Domain
- Duplicacy
- FileBrowser
- How to Create a Pre-Signed URL
- IBM Aspera HSTS Server and Desktop
- IBM Aspera with HSTS
- IBM Spectrum Protect
- Laravel
- LucidLink
- MinIO Client
- NAKIVO Backup and Replication
- qBackup
- Restic
- Rubrik
- S3cmd
- S3FS
- s5cmd
- ShareX
- Signiant Media Shuttle
- SmartFTP
- Starfish
- SyncBackPro
- Syncovery
- tntDrive
- Transmit
- UpdraftPlus
- Using SSE-C to Encrypt Objects
- Veritas Backup Exec
- Veritas NetBackup Media Server Deduplication (MSDP)
- Video Library
- WebDrive
- Commvault
- LucidLink
Lyve Cloud with Veritas Backup Exec
Veritas Backup Exec is validated for use with Lyve Cloud Object Storage.
- If needed, delete any preconfigured storage entries.

- Select Configure Cloud Storage.

- Enter a unique name, and then select Next.

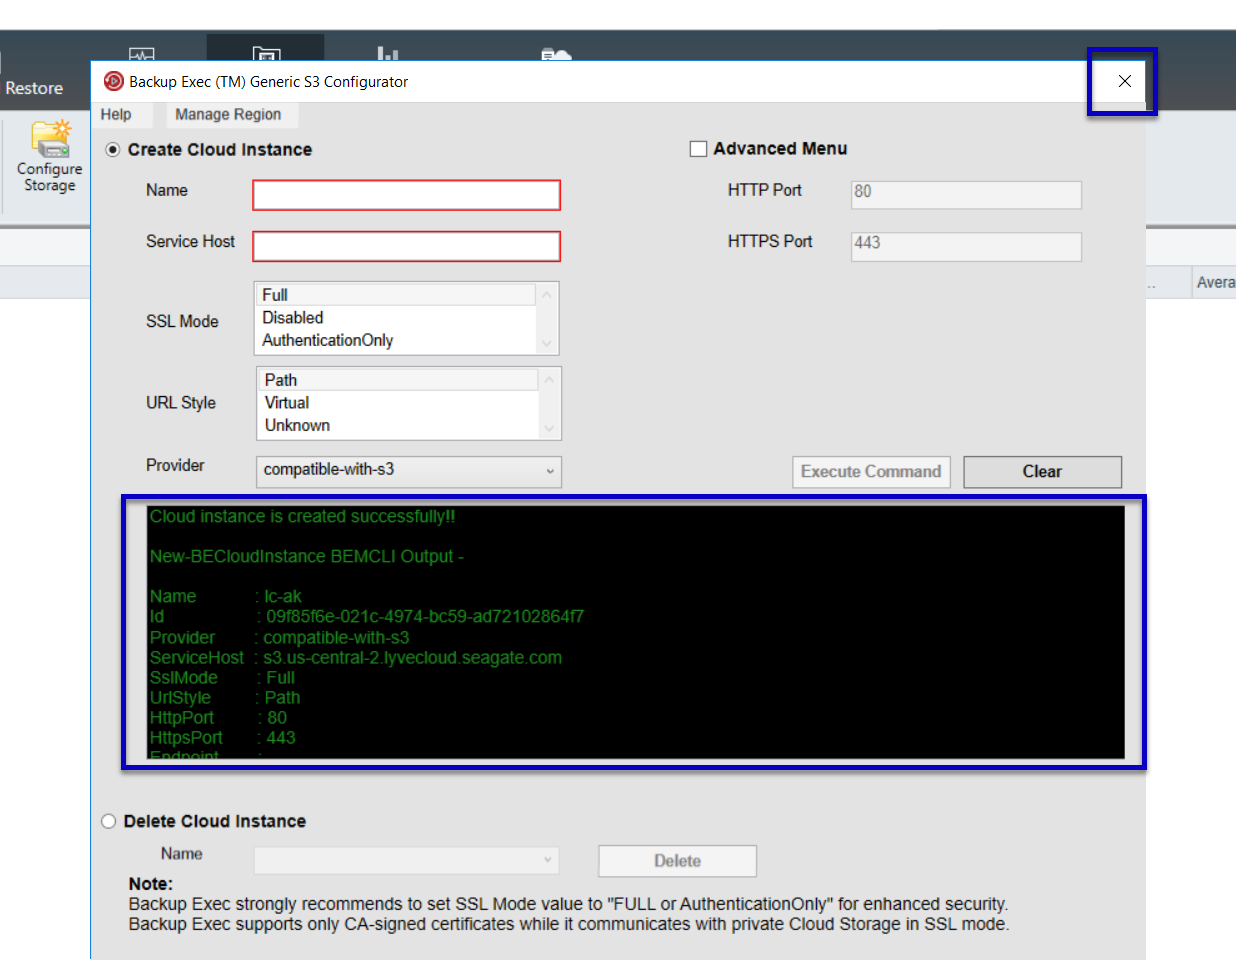
- Select the here link to add a new S3 cloud instance using the Generic S3 Configurator tool.

- Enter the following details:
| Name | Enter a unique name. |
| Service Host | Enter your Lyve Cloud bucket endpoint URL. |
| SSL Mode | Select Full. |
| URL Style | Select Path. |
Select Execute Command.

- When the status window reports that the cloud instance has been successfully created, you can close the dialog.
- Select S3 as the provider, and then select Next.

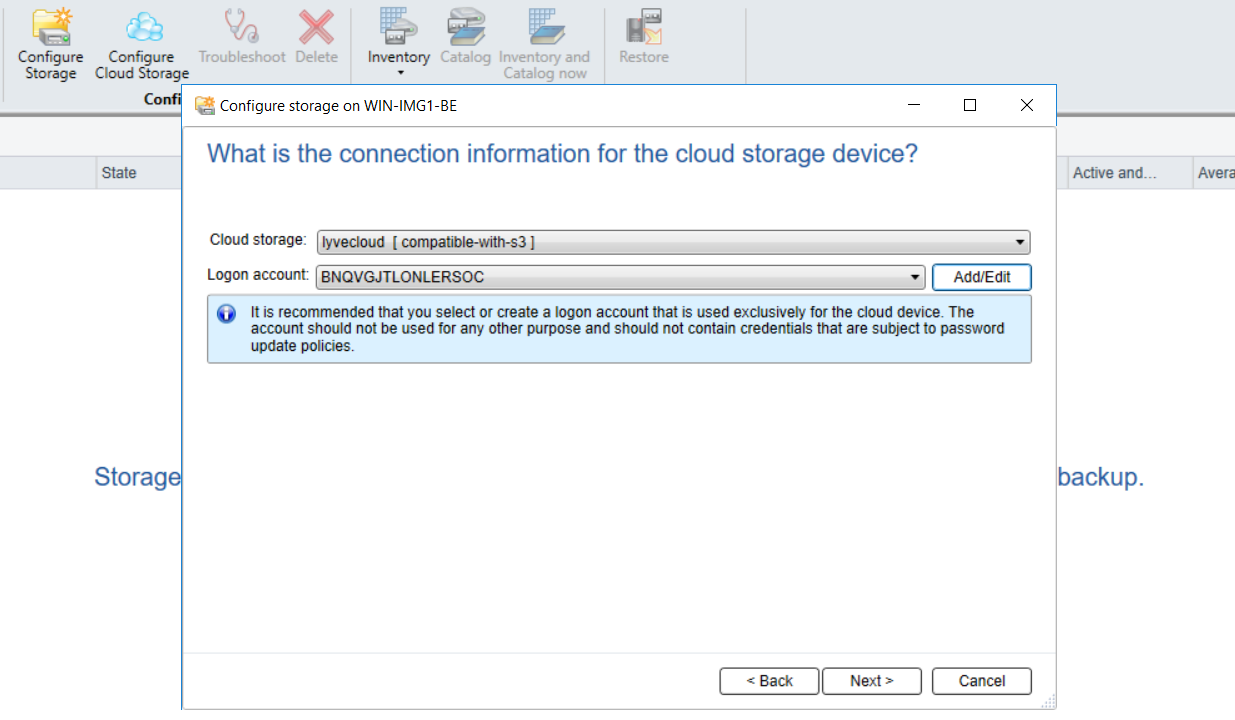
- Choose the cloud instance that was just created.

- Select the Add/Edit button next to the 'Logon account' selector.

- Select the Add button.

- Enter your logon credentials, and then select OK.

- Select the newly added account, and then select OK.

- Ensure the correct logon account is selected, and then select Next.
- Review the buckets the service account has access to.

Lyve Cloud Object Storage Resources Guide