Publishing your App
Once your app is ready and you wish to submit it for publishing, there are a few steps that are required:
- Adding the publishing information for the app, which includes descriptions, author and contact information, icons, screenshots, etc.
- Signing the app with your private key
In this section, you will learn how to achieve this in order to be able to submit your app for inclusion in the Seagate App Store.
Warning
Before publishing a new version of your app, you must create a package for all architectures with the same version. The store has the constraint that it keeps only the last version for each packages. It also impacts the upgrades that can be done from any versions.
Adding Publishing Information
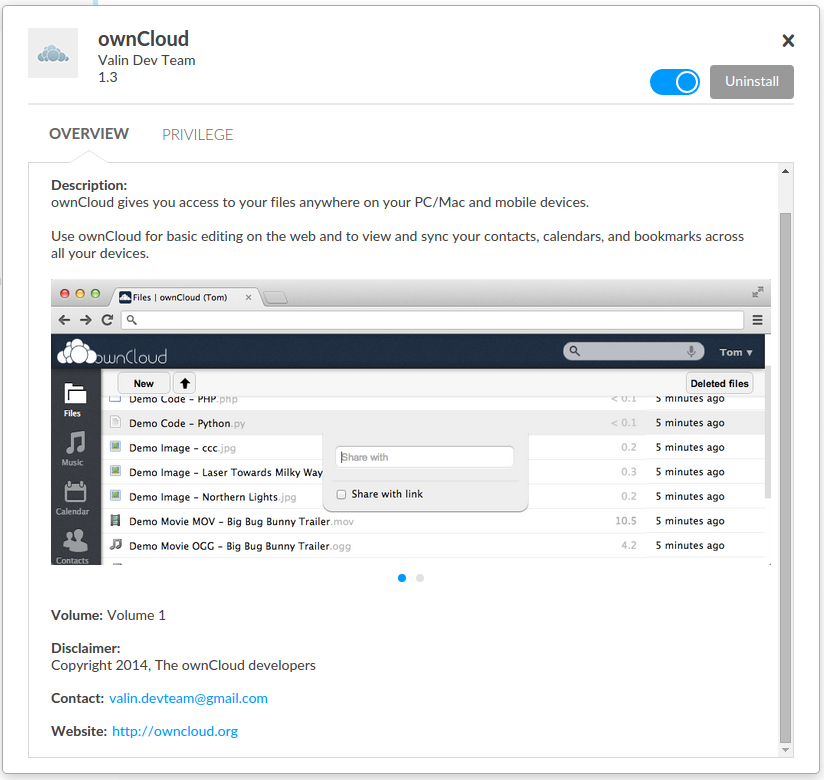
When creating your app, you have the ability to define publishing information, which will be displayed in the App Store. Here is how a detailed app view looks on the NASOS App Store:
The publishing information for your app is contained in:
- The
package-extra.jsonfile, which contains all the additional metadata for your app - The
resourcesfolder, which contains icons and screenshots
Available Information Fields
Here is the list of the information fields expected in the package-extra.json:
name
- Type: dict of strings:strings
- Description: Localized name for the app. A key is required for its English name
- Example value:
{
    "name": {
        "en": "My application",
        "fr": "Mon application"
    }
}
description_short
- Type: dict of strings:strings
- Description: Localized short description
- Example value:
{
    "description_short": {
        "en": "My short description",
        "fr": "Ma description courte"
    }
}
Note
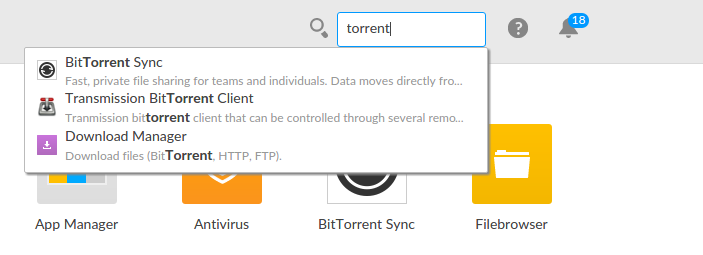
The NAS Webboard search field will return results if the search string matches any words from the description. See keywords.
description_long
- Type: dict of strings:strings
- Description: Localized long description
- Example value:
{
    "description_long": {
        "en": "My long description",
        "fr": "Ma description longue"
    }
}
Note
The NAS Webboard search field will return results if the search string matches any words from the description. See keywords.
locales
New in SDK 0.7, requires NASOS ≥ 4.2
- Type: dict of strings:dict
-
Description: Localized texts for events sent by the app. For each supported language, create a dict entry for each event. The key is the event name, the value is the event message. You can integrate arguments in your message, by placing them between curly braces in your event message.
-
Example value:
    {
        "locales": {
            "en": {
                "hello": "Hello {msg}!"
            },
            "fr": {
                "hello": "Bonjour {msg}!"
            }
        }
    }
keywords
New in SDK 0.7, requires NASOS ≥ 4.2
- Type: dict of lists of strings
- Description: A list of additional keywords that describe your app
- Example value:
{
    "keywords": {
        "en": ["pizza", "pasta"],
        "fr": ["pizza", "pâtes"]
    }
}
Note
The NAS Webboard search field will return results if the search string contains any of the keywords defined here.
publisher_name
- Type: string
- Description: The app’s publisher
- Example value:
{
    "publisher_name": "Some Name"
}
publisher_contact
- Type: string
- Description: The email of the app’s maintainer
- Example value:
{
    "publisher_contact": "some.name@somewhere.com"
}
publication_date
- Type: string
- Description: The date when this new version is available
- Example value:
{
    "publication_date": "2015-02-16"
}
Note
The expected date format is YYYY-MM-DD
disclaimer
- Type: string
- Description: A disclaimer message
- Example value:
{
    "disclaimer": "Some disclaimer"
}
website_url
- Type: string
- Description: The app publisher’s web site (URL)
- Example value:
{
    "website_url": "http://www.somewhere.com"
}
privacy_url
- Type: string
- Description: A link to the privacy policy
- Example value:
{
    "privacy_url": "http://www.somewhere.com/about/privacy"
}
supported_languages
- Type: list of strings
- Description: The list of supported languages
- Example value:
{
    "supported_languages": ["en", "fr"],
}
Note
Leave this field empty if your app supports every language, or only english.
Localization
When a field is localized, it is stored as a dict with an entry for each supported language. The key is the language code and the value for the localized string in that language. For example:
{
    "name": {
        "en": "My application",
        "fr": "Mon application"
    }
}
The supported language codes are: en, fr, es, de, cs, it, ja,
ko, nl, pt-br, ru, tr, zh-cn, zh-tw
Icons
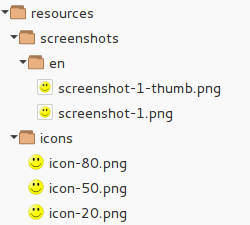
The icons shall be put in resources/icons and use the naming:
icon-<size>.png
There must be 3 icon files, with sizes 20, 50 and 80. The icons must
have transparent backgrounds.
Screenshots
The screenshots shall go in resources/screenshots, which contains
sub-directories folder for each supported language (since screenshots can be
localized), named with the corresponding language code. The screenshot files use
the naming:
screenshot-<number>.<ext>
Note
<ext> designs the file extension. Supported file formats are jpeg and
png.
The recommended screenshot size is at least 720x450 pixels, otherwise the displayed result on the app board wouldn’t be optimal.
Thumbnails shall be named:
screenshot-<number>-thumb.<ext>
For the thumbnails, there is no size recommendation.
Note
When a screenshot for a given language isn’t provided, the default language is English. Therefore, you must provide at least English screenshots.
Once completed, the resources folder should look like this:
Warning
When using the NASOS SDK graphical tool, a resource folder is created with default icons and screenshots for the app. They should be replaced by actual ones before publishing.
Signing your App
The second step of app publishing consists in signing the app with your private key, since the NAS OS App Store requires packages to be signed.
To sign your package, you will need a GPG key pair. You can either create a new key, or use an existing one.
Create your GPG key
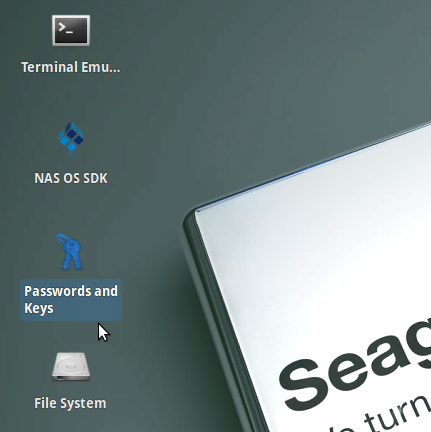
The Passwords and Keys tool should be available on the NAS OS SDK
environment’s desktop:
Note
If you cannot find the Passwords and keys tool, it can be accessed from
the menus or run directly by typing ALT+F2 and then entering the string
seahorse.
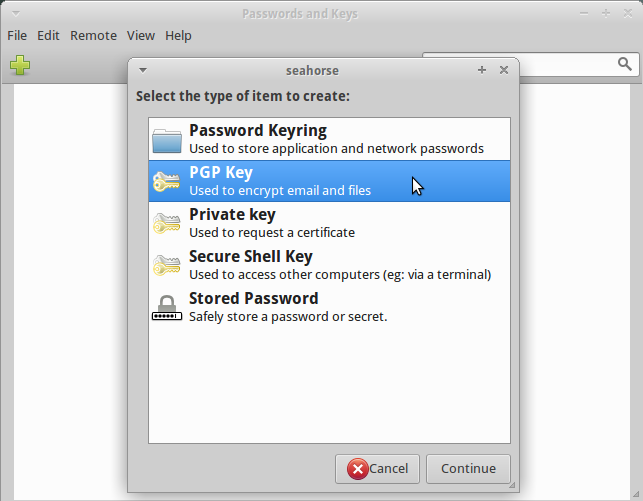
From the Passwords and Keys utility, click on the green cross
to create a new key and choose PGP Key
Fill in the requested details and choose Create

Enter a password when prompted and wait for the key to generate. It may take several minutes if there is not a lot of activity to collect enough entropy.
Note
Key creation is only performed once. After the initial key creation, it can be reused to sign the same app or, other apps. It is up to the developer to define their signing policy.
If you already have a GPG key, you can import it using the Import feature in
the Passwords and keys tool.
Sign Using the NASOS SDK Graphical Tool
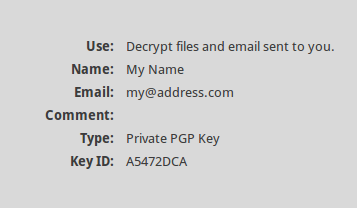
In the Passwords and keys utility, right click the key you wish to use and
select Properties. Note the Key ID:
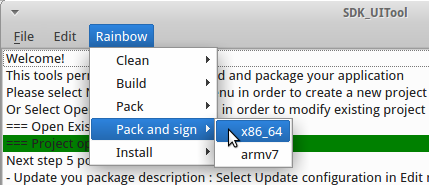
Then, from the NASOS SDK graphical tool, you can sign your package using
Rainbow > Pack and sign:
When prompted, type the Key ID you identified above, and the corresponding
passphrase.
The signed .rbw package shall then be availabe in the build/<arch>
directory, and ready for publishing.
Sign Using the Command Line
Use the following command to pack and sign your package:
sudo rainbow --pack <DIRECTORY> --key <KEY_ID> --passphrase <PASSPHRASE>
In case the passphrase contains special characters, this can cause troubles. In that case, you can put the passphrase in a file, and give the filename instead of the passphrase:
sudo rainbow --pack <DIRECTORY> --key <KEY_ID> --passphrase <PASSPHRASE_FILENAME>
The signed .rbw package shall then be availabe in the build/<arch>
directory, and ready for publishing.