Was this content helpful?
How could we make this article more helpful?
Import to Amazon S3
Prerequisites
Before you can configure and submit your import plan, make sure to complete the following steps so that Lyve Import Service can securely access your specified Amazon S3 bucket to import your data.
AWS subscription—Set up an AWS account.
Amazon S3 bucket—Set up a dedicated bucket for your import. To learn more, see Creating a bucket.
Seagate authorizations—Create an IAM role and supporting policy. To learn more, see Providing access to AWS accounts owned by third parties.
Seagate requires the following permissions to perform the import:
- s3:AbortMultipartUpload
- s3:CreateBucket
- s3:DeleteObject
- s3:GetAccelerateConfiguration
- s3:GetBucketLocation
- s3:GetObject
- s3:GetObjectAttributes
- s3:ListBucket
- s3:ListBucketMultipartUploads
- s3:ListMultipartUploadParts
- s3:PutObject
Recommendations
Seagate strongly recommends the following best practices:
- Create a bucket dedicated to your import plan.
- Block all public access for your bucket.
- Ensure bucket versioning is disabled.
- Ensure server-side encryption is enabled.
- Create an IAM Permission Policy.
- Create an IAM Role trusting Lyve Import Service, attaching the IAM policy you created.
- Disable or delete the role after the import plan has ended.
- Disable or delete the policy after the import plan has ended.
Amazon IAM Permission Policy example
{
    "Version": "2012-10-17",
    "Statement": [
        {
            "Sid": "LyveMobilePolicyTemplate",
            "Effect": "Allow",
            "Action": [
                "s3:PutObject",
                "s3:GetObject",
                "s3:ListBucketMultipartUploads",
                "s3:AbortMultipartUpload",
                "s3:GetObjectAttributes",
                "s3:CreateBucket",
                "s3:ListBucket",
                "s3:GetAccelerateConfiguration",
                "s3:DeleteObject",
                "s3:GetBucketLocation",
                "s3:ListMultipartUploadParts"
            ],
            "Resource": [
                "arn:aws:s3:::{bucketname}",
                "arn:aws:s3:::{bucketname}/*"
             ]
         }
     ]
 }
Complete the prerequisites
- All devices within a subscription must be imported to the same destination and region.
- You will be required to enter and validate your bucket credentials.
- On your Home page, select Subscriptions from the sidebar.
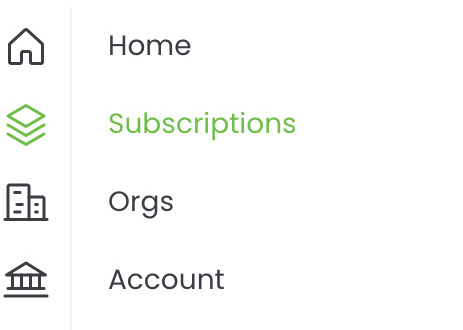
- Select a Lyve Mobile service subscription from the list that includes a Cloud Import plan.
- Select Import Plans in the sidebar, or select the link at the top of the page:

- Confirm the Cloud Destination and Region. Select Next.
- Complete the steps below so that Lyve Import Service can securely access your AWS S3 destination.
Create an IAM Permission Policy on your bucket
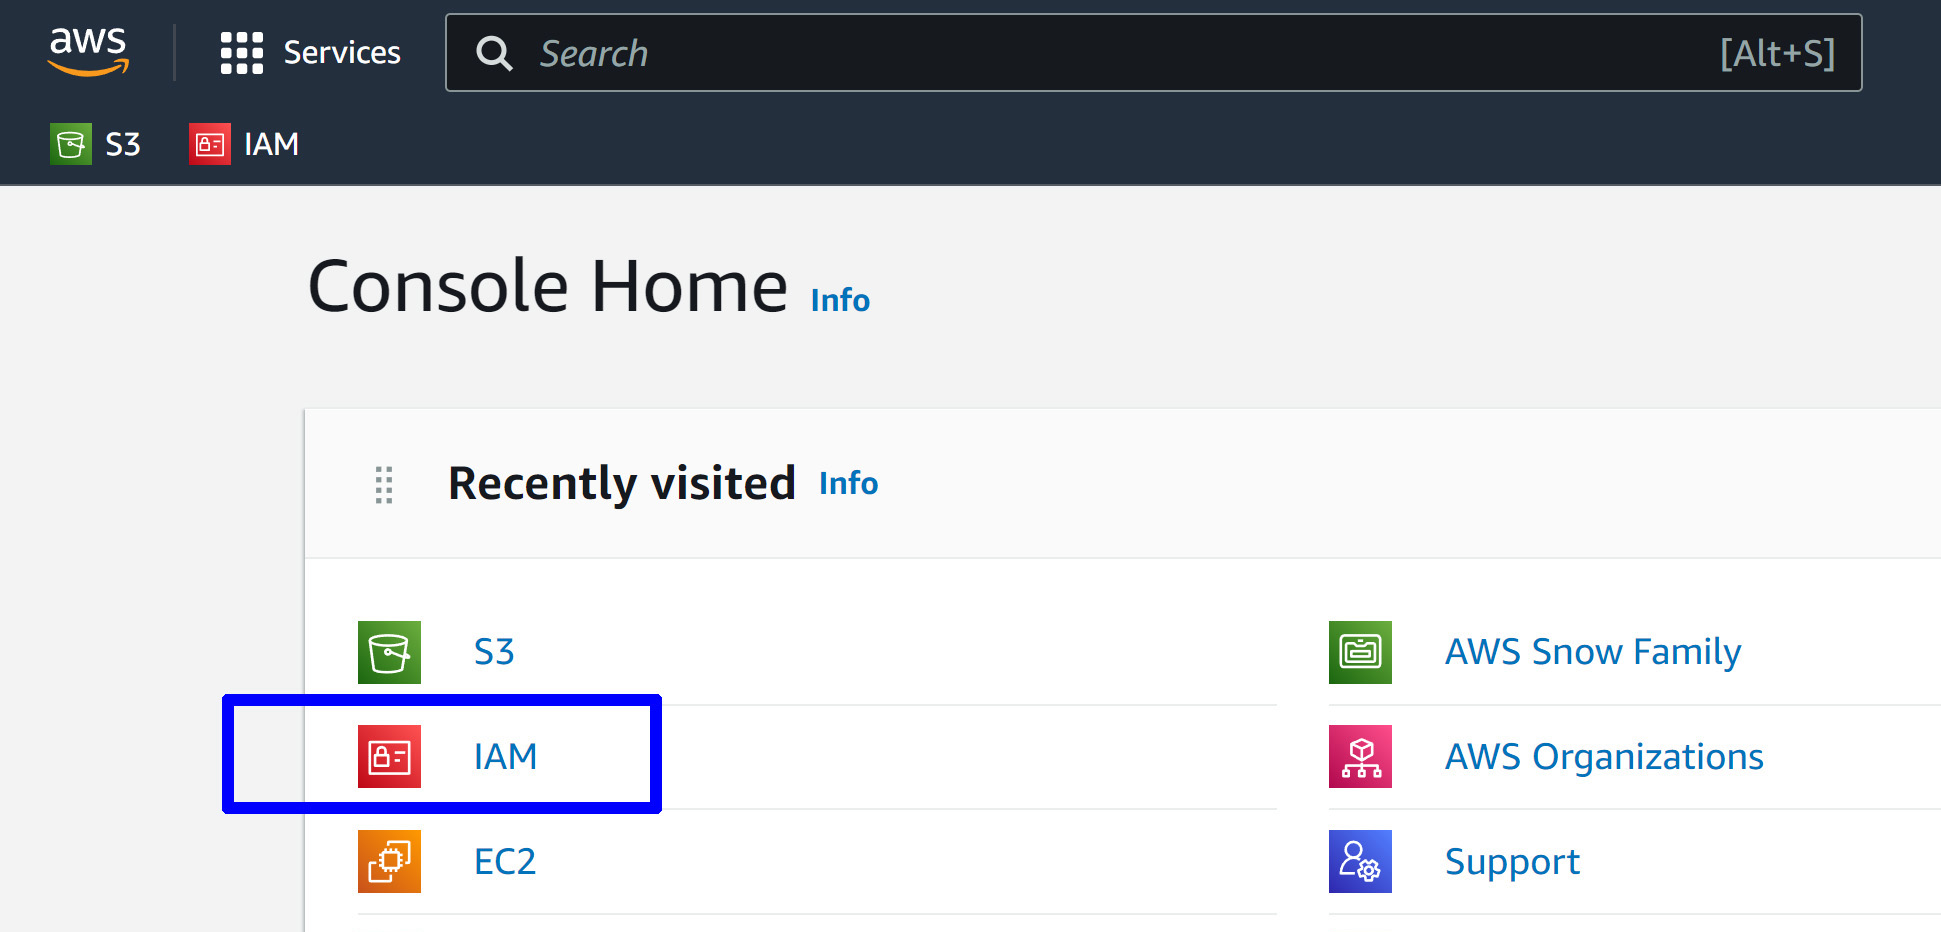
- Log in to your AWS Console.
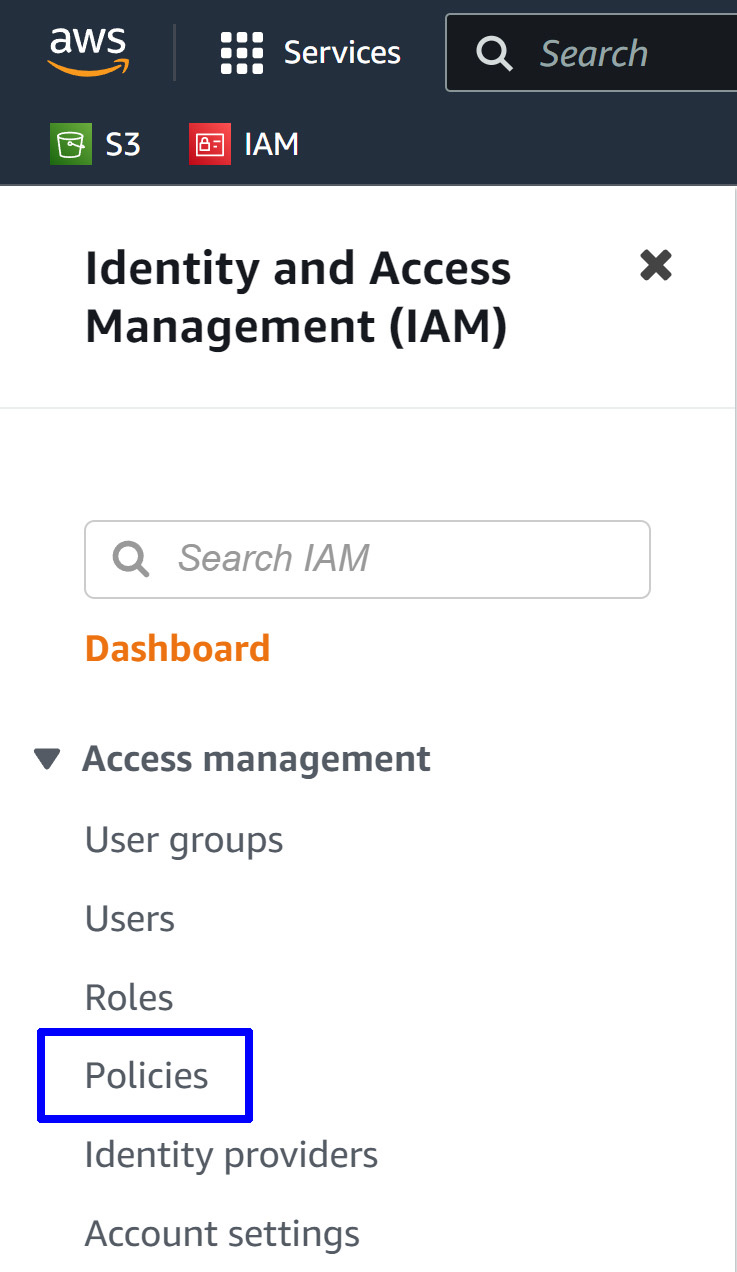
- Enter the IAM service.
- Select Policies.
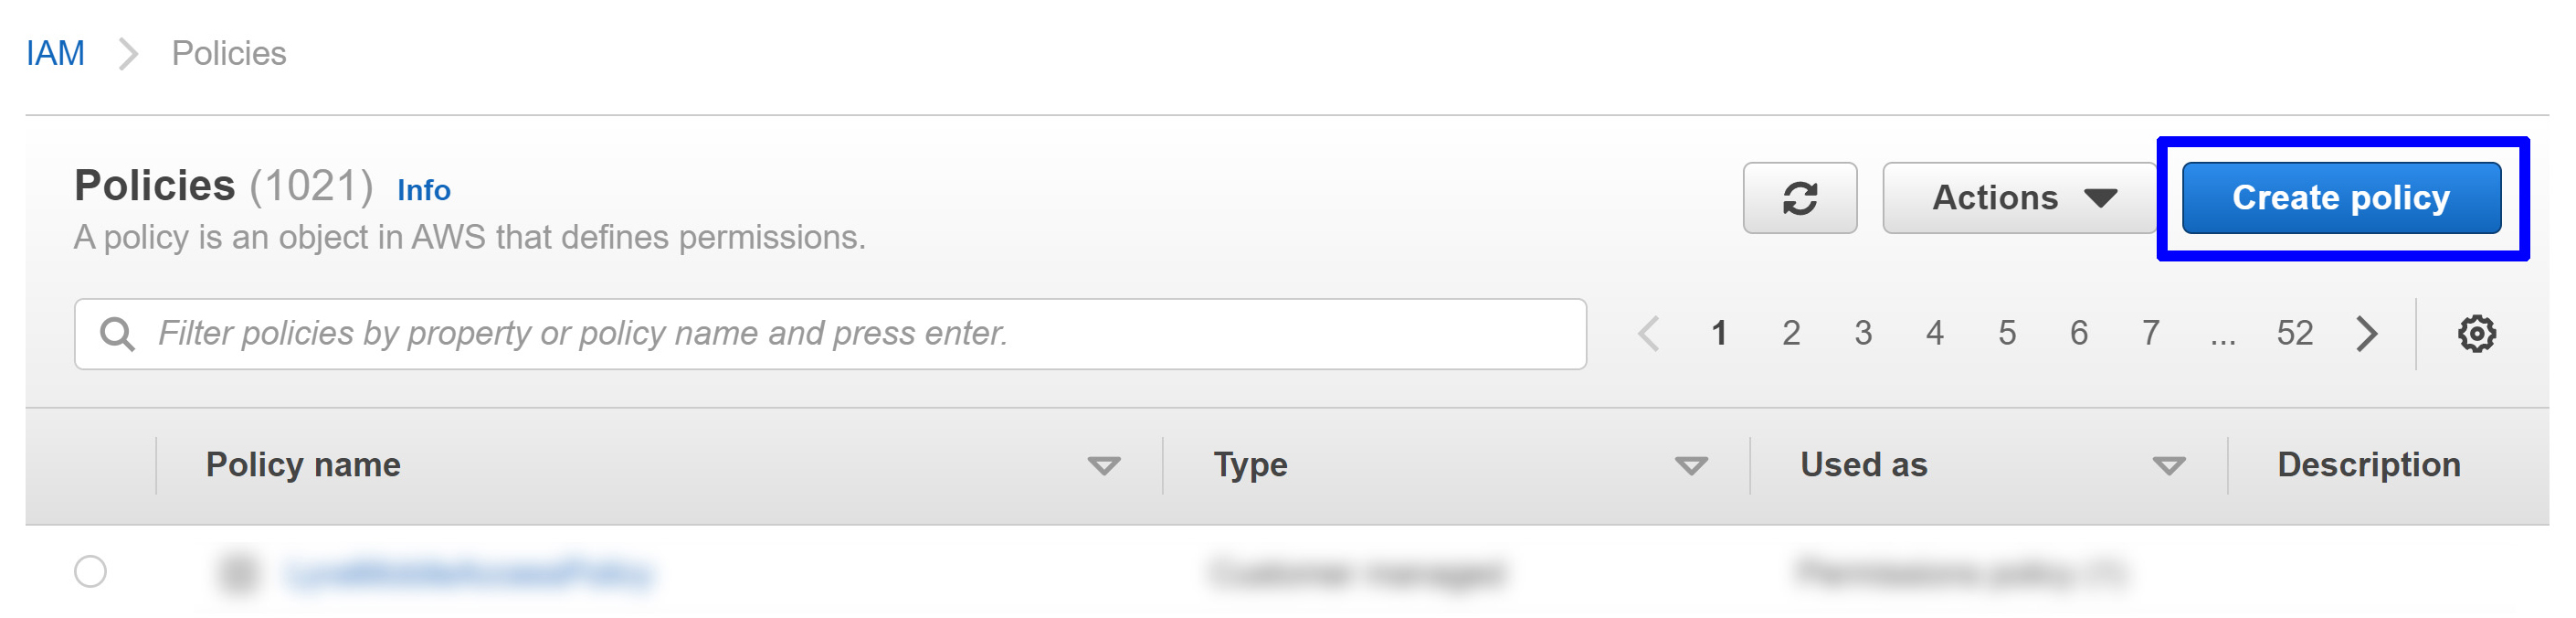
- Click on the JSON tab.
- Copy the provided JSON script below:
Click the Create policy button.

{
    "Version": "2012-10-17",
    "Statement": [
        {
            "Sid": "LyveMobilePolicyTemplate",
            "Effect": "Allow",
            "Action": [
                "s3:PutObject",
                "s3:GetObject",
                "s3:ListBucketMultipartUploads",
                "s3:AbortMultipartUpload",
                "s3:GetObjectAttributes",
                "s3:CreateBucket",
                "s3:ListBucket",
                "s3:GetAccelerateConfiguration",
                "s3:DeleteObject",
                "s3:GetBucketLocation",
                "s3:ListMultipartUploadParts"
            ],
            "Resource": [
                "arn:aws:s3:::{bucketname}",
                "arn:aws:s3:::{bucketname}/*"
             ]
         }
     ]
 }
- Paste the copied text into the JSON editor.
- Replace {bucketname} with the name of the bucket you want to import your data to.
- Click the Next: Tags button.
- Add tags (optional) and click the Next: Review button.
- On the Review policy page, name the policy LyveMobileAccessPolicy.
- .Click Create policy


Create an IAM role trusting Lyve Import Service
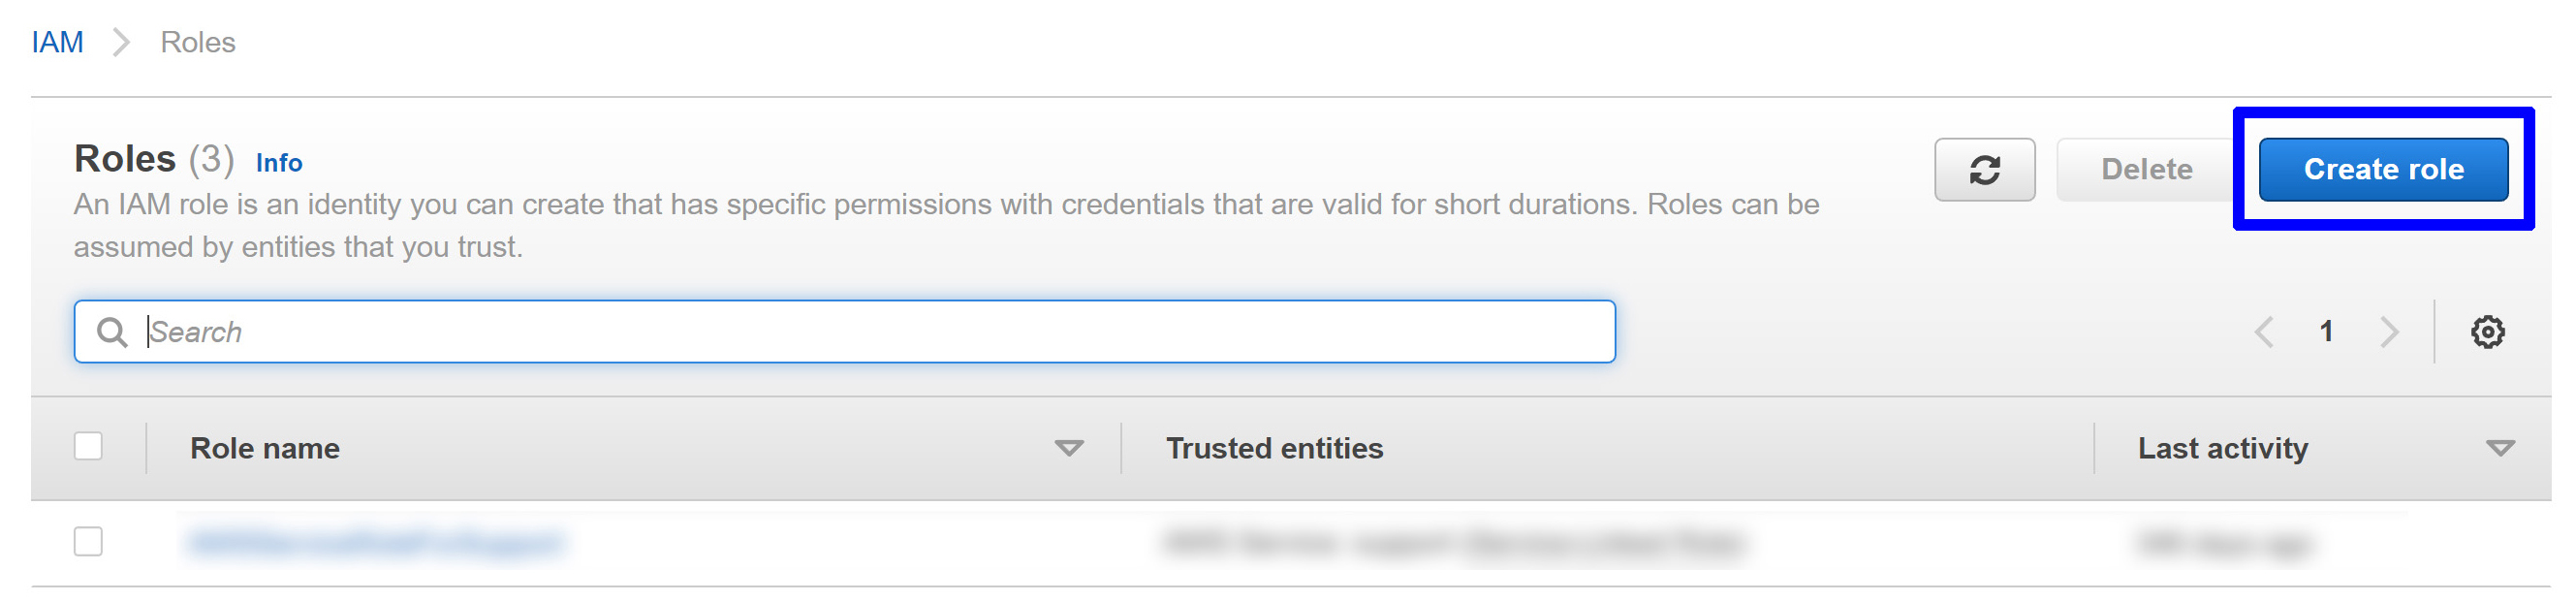
- In the sidebar, click Roles. Click the Create role button.
- On the Select trusted entity page, select Custom trust policy.
- Copy the provided trust policy below:
- Paste the copied text into the JSON editor.
- Replace {accountid} with the value you copied for Lyve’s S3 Account ID. Replace {externalid} with the value you copied for External ID.
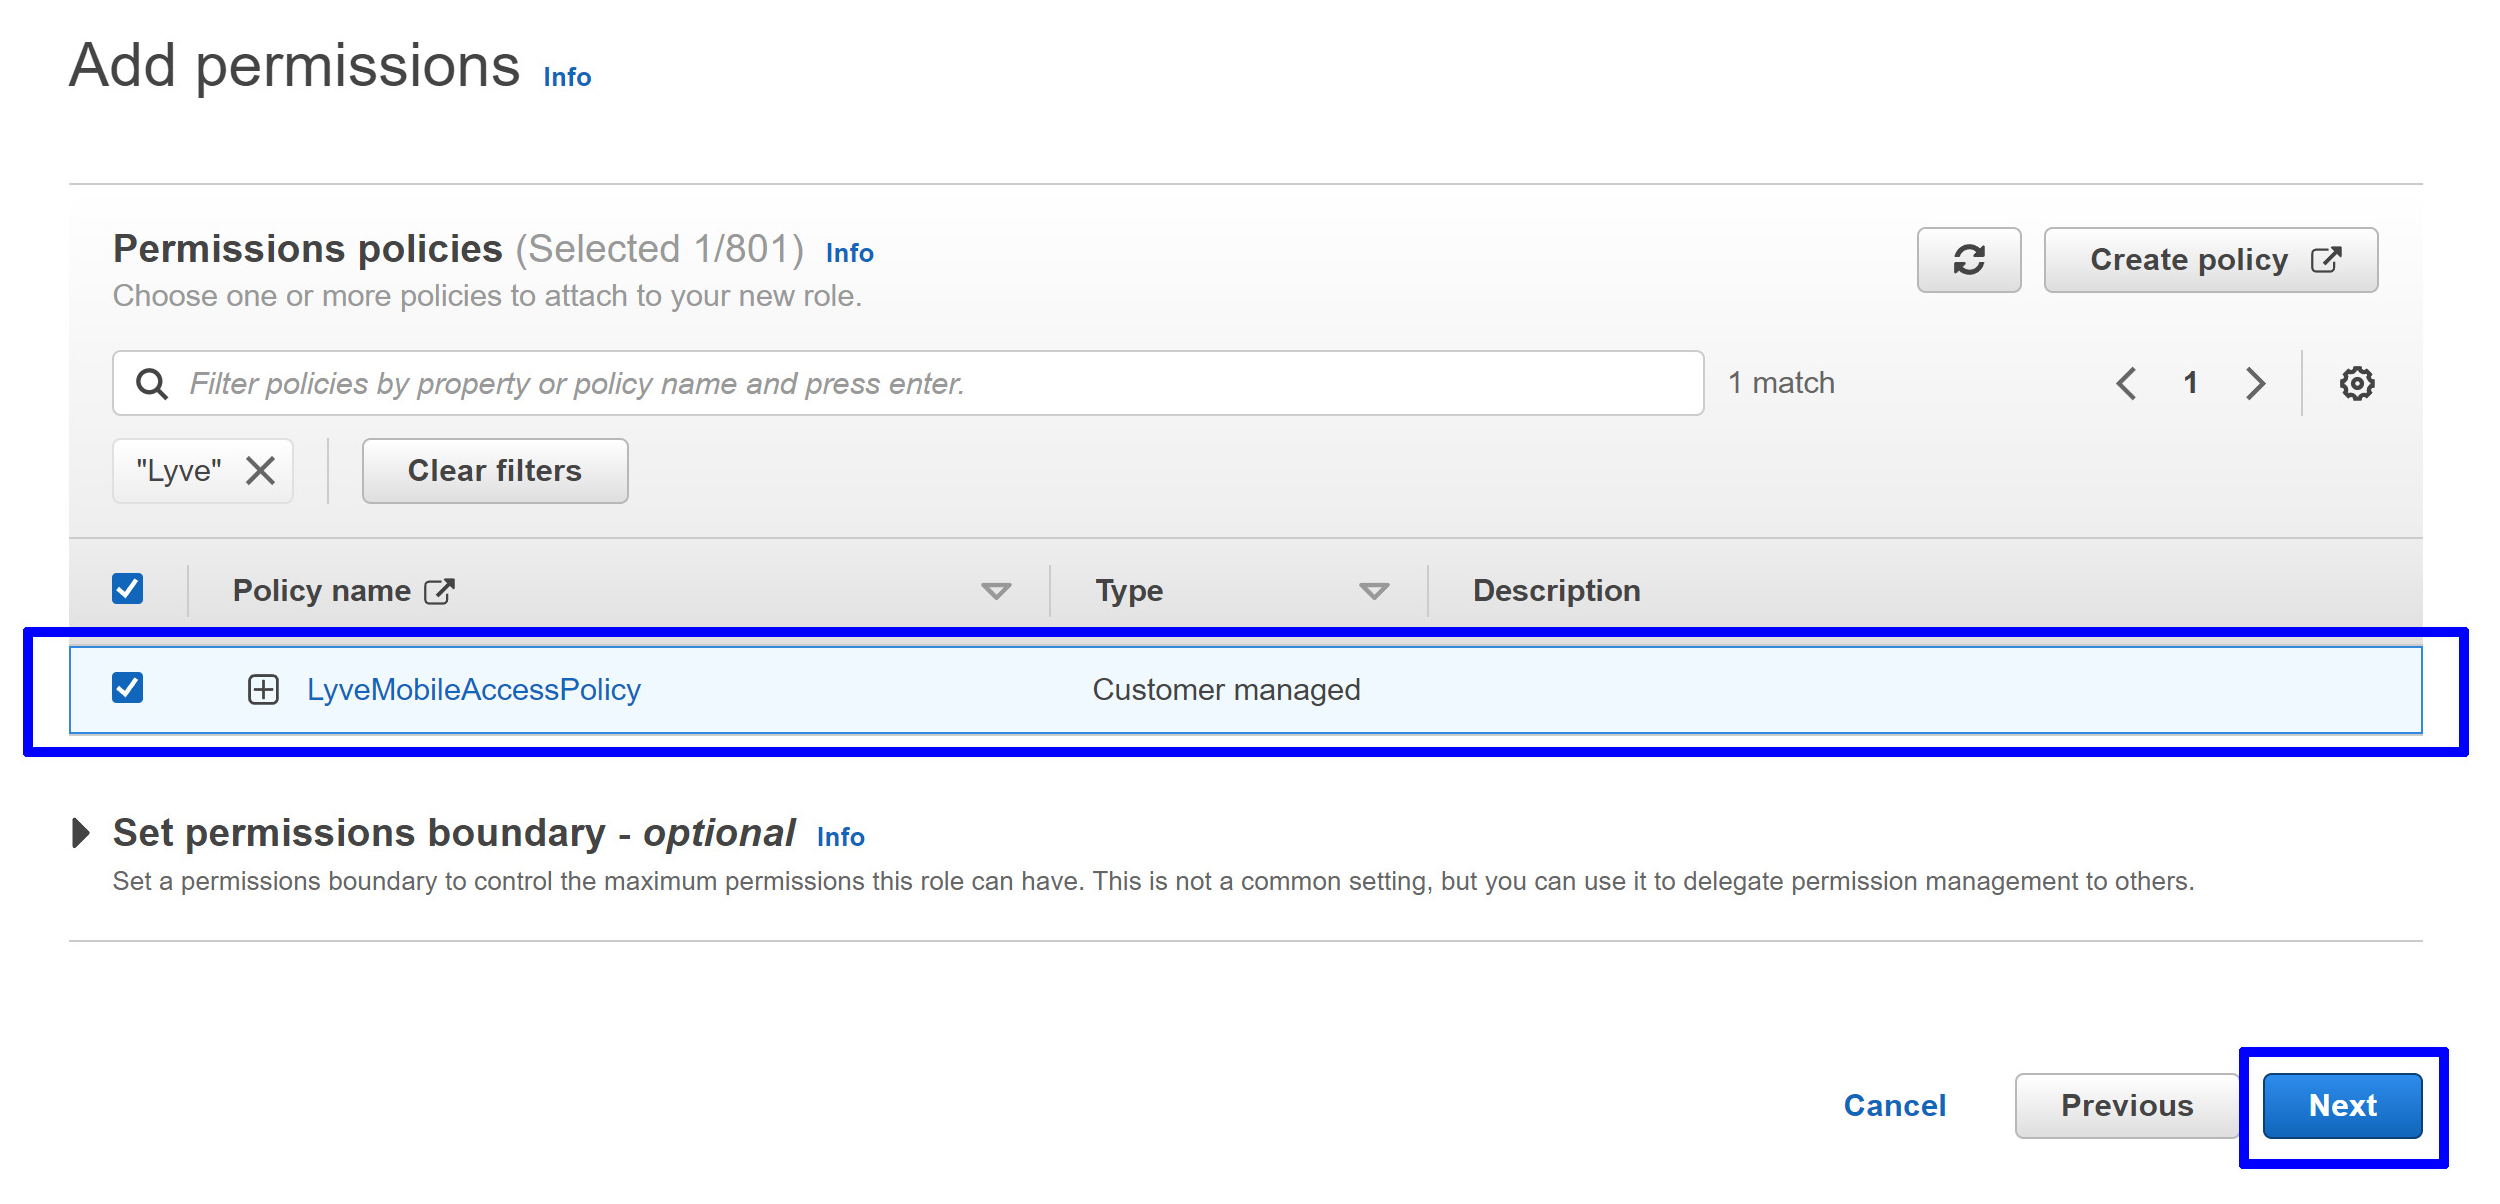
- On the Add permissions page, add the LyveMobileAccessPolicy you created earlier and click Next.
- Click Next to exit the JSON editor.
- On the Add permissions page, add the LyveMobileAccessPolicy you created earlier and click Next.
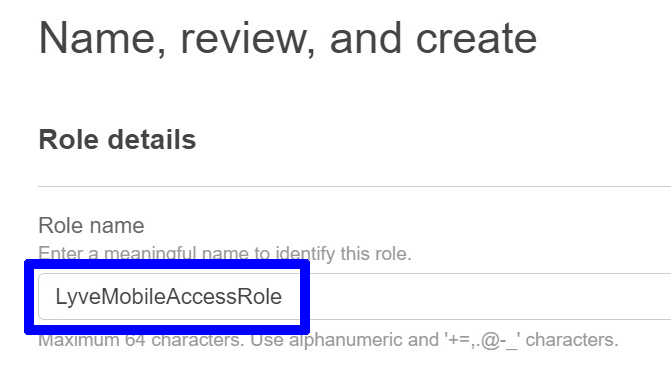
- On the Name, review, and create page, enter a Role name, for example, LyveMobileAccessRole.
- Review the trusted entity and permissions information:

{
	"Version": "2012-10-17",
	"Statement": [
		{
			"Effect": "Allow",
			"Principal": {
				"AWS": "arn:aws:iam::{accountid}:root"
			},
			"Action": "sts:AssumeRole",
			"Condition": {
				"ForAnyValue:StringEqualsIfExists": {
					"sts:ExternalId": [
						"{externalid}"
					]
				}
			}
		}
	]
}
If you have multiple import plans to configure, add the external ID for each plan separated with a comma (,). For example:
{
	"Version": "2012-10-17",
	"Statement": [
		{
			"Effect": "Allow",
			"Principal": {
				"AWS": "arn:aws:iam::{accountid}:root"
			},
			"Action": "sts:AssumeRole",
			"Condition": {
				"ForAnyValue:StringEqualsIfExists": {
					"sts:ExternalId": [
						"{firstexternalid}",
    						"{secondexternalid}",
    						"{thirdexternalid}"
					]
				}
			}
		}
	]
}
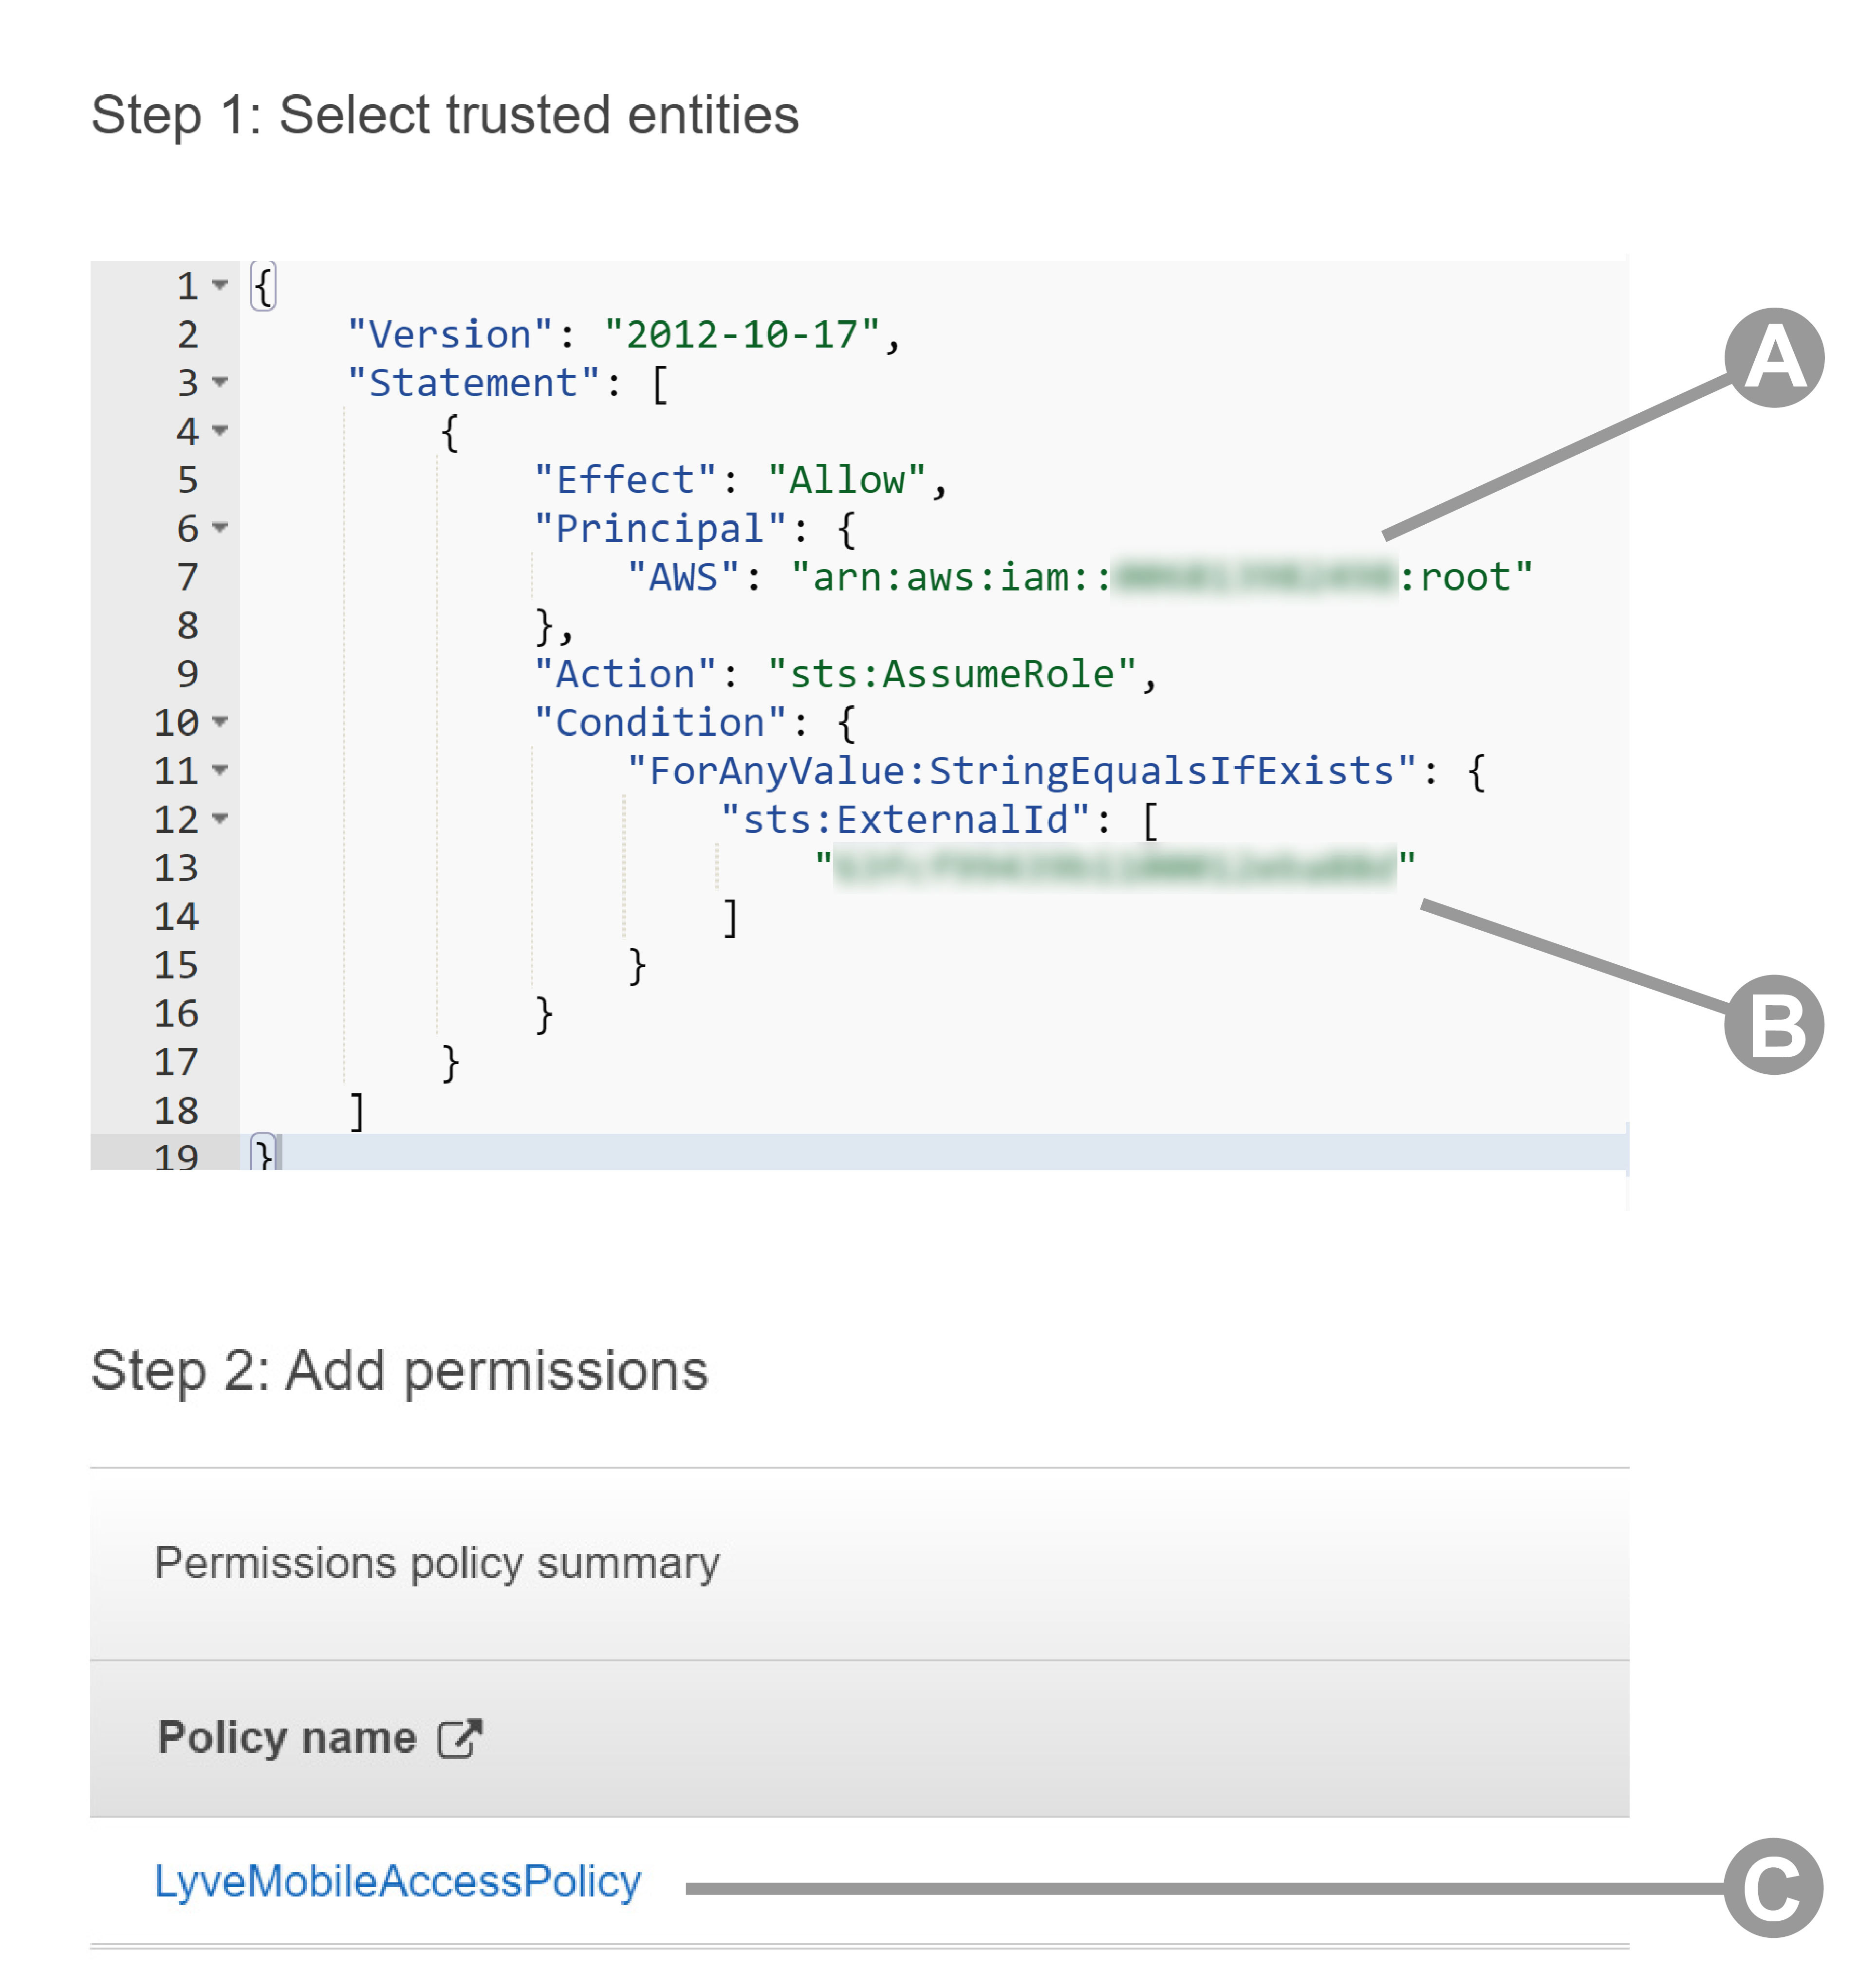
Ensure the following
- “AWS” is paired with the value you copied for Lyve’s S3 Account ID.
- “sts:ExternalID” is paired with the value you copied for External ID.
- The Policy name is the LyveMobileAccessPolicy you created earlier.
Configure your import plan
After you’ve completed the prerequisites above, return to Lyve Management Portal and enter your access details.
- On your Home page, select Subscriptions from the sidebar.
- Select a Lyve Mobile service subscription from the list that includes a Cloud Import plan.
- Select Import Plans in the sidebar, or select the link at the top of the page:
- Select the + Credentials button in the upper right corner of the page.
- Confirm your AWS S3 cloud destination and region, and then select Next.
- Enter your Account ID and specify an existing bucket for the subscription. Select Validate Credentials.
- To enable the checkbox, select the IP Address Access Guide link.
- Check the checkbox, and then select Submit.
Inviting another user to configure an import plan
If a different member of your Org needs to configure the import plan for a Lyve Mobile subscription, you can invite them to do so in Lyve Management Portal.
- The person must be a member of the Org containing the Lyve Mobile subscription to which you want to add the import plan. See Manage Org members in the Lyve Management Portal User Manual.
- The member must be given the Manage Import Plans permission. See Manage subscription members in the Lyve Management Portal User Manual.
Naming guidelines
| Safe characters | |
|---|---|
| Alphanumeric characters | |
| 0-9 | numerals |
| a-z | lowercase letters |
| A-Z | uppercase letters |
| Special characters | |
| * | asterisk |
| ! | exclamation point |
| - | hyphen |
| ( | parenthesis (open) |
| ) | parenthesis (close) |
| . | period |
| ' | single quote |
| _ | underscore |
| Characters to avoid | |
|---|---|
| & | ampersand |
ASCII characters
|
|
| @ | at sign |
| \ | backslash |
| ^ | caret |
| : | colon |
| , | comma |
| { | curly brace (left) |
| } | curly brace (right) |
| $ | dollar sign |
| = | equal sign |
| / | forward slash |
| ` | grave |
| < | greater-than symbol |
| > | less-than symbol |
| % | percent sign |
| | | pipe or vertical bar |
| + | plus sign |
| # | pound character |
| ? | question mark |
| " | quotation mark |
| ; | semi-colon |
| space - sequences with spaces, especially multiple spaces, may be lost | |
| [ | square bracket (left) |
| ] | square bracket (right) |
Best practices
See the following knowledge base articles:
- Best practices for managing AWS access keys
- Security Best Practices for Amazon S3
- Access control best practices
- Creating Amazon S3 backups
- Restoring S3 data
Troubleshooting
See the following knowledge base article: