Was this content helpful?
How could we make this article more helpful?
Import to IBM Cloud
Prerequisites
Before you can configure and submit your import plan, make sure to complete the following steps so that Lyve Import Service can securely access your specified IBM Cloud bucket to import your data:
IBM Cloud subscription—Set up an IBM Cloud Platform account.
Object Storage instance—Set up a storage instance. To learn more, see Choosing a plan and creating an instance.
IBM Cloud bucket— Set up a dedicated bucket for your import. To learn more, see Create some buckets to store your data.
IP address access—If configured by your organization, list Seagate’s IP address(es) as an allowed source. See IP Address Access.
Seagate authorizations—See below.
Seagate authorizations
Seagate requires permissions to read, write, and list to your bucket to perform the import. Hash-based message authentication code (HMAC) keys using an Access Key ID and Secret Access Key are required to authenticate requests to your cloud resources. To generate the HMAC keys, follow the steps below after creating your bucket:
- In your Object Storage instance, click the Service credentials tab.
- Click the New Credential button.
- Name the credential and make the following selections:
- Role = None
- Service ID = Auto Generated
- Include HMAC Credential = On

Click the Add button. Once added, you can expand the credentials to view the values for the Access Key ID and Secret Access Key.

Proceed through the steps below to edit the access policy for the service ID:
- Navigate to the IAM console by clicking Manage > Access (IAM). Click Service IDs in the side panel. Click on the service ID you want to edit.
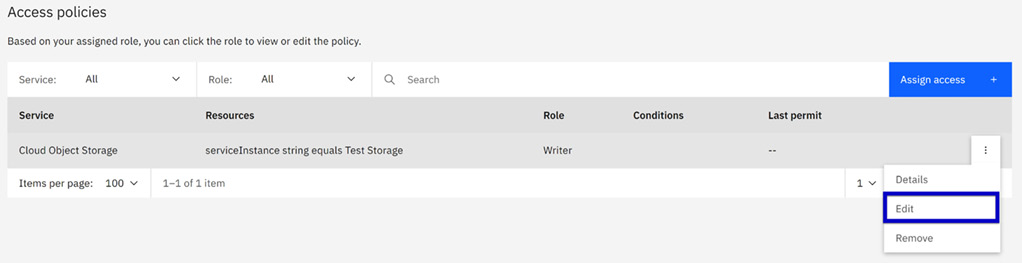
- Under Access policies, locate the role with the access policy you want to edit. Click the Actions icon and select Edit.
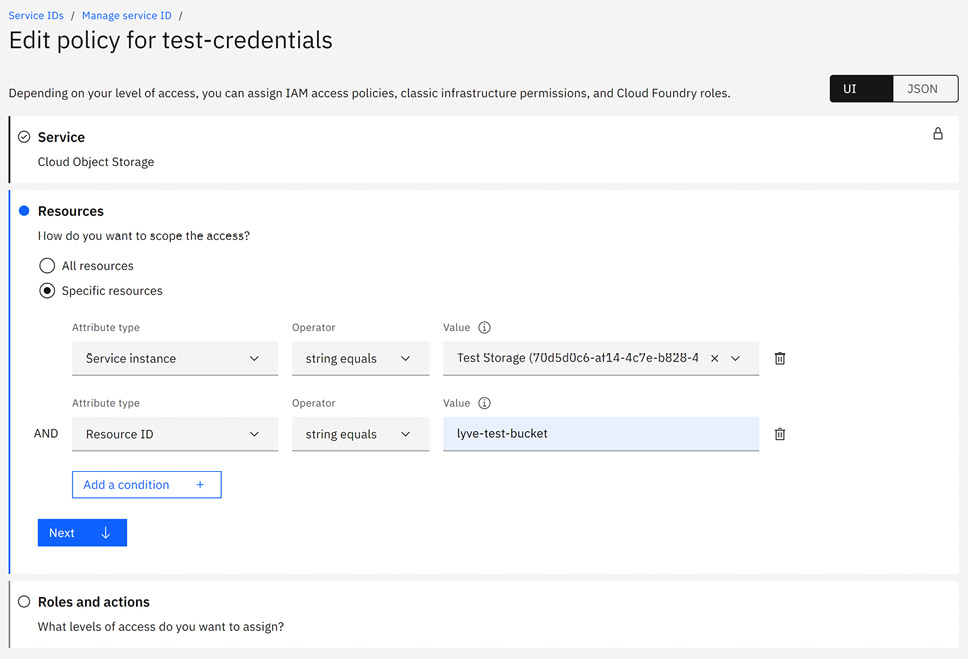
- Click on the Resources tab and select Edit. Select Specific resources and add conditions to scope access to specific resources.
- Click Next to continue to the Roles and actions tab. In the Service access column, assign the Writer role. Click Review.
- Click Save.

Recommendations
Seagate strongly recommends the following best practices:
- Create a bucket dedicated to your import plan.
- When creating your bucket, select “Regional” for resiliency.
- Block all public access for your bucket.
- Disable or delete the HMAC key after the import plan has ended.
Configure your import plan
Add your cloud destination credentials and bucket information to configure your cloud import plan.
- All devices within a subscription must be imported to the same destination and region.
- You will be required to enter and validate your bucket credentials.
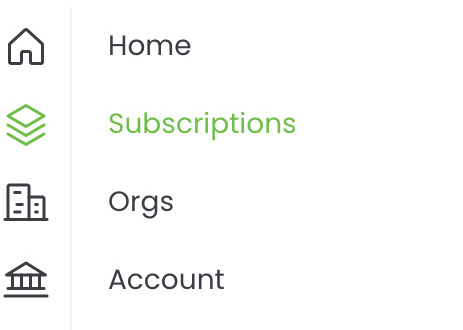
- On your Home page, select Subscriptions from the sidebar.
- Select a Lyve Mobile service subscription from the list that includes a Cloud Import plan.
- Select Import Plans in the sidebar, or select the link at the top of the page:

- Confirm the Cloud Destination and Region. Select Next.
- Add the Access Key ID and Secret Access Key for your cloud destination. Specify an existing bucket for the subscription. Select Validate Credentials.
- To enable the checkbox, select the IP Address Access Guide link.
- Select the checkbox, and then select Submit.
Inviting another user to configure an import plan
If a different member of your Org needs to configure the import plan for a Lyve Mobile subscription, you can invite them to do so in Lyve Management Portal.
- The person must be a member of the Org containing the Lyve Mobile subscription to which you want to add the import plan. See Manage Org members in the Lyve Management Portal User Manual.
- The member must be given the Manage Import Plans permission. See Manage subscription members in the Lyve Management Portal User Manual.
Naming guidelines
Bucket naming guidelines:
- Must be unique across the whole IBM Cloud Object Storage system.
- Do not use any personal information (any part of a name, address, financial or security accounts or SSN)
- Must start and end in alphanumeric characters (3 to 63)
- Characters allowed: lowercase, numbers and nonconsecutive dots and hyphens
- Avoid using these characters: / \ “ ? < > 1 . This will not cause issues with IBM Cloud Object Storage but may cause issues with your applications.
Object naming guidelines:
- Object keys can be up to 1024 characters in length, and it’s best to avoid any characters that might be problematic in a web address. For example, ? , = , < , and other special characters might cause unwanted behavior if not URL-encoded.
Troubleshooting
See the following knowledge base articles: