VMware ESXi Version 5.1.0 Build 799733 and VSphere Client Version 5.1.0 Build 786111 were used for this article.
Step 1: Use the Dashboard to create an NFS Public Share
1.1 Log into Dashboard using Seagate NAS Discovery or by entering the IP address of the NAS device in the address bar of a web browser.
1.2 From the left sidebar, select Network, then Web Services.
1.3 At the NFS Service box, check Enable.
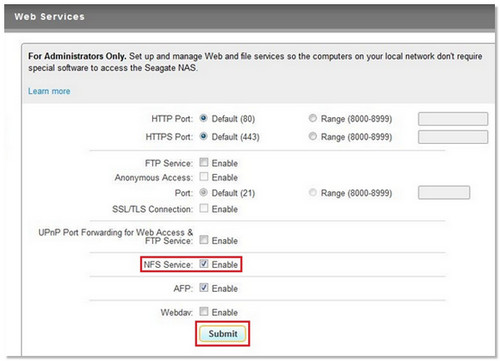
1.4 Click Submit.
1.5 From the left sidebar, select Storage, then Shared Folders.
1.6 Select Add Shared Folder.
1.7 Enter the following information:
- Share Folder Name
- Description
- At Services, check the NFS box.
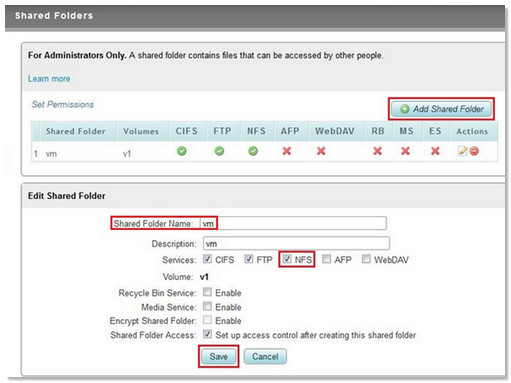
1.8 Click Save.
Step 2: Configure network configurations
2.1 Confirm that at least one (Seagate recommends two or more, for redundancy) of your Ethernet port(s) is/are configured for the Subnet for which the Seagate Business NAS is configured.
2.2 If you are using static IP addresses, you will have to manually input the following values on the ESX server when you are creating a new vSwitch for NFS:
- IP Address
- Subnet Mask
- Gateway
Step 3: Create a new vSwitch for NFS Network Traffic (implemented on the ESX Server using the vSphere Client)
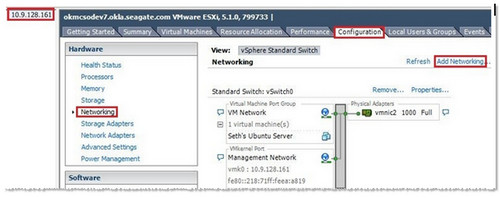
3.1 Click on the ESX server’s IP Address in the top left corner.
3.2 Select the Configuration tab.
3.3 In the left sidebar, select Networking.
3.4 In the upper right corner, select Add Networking.
3.5 Select VMkernel and then Next.
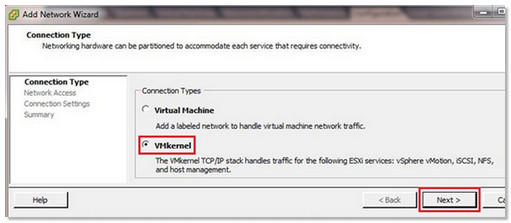
3.6 Select the checkbox for the vmnic(s) that have been configured with the NFS Subnet used on the Seagate Business NAS in Step 1, then select Next.

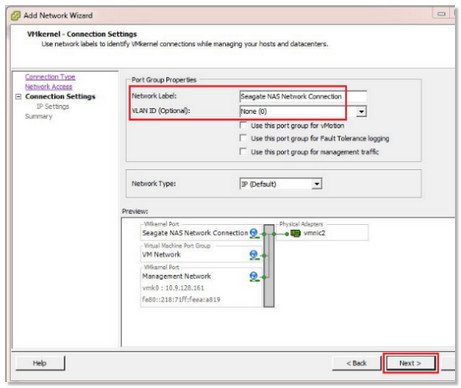
3.7 At the Port Group Properties window, fill in the following information:
- Network Label - Enter any name to describe the Port Group.
Example: Seagate Business NAS Network Connection - VLAN ID (optional) - Leave at the default value (None (0)) unless the Ethernet port has been configured with multiple VLANs. If that is the case, enter the VLAN ID for the Seagate Business NAS Device.
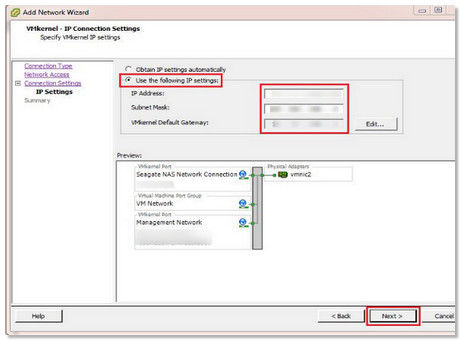
3.8 At the IP Settings window, select Obtain IP settings automatically if your Seagate Business NAS is using DHCP. If not, check the Use the following IP settings: button and enter the VM kernel IP Address, Subnet Mask, and VM kernel Default Gateway.
Then select Next.
3.9 Summary Page - Confirm the details are correct and then click Finish.

Step 4: Add the NFS Datastore
If you have a Virtual Center Server, then the following applies:
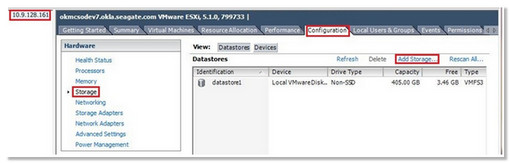
4.1 In the left sidebar, select ESX server IP Address.
4.2 Select the Configuration tab.
4.3 In the left sidebar, select Storage.
4.4 Select Add Storage in the upper right corner.
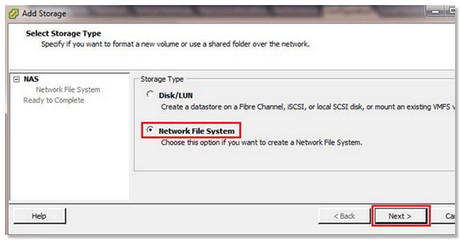
4.5 Select Network File System, then click Next.
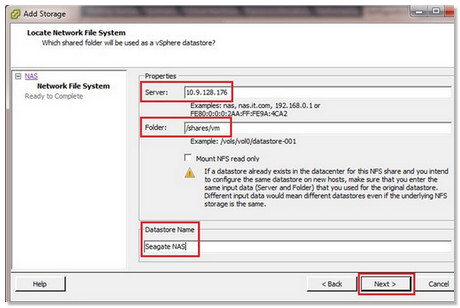
4.6 At the Server window, enter the following information:
- Seagate Business NAS IP Address - 10.9.128.176
- Folder - /shares/vm (where vm is the share name)
- Datastore Name - Enter any name for that specific NFS Mount
Then click Next.
4.7 Review the summary and and click Finish.
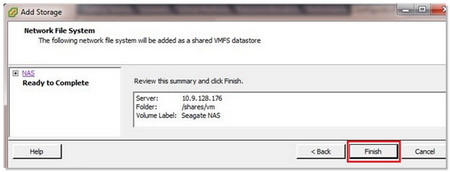
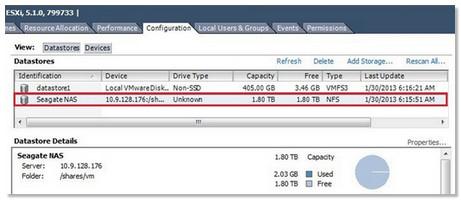
The NFS Datastore is created and mounted. ISO images can be uploaded to the Datastore and Virtual Machines can now be created.
Adding ISOs or images to the Seagate Business NAS NFS Datastore
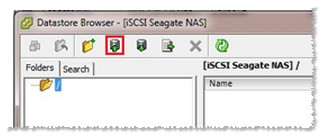
- Right-click on the Seagate Business NAS Datastore and choose Browse Datastore...
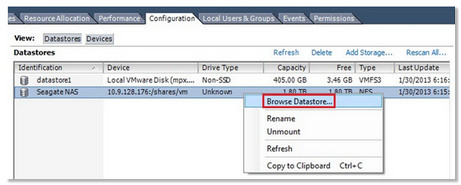
- In the Datastore Browser, click the Upload button.

Creating an iSCSI Datastore
- Log into Dashboard using Seagate NAS Discovery or by entering the IP address of the NAS device in the address bar of a web browser.
- From the left sidebar, select Storage, then Virtualization (iSCSI).
- Select the iSCSI Target Service to Enable and click Save.
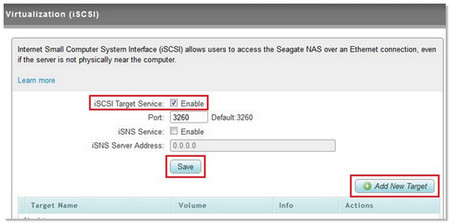
- Click the Add New Target button.
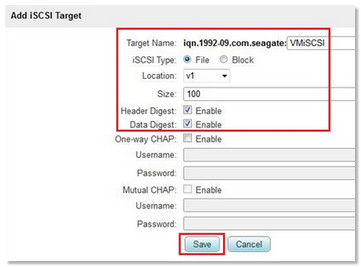
- At the Add iSCSI Target window, enter the following information:
- Target Name: According to your preference.
Example: VMiSCSI - iSCSI Type: File is the value used in this example.
 iSCSI type File is more simplistic than Block type. iSCSI File type provides a centralized, highly available, and accessible place to store files and folders.
iSCSI type Block provides more flexibility and versatility, but requires that you create a RAW volume on the Seagate Business NAS first. The RAW volume will then be a choice in the Location drop-down when Adding the iSCSI Target. - Location: Choose the volume name from the drop-down menu.
- Size: Select the number of GB you want.
- Header Digest: Enable.
- Data Digest: Enable.
It may take time to create the iSCSI Target depending on the size. Wait for completion before continuing setup.
- Target Name: According to your preference.
iSCSI Target/Drive setup in the Seagate Business NAS has now completed.

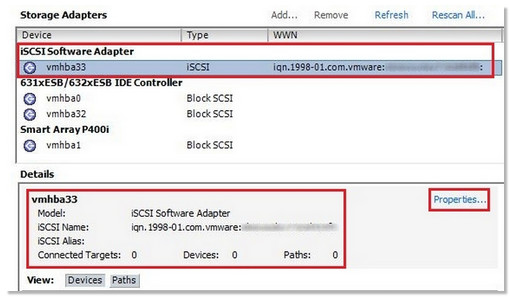
Adding an iSCSI Storage Adapter using the vSphere Client
- Click the ESX server or its IP Address in the top left menu.
- Select the Configuration tab.
- Select Storage Adapters on the left.
- Select Add...

- At the Add Storage Adapter pop-up, select OK.
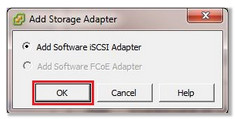
A new software iSCSI adapter is added to the Storage Adapter list.

- Highlight the iSCSI Software Adapter and click Properties.
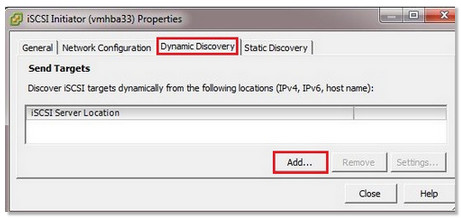
- Select the Dynamic Discovery tab and click Add.
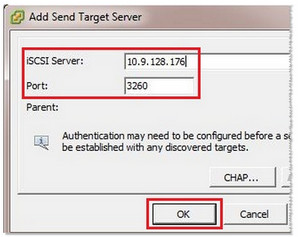
- In the Add Send Target Server box, enter the Seagate Business NAS IP Address and Port: number, then click the OK button.
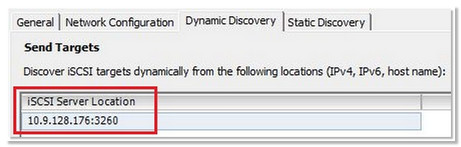
The target is discovered.
- Click the Yes button if the following prompt displays: "A rescan of the host bus adapter is recommended..."

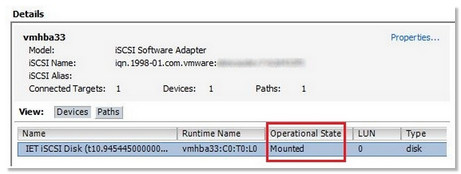
The iSCSI Disk displays as Mounted.
Adding the iSCSI Target as a Datastore
- In the left sidebar, select Storage.
- Select the Configuration tab.
- Select Add Storage...

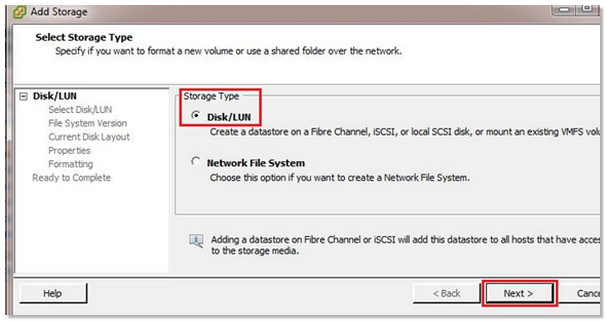
- Select Storage Type.
- Select Disk/LUN and then Next.
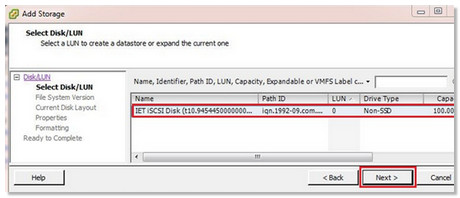
- Select the desired Disk/LUN and then Next.
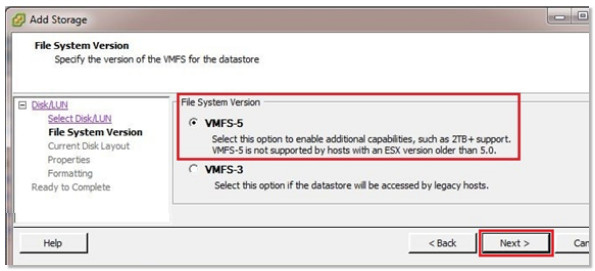
- Specify the version of the VMFS (VMware File System) for the Datastore.
- VMFS-5 - This option enables additional capabilities, such as 2TB+ support. VMFS-5 is not supported by hosts with an ESX version older than 5.0.
or - VMFS-3 - This option is best if the datastore will be accessed by legacy hosts.
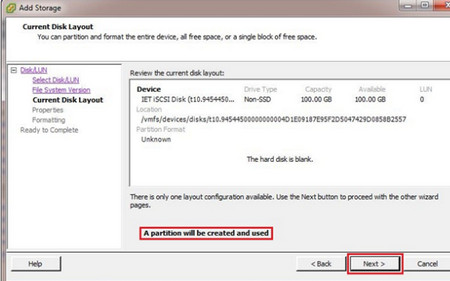
A partition is created. - VMFS-5 - This option enables additional capabilities, such as 2TB+ support. VMFS-5 is not supported by hosts with an ESX version older than 5.0.
- Select Next.
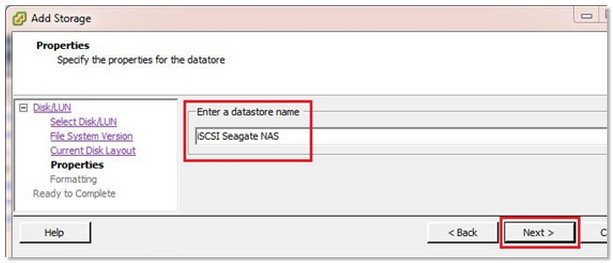
- Enter a Datastore name.
Example: iSCSI Seagate NAS
Once done, click Next.
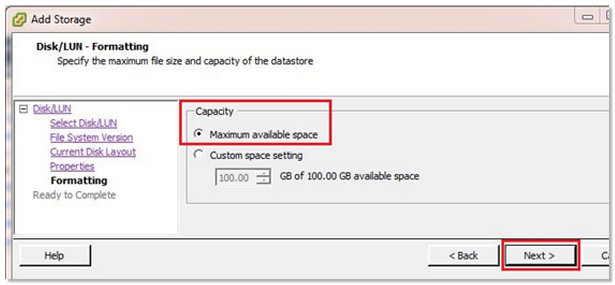
- Select Maximum available space and click Next.
- Review the Disk layout and when ready, click Finish.
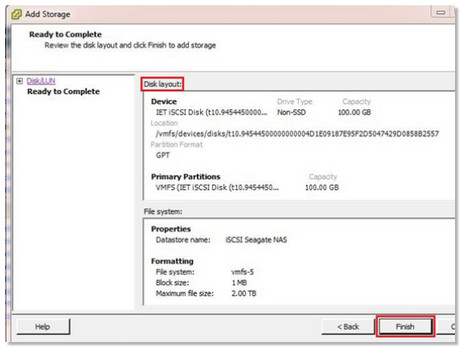
iSCSI VMFS Datastore setup is complete.
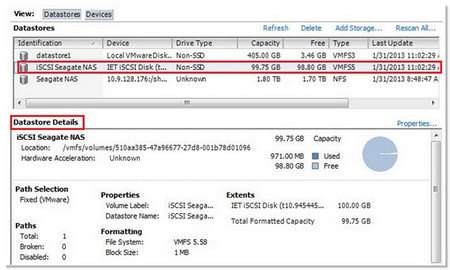
The iSCSI Datastore was successfully created and mounted. ISO images can be uploaded to the Datastore and Virtual Machines can now be created.
Adding ISOs or images to the Seagate Business NAS iSCSI Datastore
- Right-click the iSCSI Datastore and select Browse Datastore.
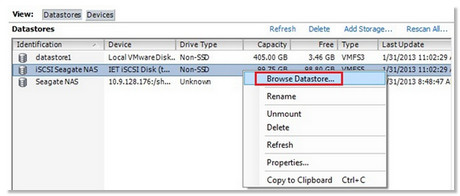
- In the Datastore browser, click the Upload icon.