


See the knowledge base article below for Frequently Asked Questions and their answers about the Lyve Mobile Array hardware.
More information can be found in the User Manual, and in the Lyve Mobile Solutions FAQ (general), and the Lyve Client FAQ (software):
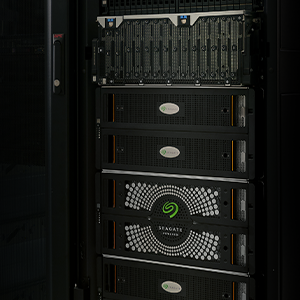
Q: What is the Lyve Mobile Array?
A: Seagate Lyve Mobile Array is a portable, rackable data storage solution designed to store data quickly and securely at the edge or move data across your enterprise. Both the full-flash and hard drive versions enable universal data compatibility, versatile connectivity, secure encryption, and ruggedized data transportation.
Q: Does the Mobile Array come in an SSD configuration?
A: Yes, there are both HDD (Hard Disk Drive) and SSD (Solid State Drive) options.
Q: Which operating systems support the Mobile Array?
A: Multiple operating systems are supported:
-
Windows 10, version 1909 or Windows 10, version 20H2 (latest build)
-
macOS 10.15.x or macOS 11.x
Q: What are the physical dimensions of the device?
A: Length—16.417 in/417 mm
Width—8.267 in/210 mm
Height—5.787 in/147 mm
Q: How do I use my Mobile Array as a direct attached storage (DAS)?
A: Use the following ports when connecting Lyve Mobile Array to a computer:
-
Thunderbolt 3/USB-C (host) port—Connect to Windows and macOS computers
-
Thunderbolt 3/USB-C (peripheral) port—Connect to peripheral devices
-
Power input—Connect the power adapter (20V/13A)
-
Power button
Q: Which ports connect my Mobile Array when mounted in a Lyve Rackmount Receiver?
A: The following ports are used when Lyve Mobile Array is mounted in a Lyve Rackmount Receiver:
-
PCIe (Gen 3) port—Transfer substantial amounts of data to your private or public cloud with VASP technology for efficient throughput up to 6GB/s on supported fabrics and networks
-
Power input—Receive power when mounted in Rackmount Receiver
Q: Does the Mobile Array come with a shipping case?
A: Yes, a Pelican shipping case is included with Lyve Mobile Array.
Q: How do I authorize my computer to use my Mobile Array?
A: To Authorize computers to unlock and access a Mobile Array it is required to have a Lyve Management Portal username and password:
-
Account manager—You created a Lyve Management Portal username and password when you set up your Lyve account at lyve.seagate.com
-
Product admin or product user—You were identified as a product user for a project created in the Lyve Management Portal. An email was sent to you from the Lyve team that included a link for resetting your password.
An active internet connection is required when authorizing a host computer:
-
Open Lyve Client on a computer intended to host Lyve Mobile Array
-
When prompted, enter your Lyve Management Portal username and password
Lyve Client automatically authorizes the host computer to unlock and access Lyve devices and manage projects on the Lyve Management Portal.
Q: What are the connection options for the Mobile Array?
A: There are two available methods:
-
Lyve Mobile Array can be used as direct-attached storage
-
Lyve Mobile Array can also support connections via Fibre Channel, iSCSI, and Serial Attached SCSI (SAS) connections using the Lyve Rackmount Receiver
Q: How do I unlock the device from a host computer?
A: The LED on the device blinks during the boot process and turns solid orange. The solid orange LED color indicates the device is ready to be unlocked. Once Lyve Client has validated permissions for the device connected to the computer, the LED on the device turns solid green. The device is unlocked and ready for use.
Q: How do I power on/off my Mobile Array device?
A: Power on—A direct connection to a computer is not required to power on Lyve Mobile Array. It automatically powers on when connected to a power outlet.
Power off—Before powering off Lyve Mobile Array, make certain to safely eject its volumes from the host computer. Apply a long press (3 seconds) to the power button to turn off Lyve Mobile Array.
Q: How do I activate my Mobile Array with the Lyve Rackmount Receiver?
A: "1. Connect Ethernet port—Lyve Client communicates with devices inserted in Lyve Rackmount Receiver via the Ethernet management ports. Ensure that the Ethernet management ports are connected to the same network as the host devices running Lyve Client. If no device is inserted in a slot, there is no need to connect its corresponding Ethernet management port to the network.
2. Connect Lyve Mobile Array—Insert Lyve Mobile Array into slot A or B on Rackmount Receiver. Slide device in until it is fully inserted and firmly connected to Rackmount Receiver's data and power. Close latches.
3. Turn on power—Set the power switch on Lyve Mobile Rackmount Receiver to ON.
4. Unlock the device—The LED on the device inserted in Lyve Rackmount Receiver blinks during the boot process and turns solid orange. The solid orange LED color indicates the device is ready to be unlocked. To access Lyve Mobile Array and compatible devices, a Lyve Management Portal username and password must be entered in the Lyve Client app installed on the connected host computer. Once Lyve Client has validated permissions for the device connected to the computer, the LED on the device turns solid green. The device is unlocked and ready for use.
Q: Lyve Mobile Array will not unlock after logging into Lyve Client and/ or Lyve Hub gives error message " There could be a misconfiguration in the system or a service outage"
A: Go to System Preferences > Network > RNDIS/Ethernet Gadget. This connection should have a self-assigned APIPA (Automatic Private IP Addressing) IP address (starting with 169.254). If it does not, then follow these steps:
-
Delete this connection
-
Disconnect and reconnect the Thunderbolt cable from the computer
Q: How do I identify a connected Lyve Mobile device via LED?
A: "Click on the Devices tab to view devices that have been added to Lyve Client. It can identify a connected Lyve Mobile device for you by having it temporarily flash its LED. This is useful if you have a large bank of connected Lyve Mobile devices and you need to identify a particular device.
1. Hover your cursor over a Lyve Mobile device card and click on the Identify LED icon.
2. Observe the front faces of your devices to spot the one with the flashing purple LED.
3. Click the Identify LED icon a second time to turn off the identification."
Q: The Lyve Mobile Array is up in Disk Utility or Disk Management but does not mount?
A: About file system formats:
NTFS: since it is the native file system for Windows, volumes created in NTFS are read and write compatible with computers running Windows. Mac OS can read NTFS volumes but cannot natively write to them.
Mac OS Extended (HFS+): the native hard drive file system for Mac. Windows cannot natively read or write to HFS+ (journaled) hard drives.
exFAT: generally compatible with Mac and Windows. exFAT is not a journaled file system which means it can be more susceptible to data corruption when errors occur, or the drive is not disconnected properly from the computer.
FAT32: compatible with Mac and Windows. However, FAT32 is a legacy file system designed for low capacity hard drives and it is not recommended for modern hard drives or operating systems. A FAT32 partition can reach up to 32GB when formatted on a Windows PC.
How to choose the file system format:
Use NTFS if:
…the storage device is connected to Windows PCs.
Use HFS+ if:
…the storage device is connected to Macs.
Use exFAT if:
…the storage device is shared between Mac and Windows computers.
Use FAT32 if:
…the storage device is connected to older Windows and Mac computers. FAT32 is not recommended for modern operating systems and computers.
Q: How do I reformat the volume to HFS+ or NTFS?
A: " Caution: Formatting erases everything on the storage device. LaCie highly recommends that you back up all data on your storage device before performing the steps below. LaCie is not responsible for any data lost due to formatting, partitioning, or using a LaCie storage device.
Note: Refer to your operating system's documentation for more information on formatting and partitioning storage devices.
Windows
Make sure the storage device is connected to and mounted on the computer.
Go to Search and then type diskmgmt.msc. In the search results, double click Disk Management.
From the list of storage devices in the middle of the Disk Management window, locate your LaCie device.
The partition must be available to format. If it is currently formatted, right click on the partion and then choose Delete.
To create a new partition, right click on the volume and select New Simple Volume. Follow the on-screen instructions when the New Simple Volume Wizard appears.
Mac
Make sure the storage device is connected to and mounted on the computer.
Select Go > Utilities in the Finder menu bar.
In the Utilities folder, double-click Disk Utility. All connected storage devices, partitions or disk images are displayed in the left column.
Select the LaCie hard drive in the left column.
Click the Erase tab.
Choose a format from the drop-down window.
Enter a name for the volume.
Click Erase and confirm your selection in the pop-up window.
Q: Why is my USB-C performance less than 60MB/s
A: Use the USB-C to USB-C cable instead of the Thunderbolt 3 cable.