The BlackArmor NAS 400 Series 4-drive RAID 5 configuration can be upgraded to larger hard drives without data loss.
 This process may take 3-4 days to complete. It depends on drive size, used space, and the user's availability to manually remove drives and insert new drives when prompted by the Manager page. 40GB drives were used for the screen shots in this article.
- Before using the Enlarge feature, make sure that a backup of all data on the NAS has been completed.
- Log in as Administrator to the BlackArmor NAS Manager page.
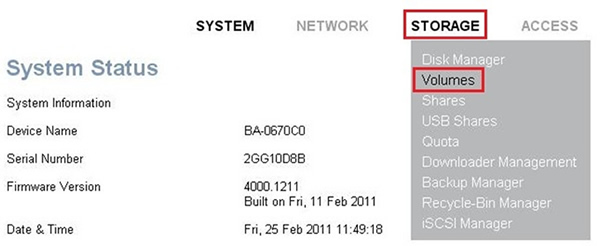
- Hover the mouse over Storage. In the dropdown menu, click Volumes.
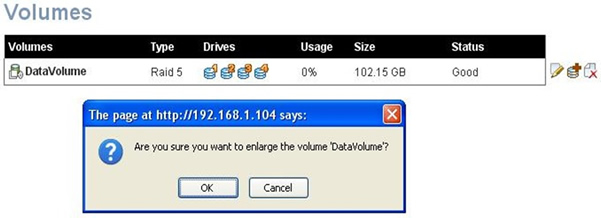
- Click the disk icon with the red plus (+) sign to begin the Enlarge process.

- The prompt will ask, "Are you sure you want to Enlarge the volume 'DataVolume'?"
Click OK.
 This process can not be cancelled once OK has been clicked.
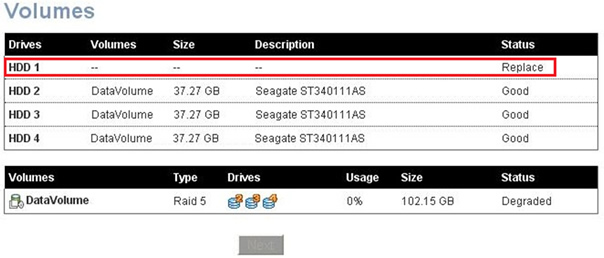
- The Volumes page changes. Click Next.

- The page will display Processing...

- The Volumes page instructs you to replace HDD 1, the first hard drive
.
- Open the front panel of the 400 series BlackArmor NAS. The green LED light below drive 1 will not be illuminated.

Removing HDD 1
 Before removing any hard drive, touch bare skin to the metal chassis on the back of the NAS to discharge static electricity or, preferably, wear a ground strap.
- Press down on the orange button to release hard drive 1 from the server.

- Holding the handle, gently slide the hard drive partially out of the server until you can get a firm grip on the drive itself. Then remove the drive from the server.
 The hard drive may be hot when removed.
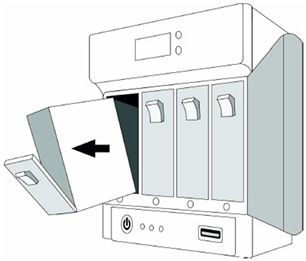
- Position (hold) the hard drive carrier so that the drive label is facing up and the text is readable (not upside down). Carefully bend the left side of the plastic carrier outward to release the drive from the carrier. Remove the hard drive from the plastic carrier enclosure.
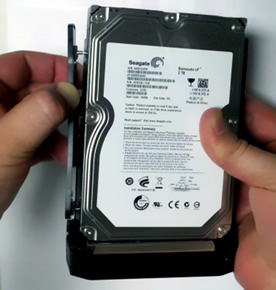
Installing the larger capacity hard drive
- Place the new hard drive into the carrier, ensuring that the four pins hold the drive securely in place.
- Carefully slide the new drive into the server. Push firmly to install it completely, and then close the handle to lock the drive in place.
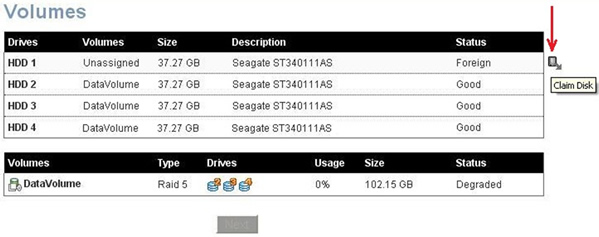
The hard drive's LED light should turn green in a few moments. - In BlackArmor Manager, the drive's status changes to Foreign when it is ready.
Click the Claim Disk icon, and then click OK. The drive's status will change to Good in 15-20 seconds.
- Click the Recover icon.
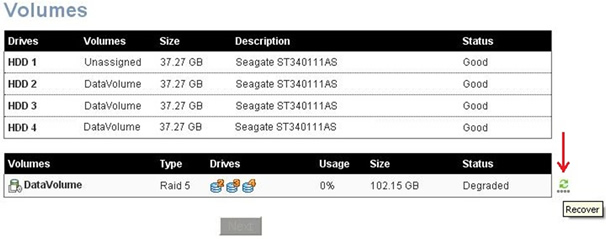
The Status will show a link Recovering. Clicking the link will show a pop-up Status box with the Rate of Progress, Estimate Time, and Disk Speed.
The recovery process time for each drive can vary widely based on drive size and data.
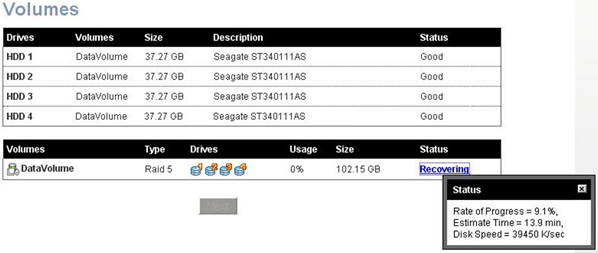
40GB drives were used for the screen shots in this article, so the Estimate Time / Completion Time is much lower than it would be if 2 and 3TB drives are used. - When the recovery process for HDD 1 completes, it will report a Good Status.
Click Next.
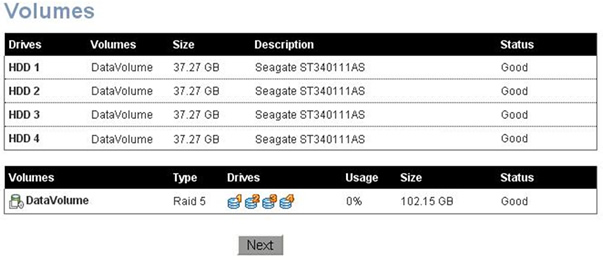
- The page will now show display Processing...

- After a few moments, HDD 2 will report Replace.
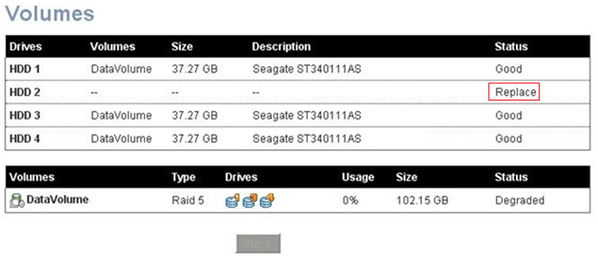
Use the instructions above, beginning at Step 10, to remove HDD 2, HDD 3, and HDD 4 when prompted. - When the recovery process for HDD 4 completes, it will report a Good Status.
Click Next. It will be reported that the RAID configuration was changed successfully - re-syncing/formatting are in progress. - Next, the NAS may begin a File System Check. Click the Checking link to receive a rate of progress.


