


Please follow this procedure to recover from a failed RAID in a Seagate Business NAS device:
- Log into Seagate NAS Manager using Seagate NAS Discovery or by entering the IP address of the NAS device in the address bar of a web browser.
- On the Manager home page, note the current firmware version.

- Check the current firmware version against the latest version available on the Seagate Website.
- Update the firmware if necessary. Note: It is always recommended that you have a good current backup before any firmware updates are done.
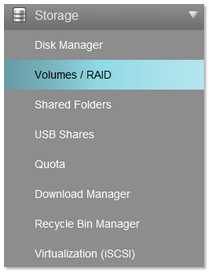
- Once any necessary firmware update is complete, select Storage in the left sidebar menu.
- Select Volumes / RAID.
- The Volume displays as Degraded or Failed.
Select the hammer and wrench icon ( ) under Actions.

- The Manager displays what precisely has failed. If the Volume has failed see the note at the bottom of this article.
- If the RAID is degraded: Go to Disk Management and look to see what disk has failed. Note: If the volume shows as degraded make sure you have a current backup before trying to rebuild the Volume/Raid
- Replace the failed drive.
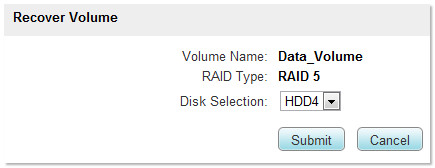
- Go back to Volumes/RAID and choose the recover option
- Under Disk Selection select the disk you would like to use to rebuild the volume.
- Select Submit after you verify the drive/RAID.
The Recover Volume process begins. You will no longer be able to access the NAS until the process has completed.
A status indicator displays the current progress.
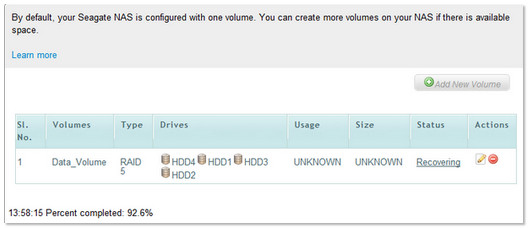
Recovery time will vary greatly depending on the type of RAID, number of drives and their size. While it may only take a few hours to recover a RAID 1 with two hard disks, a RAID 5 with four 4TB drives can take several hours. Seagate recommends that you plan your recovery accordingly.
Note: If the volume has failed and you did not have a current backup, you will need to contact Seagate's data recovery department. You can also contact your preferred data recovery specialist. If you have a current backup of your data, you will need to shut the system down pull the drives out and attach them to a Windows machine. Once they are connected, verify the disk number of the drives. From a Command Prompt, diskpart the drives. Once the drives have been cleaned (Step 5), put them back in the NAS and boot the unit up. When the unit comes back online you can create a new volume. This process will help eliminate the risk of data corruption.
Follow these steps to diskpart your drive using Command Prompt.
First check what number the drive is detected as in your list of disks in your disk management utility. To access Disk Management, right click on( My) Computer, go to Manage, and then choose Disk Management. Within Disk Management, the drive should show in your list of disks in the lower portion of Disk Management (Disk 1,2 3 etc etc). Take note of the disk number for the drive. You will need it shortly.
**All data on the hard drive will be erased during this procedure.**
1 Go to DOS command line:
-In Windows 7/Vista, click the Windows icon and then type cmd in the search field and press Enter.
-In Windows XP, click the Start menu, select Run, then type cmd and press Enter.
2 In the command line, type:
DiskPart
and press Enter.
3 Type:
list disk
and press Enter to show all disks in this machine.
4 Figure out which disk you want to erase - it will be identified with a number.
Then type:
select disk X
where “X” is the number of the disk you want to erase. This will set the focus to the specified drive
For example:
select disk 2
Press Enter
5 Type:
clean
and press Enter to erase the disk.
6 Repeat with all drives you need to clean this way.
Note: You should leave the drives blank and not reformat them. Windows might prompt you to format the drives but you should put them as-is inside the NAS. The NAS will format the drives properly in a Linux format and will then build the RAID