


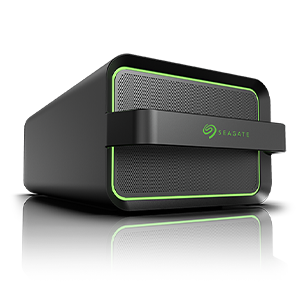

4-Bay NAS empty enclosure
Prepare the NAS OS installer
The included USB key is shipped with software installers to set up your NAS. Seagate periodically adds new features to software and recommends updating the key before proceeding:
- Go to http://www.seagate.com/naskey to download the installer.
- Launch the installer and follow the on-screen instructions.
Step 1 - Rack

Install your rack rails or rack kit per the instructions of the manufacturer. Make certain that your rack rails and rack support the weight of the 4-bay Rackmount NAS (12Kg/26.5 lb.).
Important info: Seagate is not responsible for damage to the NAS or other equipment due to the use of improper or faulty third-party racks and/or rack rail systems or rackmount kits/shelves.
Step 2 - Cables

Connections
- Ethernet
- Power cable
You can also connect:
- A second Ethernet cable for redundancy or performance.
- A mouse, a keyboard and a VGA monitor for maintenance.
Cable management: Careful management of cables is recommended for optimal operation. It prevents potential hazards and allows for easier maintenance.
Network and power

- Connect the Ethernet cables to your router.
- Connect the power cable to an outlet.
Step 3 - USB Key and Power
- Connect the Seagate USB Key to the front USB port.
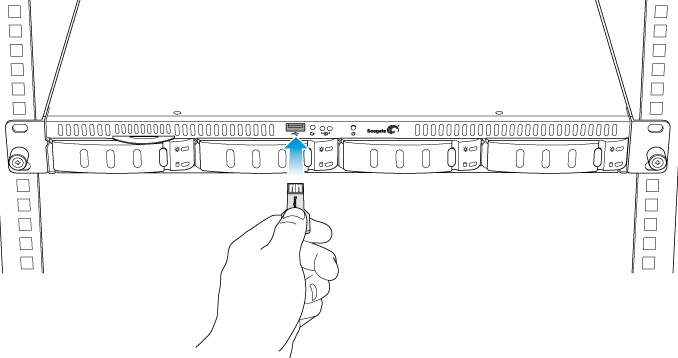
- Power on the NAS.
Step 4 - Install the drives
Before installing the drives, consider the following:
- Insert disks from left to right.
- Empty trays must stay in the bays for proper airflow.
- Make certain that you are properly grounded before touching the disks.
- Unlock and remove the empty disk tray from the 4-bay Rackmount NAS.
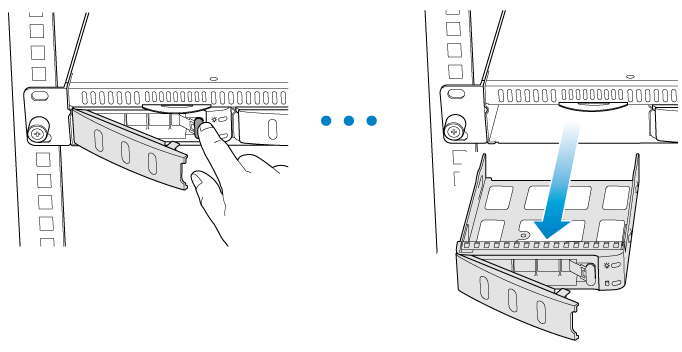
- Release the placeholder from the disk tray by squeezing the brackets inward and lifting up.

- Insert the drive into the tray. Confirm that the SATA connection is at the rear of the tray.

- Screw the drive to the tray, two screws on each side.

- Insert the disk into the empty bay as far as it will go before closing the tray handle.
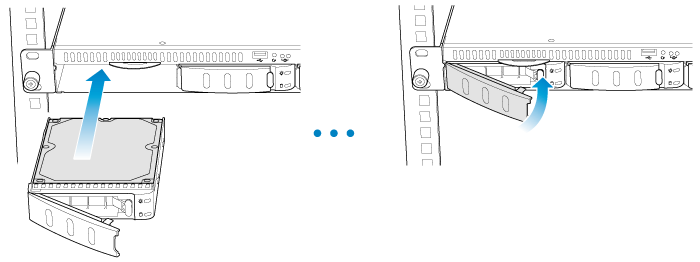
- Repeat the steps for each disk.
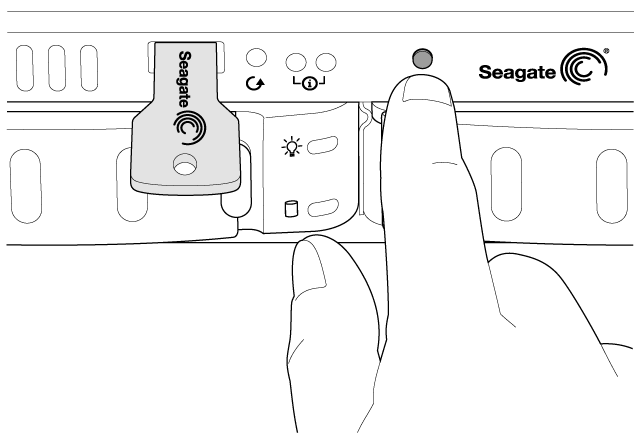
Step 5 - MAC address
- You will be prompted to enter the NAS’s MAC address in the next step. Slide out the label on the front of the
NAS and note one of the MAC addresses.

Step 6 - Log on to the NAS
Confirm that the status LED is solid blue before following the steps below.
- Launch a web browser from a computer on the network.
- Enter http://seagate-r4 or, http://seagate-r4.local for Mac or any workstation using Bonjour®.

- Follow the on-screen instructions to complete the installation.

Should you want to view the Manual in its full version please click here