


Please follow this procedure to restore the Business Storage Windows Server Network-Attached Storage device to its factory default values.
- Power down the NAS device.
-
Locate the flash drive (key) that was originally packaged with the NAS unit.
-
Connect the following items to the NAS device:
- A computer monitor (since Remote Desktop will not work)
- A keyboard
- The USB flash key
- Power on the NAS device.
-
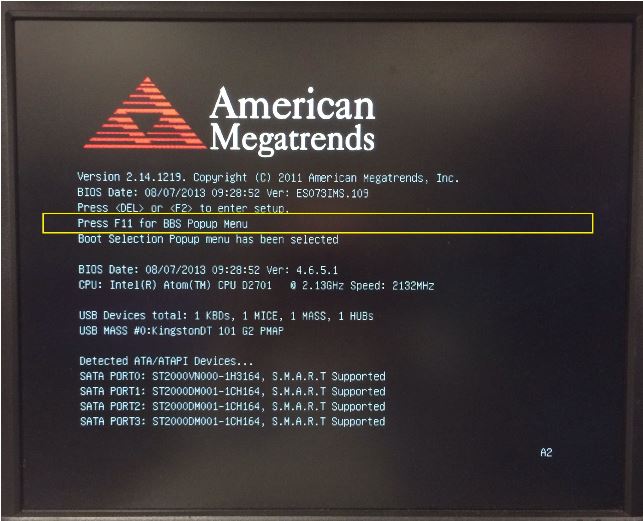
While the unit is rebooting, hold the F11 key.
-
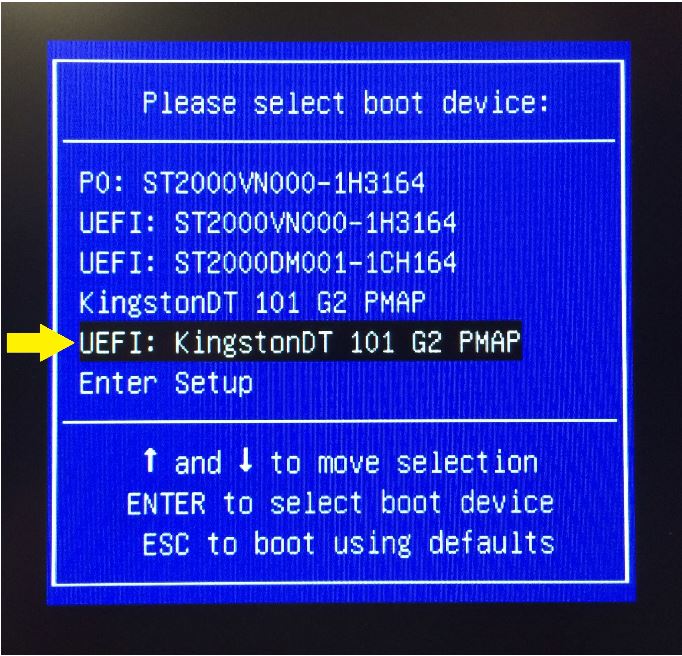
Choose the USB Device to boot from.
NOTE: The USB Flash Drive will show twice. Be sure to choose the USB drive that has UEFI: in front of it.
-
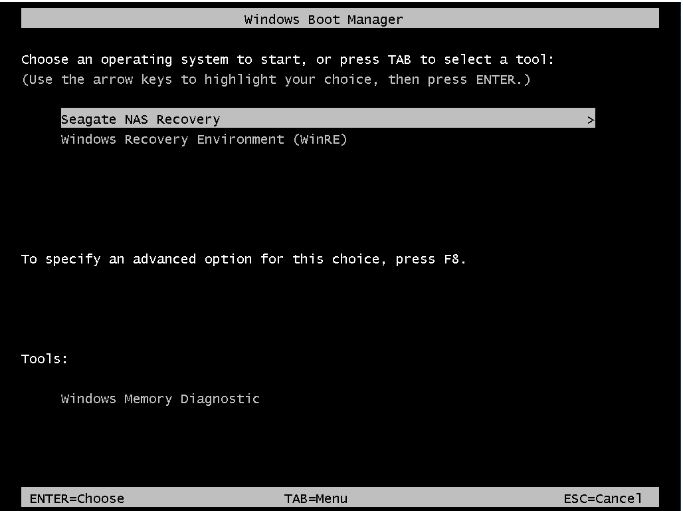
Select the Seagate NAS Recovery operating system from the Windows Boot Manager
-
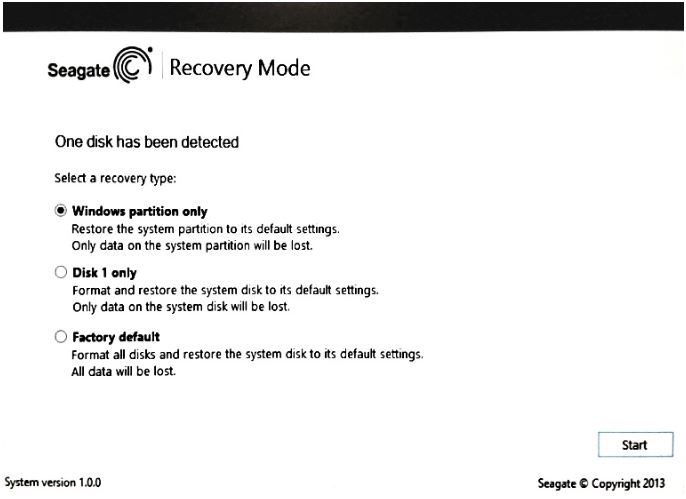
Select one of three options for the system recovery:
-
Windows partition only
This option restores the system partition to default setting.
WARNING: All data on the system partition will be erased.
-
Disk 1 only
This option formats and restores the system disk to its default settings.
WARNING: All data on the system disk will be erased.
-
Factory Default
This option formats all disks and restores the system disk to its default settings.
WARNING: All data on the NAS device will be erased.
-
Windows partition only
-
An acknowledgement statement appears, informing you of the upcoming action.
Press the Start button to proceed.
The restore process begins. The time required depends on the amount of data on the selected unit.
When the restore process is complete, the unit asks you to remove the USB key. - Remove the USB key and select Reboot.
- Proceed to set up the unit again, depending on which factory reset option you performed.