
IMPORTANT: This article applies to the following macOS versions:
- macOS 10.15 (Catalina)
- macOS 10.14 (Mojave)
- macOS 10.13 (High Sierra)
Need Help?
- Not sure which version you are using? Click here to determine your version of macOS
- Not seeing your version of macOS? Click here to see other versions of macOS and different formatting options
It is important to keep the following in mind when formatting to APFS:
- APFS is not officially supported for macOS versions prior to 10.13 (High Sierra), and will not mount on 10.12 and earlier
- APFS is only available when Scheme is set to ‘GUID Partition Map’, APFS will not be shown when Scheme is set to Master Boot Record – See Step 6
- APFS formatted external drives are not compatible with Time Machine on macOS versions High Sierra to Catalina. Time Machine requires the external drive to be formatted Mac OS Extended (Journaled) for these versions.
- APFS does not natively work with Windows. If you need to go between macOS and Windows then format your drive ExFAT on macOS
Looking for a different formatting option?
IMPORTANT: Reformatting the drive will erase all data on the drive, so you should copy any data you want off the drive prior to formatting.
- Open Disk Utility
To open Disk Utility - Open Finder > Applications > Utilities > Disk Utility - Click View in the upper left and select Show All Devices
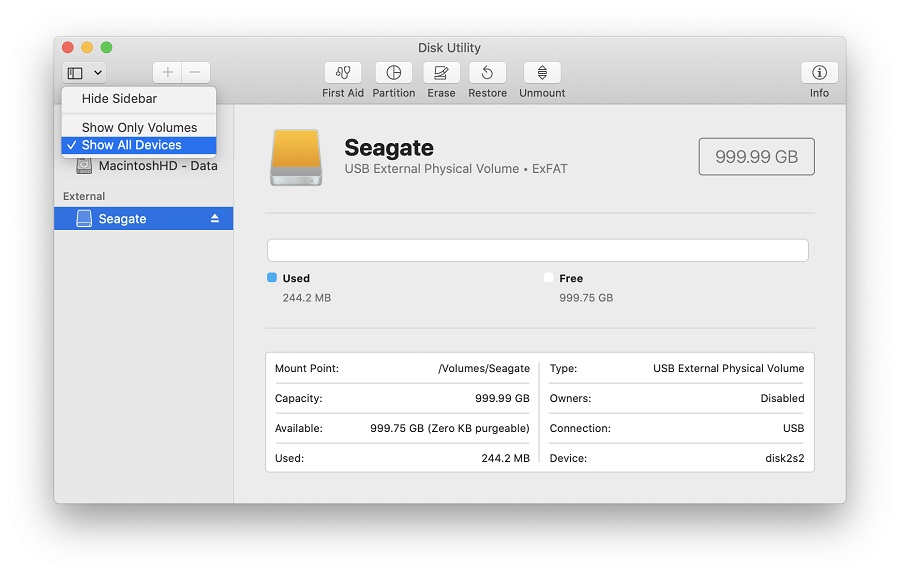
- Select the non-indented entry, you will see Media in the name
-
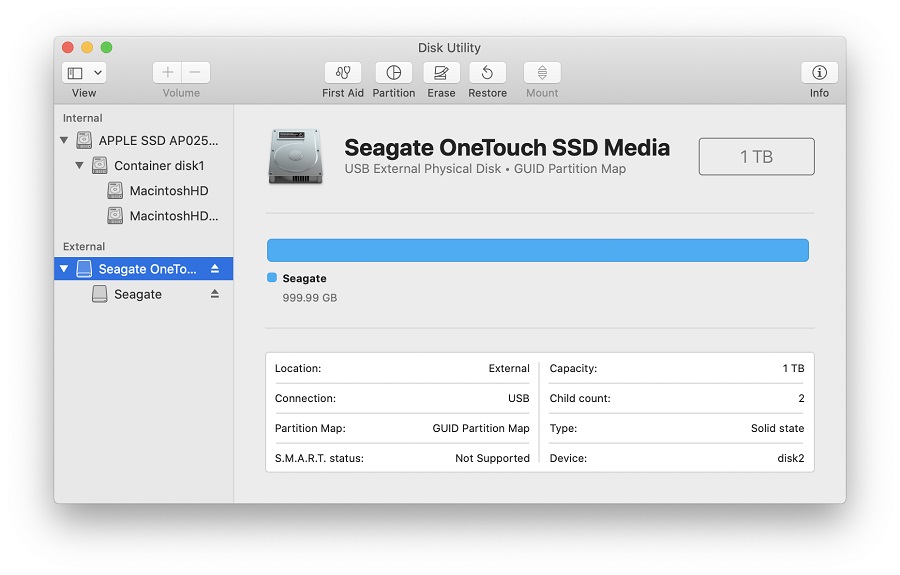
Click the button labeled Erase in the menu which will bring up this window.
NOTE: If you don’t see scheme, then make sure that all devices are showing and the non-indented entry is selected. Check step 2 to confirm Disk Utility is Showing All Devices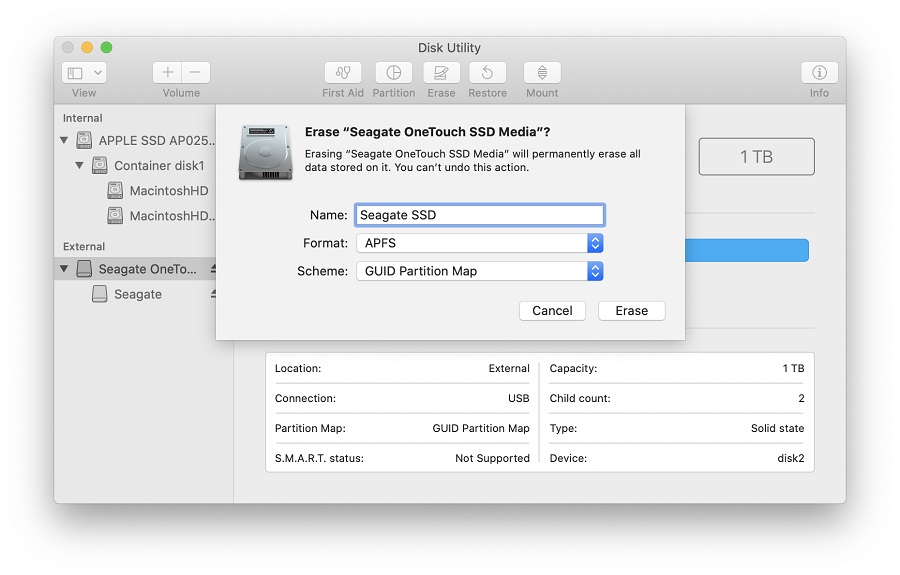
-
Provide a Name for the volume
- Set Scheme to GUID Partition Map
- Set Format to APFS
NOTE: Make sure that Scheme is set to GUID Partition Map and not Master Boot Record (MBR). If APFS is not available then the drive is in MBR and not GUID Partition Map. See previous step.
WARNING: Formatting the drive will erase all data on the drive, so you should copy any data you want off the drive prior to formatting. - Click Erase, Disk Utility will start formatting the drive
- Once complete, click Done
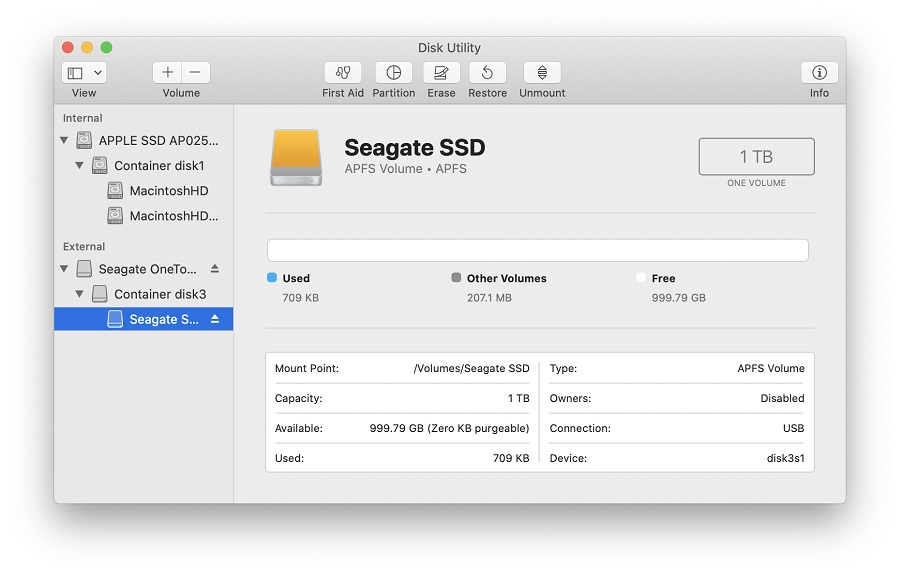
- The drive should now be formatted APFS, this can be confirmed by selecting the indented entry which will now show APFS Volume under the name you provided