Volume corruption can occur from a variety of causes. To fix this problem, the best way is to reinitialize the drive, then reformat it. If a backup of the corrupted drive is not available, recovering the data should be done first. The reformatting process will erase the data permanently, so it must be recovered prior to attempting to fix it.
IMPORTANT NOTE: Following the procedure below will ERASE ALL DATA on the drive. Prior to following these directions, verify important data is stored securely on a different storage device.
Begin by clicking Start, then Run. If "Run" is not available, press the [windows button] and [R] on the keyboard at the same time.
In the box, type:
cmd
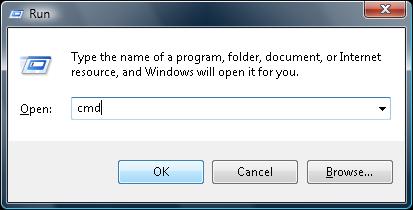
Click OK.
A DOS window will open. Use a command called "diskpart" to perform the beginning part of the format process.
Type:
diskpart
then press enter. The system will change the prompt to say DISKPART>
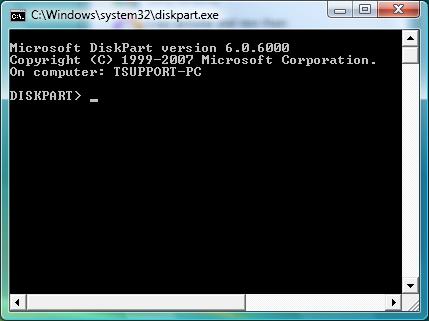
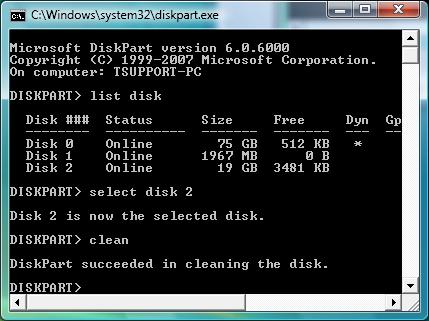
Next, type list disk, then press enter. Doing so will display a list of all hard drives attached, the size of the drives, and the disk number assigned.
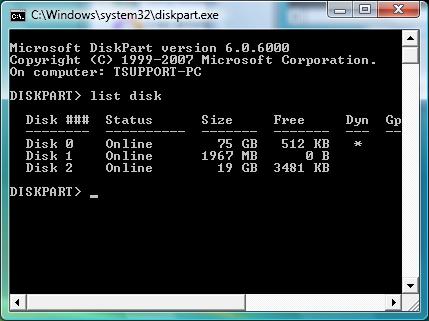
Identify the corrupted disk. This can be difficult if there are multiple, identical disks. If this is the case, unplug the drive, then type list disk again. Note which drive is missing, then reconnect it. Type list disk once again to get the new listing, and identify the proper drive.
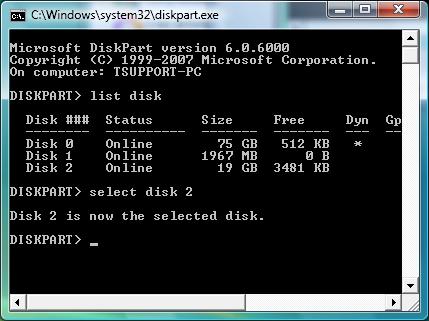
The next step is to target the right disk with the program. Type:
select disk
followed by the corrupted disk's disk number. In the example, we used the command:
select disk 2
Disk 2 is the problematic one, so that was correct. This differs from system to system, so ensure the correct disk is selected. Press enter when ready.
Finally, type the command:
clean
then press enter. This will erase the partition information, and allow a new format to be applied. The message "DiskPart succeeded in cleaning the disk." The DOS window can be closed, now.
The next step is to apply a new format to the disk, and perform a test to see if the drive is physically working properly. Use a program called Disk Management to do this.
To access the Disk Management program, press [windows button] + [R] again to open the Run window.
Type the command:
diskmgmt.msc
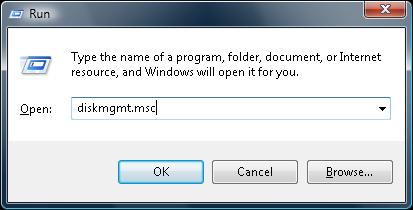
Click OK.
The Disk Management program will open. If a window called the "Initialize and Convert Wizard" appears, click cancel.
The top frame lists partition summaries for connected drives. The bottom frame shows how the disks are physically related to these partitions. We are interested primarily in the bottom frame. Look for the disk number selected earlier in the DiskPart program. It should have a different icon (a red arrow, specifically.)
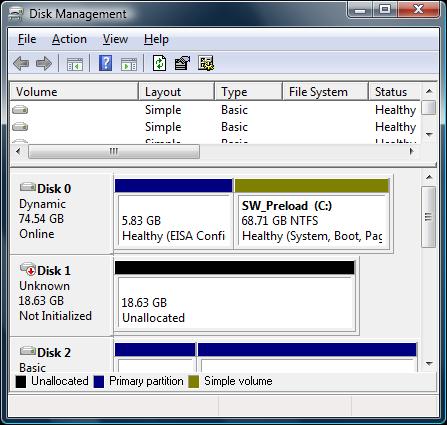
Right-click that symbol, and choose to "Initialize Disk". A new window will appear asking for confirmation. Confirm this command.
When it has completed, it will now appear like so:
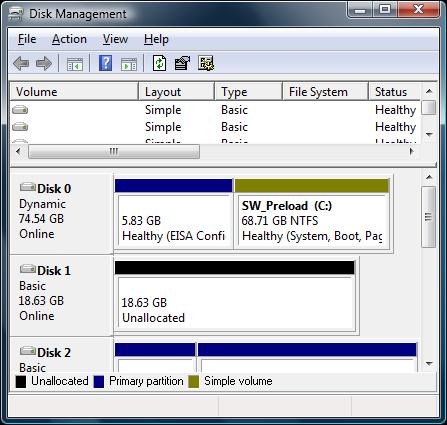
Next, space must be allocated to hold files. Computers call these "Partitions." Right-click the area marked "Unallocated", and choose to make a "New Simple Volume."
For the following choices presented, the default is the most desirable option. It will set up the entire disk as one drive, make it the Windows file format, and run a read/write test on the drive. Read each question carefully to ensure that it will meet any required needs, as reformatting erases the data, again.
Once it has completed, the drive will be accessible.


