


- Log in to the Seagate NAS Welcome page as an admin or a user with administrative privileges.
- On the Home page click the Device Manager icon.
- Click Services under Customize.
- Hover the mouse cursor over the the NFS Service and Click the Edit button and click Start.
- A green light will indicate the service has started.
View NFS options
- Click the NFS Edit button and notice the Start option has been replaced with Stop.
- Click Edit and Share access. The NFS service is enabled on all shares by default. This means that when a new share is created, NFS is enabled on any new share.
- Click Edit and Advanced parameters. This mode can be changed from Asynchronous to Synchronous. The default is Asynchronous. Available on all LANs is the default and this means that if the NAS has two network ports NFS is available for both. Click Cancel.

Asynchronous vs. Synchronous behavior in NFS
"Asynchronous" yields better performance at the cost of possible data corruption if the server reboots while still holding unwritten data. The reason is the Async option instructs the server to lie to the client, telling the client that all data has indeed been written to stable storage.
With Synchronous behavior the server will not complete (reply to the client) until the local file system has written all data/metadata to the disk.
Create a share on the Seagate NAS or use an existing share
- Click Shares on the left. A new public share can be created or an existing share can be used.
- To create a new share click the Add share button.
- Enter a Name, Description, and select Public, then click Next.
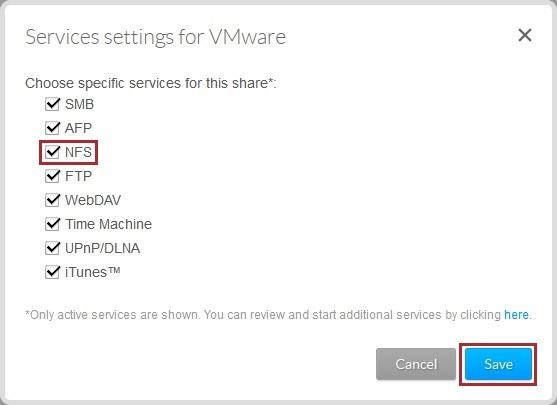
- Check to see if NFS is enabled on the new or used share by clicking Edit to the right of the Share name, then Services. Verify the NFS service is checked then click Save
In this example the new share’s name is VMware. NFS is checked.
Setup VMware using the vSphere Client
- Login to the VMware vSphere Client.
- From the Home page choose Inventory.
- Click to highlight the VMware Server's IP Address on the top left.
- Click the "Configuration" tab the right.
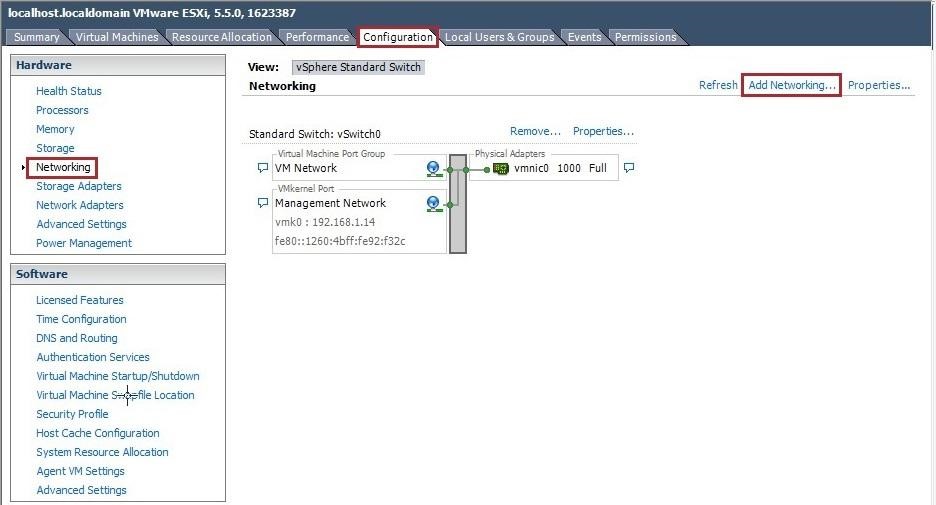
- Click on Networking under Hardware on the left.
- Click Add Networking... on the top right between Refresh and Properties…
Choose the Connection Type
- For the Connect Type choose VMkernel and click Next.
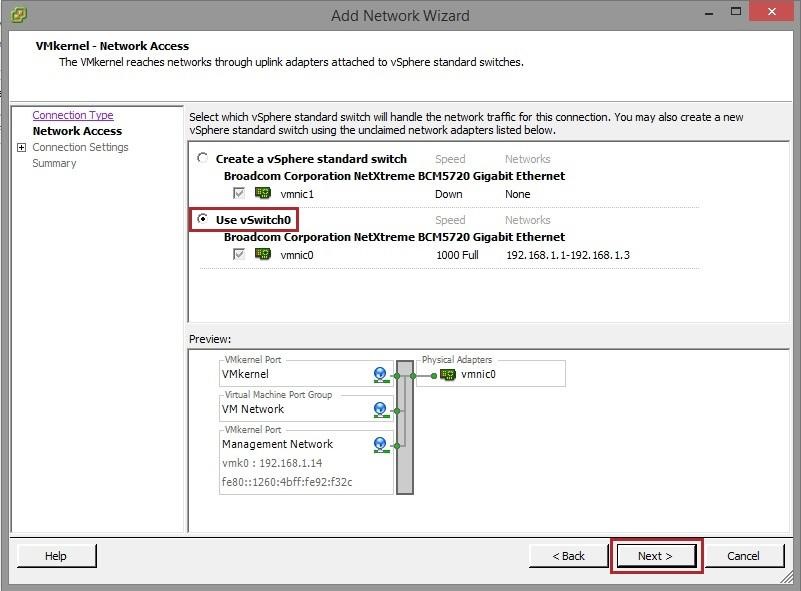
Choosing how to handle the Network Traffic for this connection
- Select vSwitch0 and click next.
Note: In this example we used an existing vSwitch. For help creating a new vSwitch go to:
http://www.vmware.com/support.html
Use network labels to identify connections
- Enter a Network Llabel to describe the Port Group Properties or use the Default. For the VLAN ID leave the default then click Next".
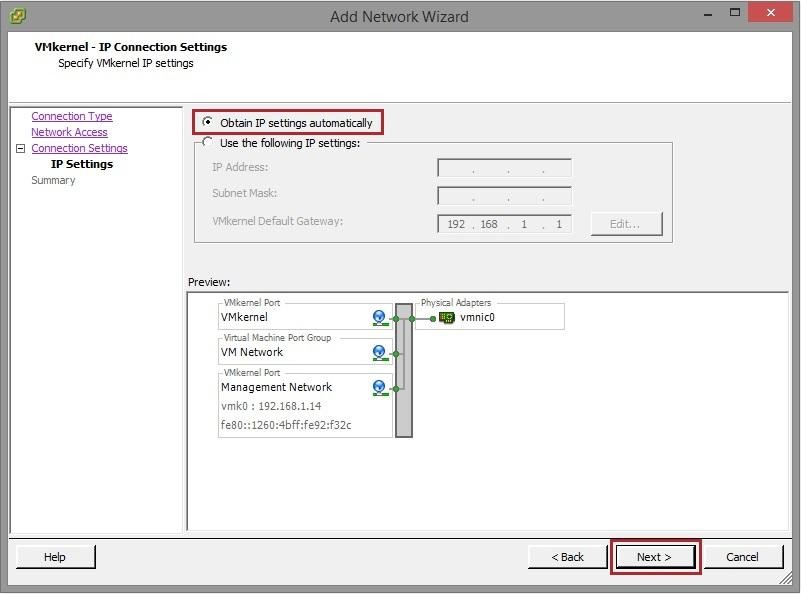
Specify VMkernel IP settings
- Choose Obtain IP setting automatically if you use DHCP. DHCP is used in this example. If a Static IP Address and Subnet Mask are prefered select, Use the following IP settings. Enter the correct information for your network, then click Next.
- Review the Summary and click Finish.
Adding the NFS Storage Type
- On the Configuration tab click Storage under Hardware on the left.
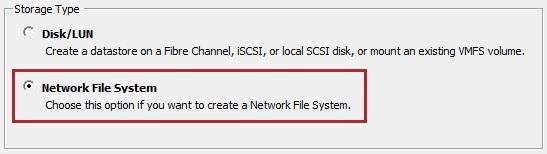
- Click Add Storage and select Network file System (NFS) and click Next.
Determining which shared folder from the Seagate NAS will be used for the Datastore.
- In the Server: field type the NAS IP Address or use the NAS Host Name.
- In the Folder field type /shares/sharename

- Enter a descriptive Datastore name and click Next.. In this example we chose NFS Vol.
- Review the summary and click Finish.
The new NFS Datastore is now ready to be used.
Note: Basic Configurations that were used in this article are for example only. Settings could differ in the field. For help with VMware go to http://www.vmware.com/
